Posts Tagged ‘cycling food’

My Dear Ol’ Mom’s “JIC” and Nut Butter and Cookie Spread Road Crepe

My dear ol’ Mom “live life ‘bright eyed & bushy tailed’ and with compassion” role model had quite a few family famous lines. One was “Take it with you, JIC”, aka “Just in Case”, which she almost always qualified with a blunt “It’s better to have it and not need it than not have it and need it”. Yes, ma’am.

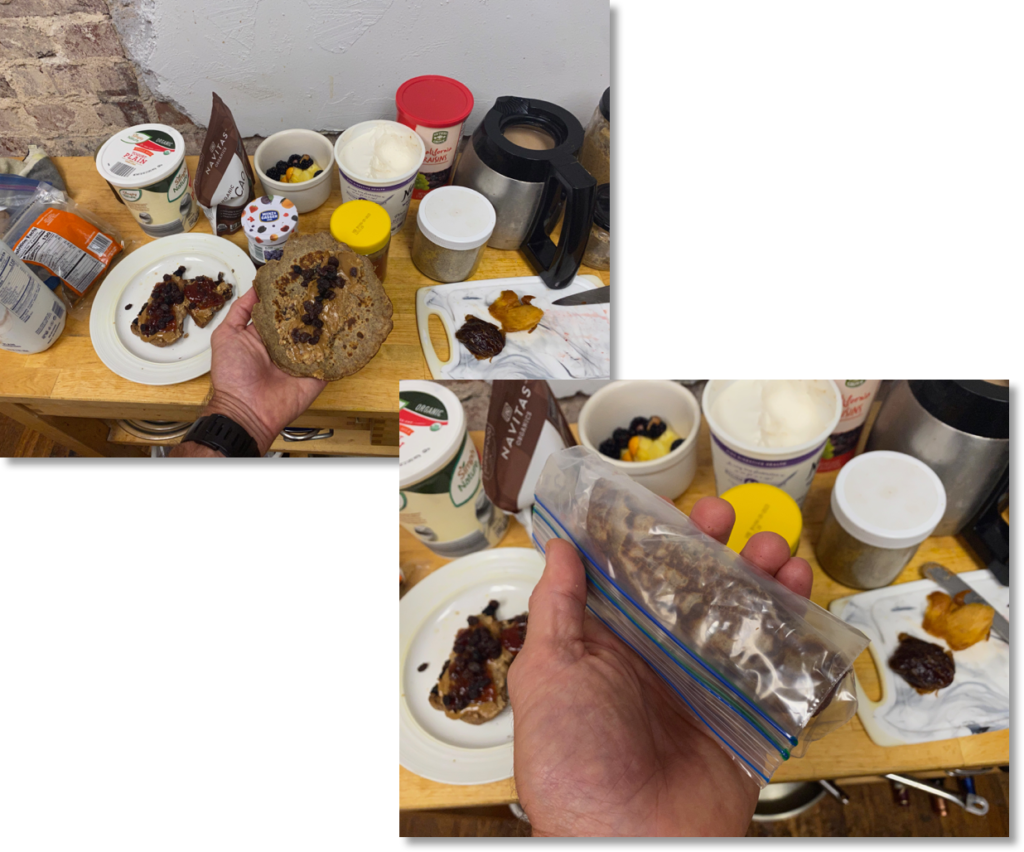
This past Saturday I sure heard her voice between my ears while prepping for a crunch on the bike with my good Hickory brothers. I’d actually started that prep the night before by making fresh crepes – all easy (click this link for picture book directions). I then laid on a good spread of both nut butter and cookie spread and topped that with raisins (click this link for step-by-step picture directions – and skip adding yogurt & whipped cream if you’re packing that crepe as shown below).

Crepe with nut butter, cookie spread & raisins packed in a zip bag for a bike ride

In the background of the 2-shot picture above, you can see what I had for breakfast before the morning ride: fruit with yogurt, jam and dried fruit along with 1/4th of a toasted waffle with nut butter, cookie spread and raisins that I topped later with a shot of yogurt and whipped cream – and very little coffee. I thought I had time. I didn’t.

As I’ve mentioned before, a breakfast like the one above almost always keeps me completely fueled for my rides. Same thing here. We stopped for coffee halfway out. I had an extra large with milk but didn’t eat anything – I wasn’t even slightly hungry – and was just fine for the whole ride as mapped out above.

If my dear ol’ mom could’ve seen me, she would’ve smiled, “Well, at least you had it, sonny. JIC!” Ma’, you bet – and thanks! (Wow, that last line makes my eyes swim – for good reason!)

Fresh Crepes with Nut Butter, Jam, Yogurt & Whipped Cream

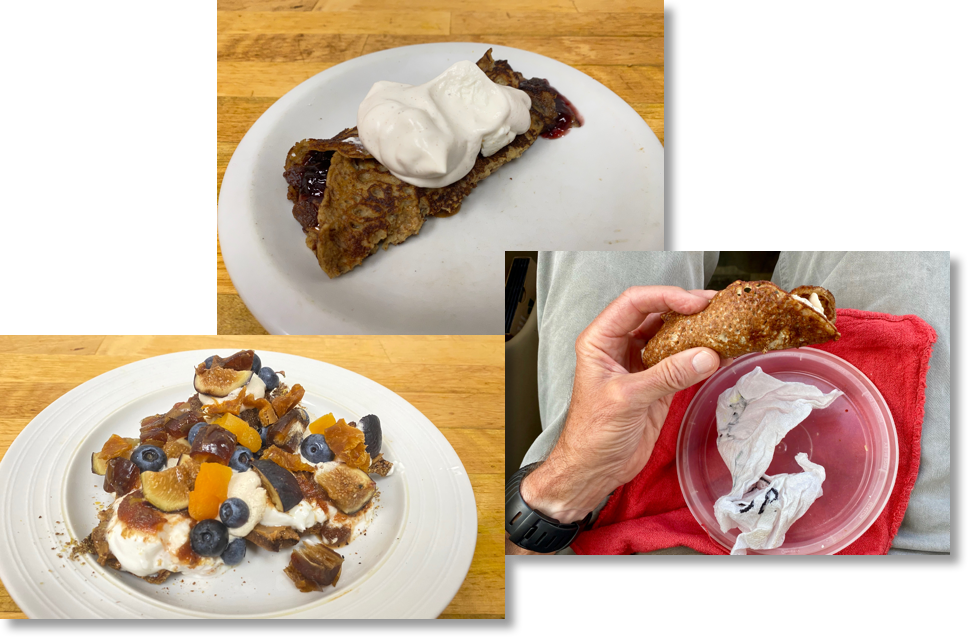
Last post – I know, quite a while ago – showed how to make fresh crepes, which are just as easy to make as flapjack pancakes but are way more versatile, as shown with just a few examples above.

Whether you use your own crepes or pre-made store bought crepes, the top middle version, filled with nut butter and jam and topped with yogurt and whipped cream is very easy to make, killer flavorful and great power fuel for any kind of strenuous activity because of its combination of simple “get up and go!” sugars from the jam and cookie spread (optional), complex carbs from the flour in the crepe, protein from the egg in the crepe, Greek yogurt and nut butter, and fats from nut butter, yogurt (if you use whole milk yogurt) and whipped cream.

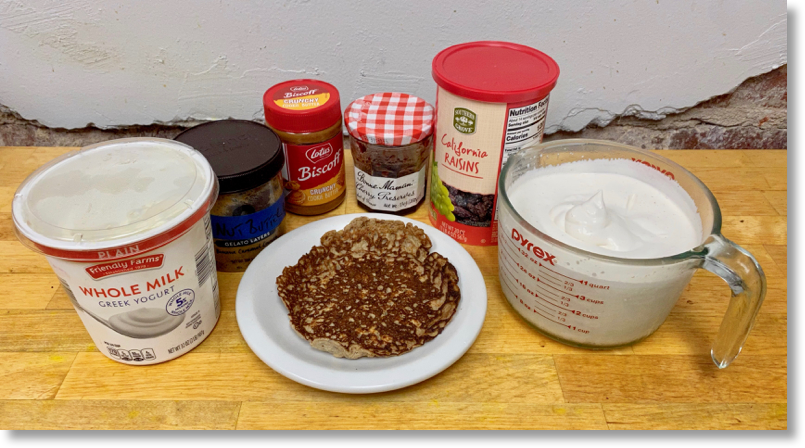
Here’s what I use to put together a crepe like this: homemade crepe (which can be substituted with a prepared, store bought crepe), then from left to right: whole milk Greek yogurt, almond butter, cookie spread (optional – I love both added flavor and light crunch!), jam, raisins and whipped cream.

Crepe with nut butter, jam, yogurt and whipped cream ingredients

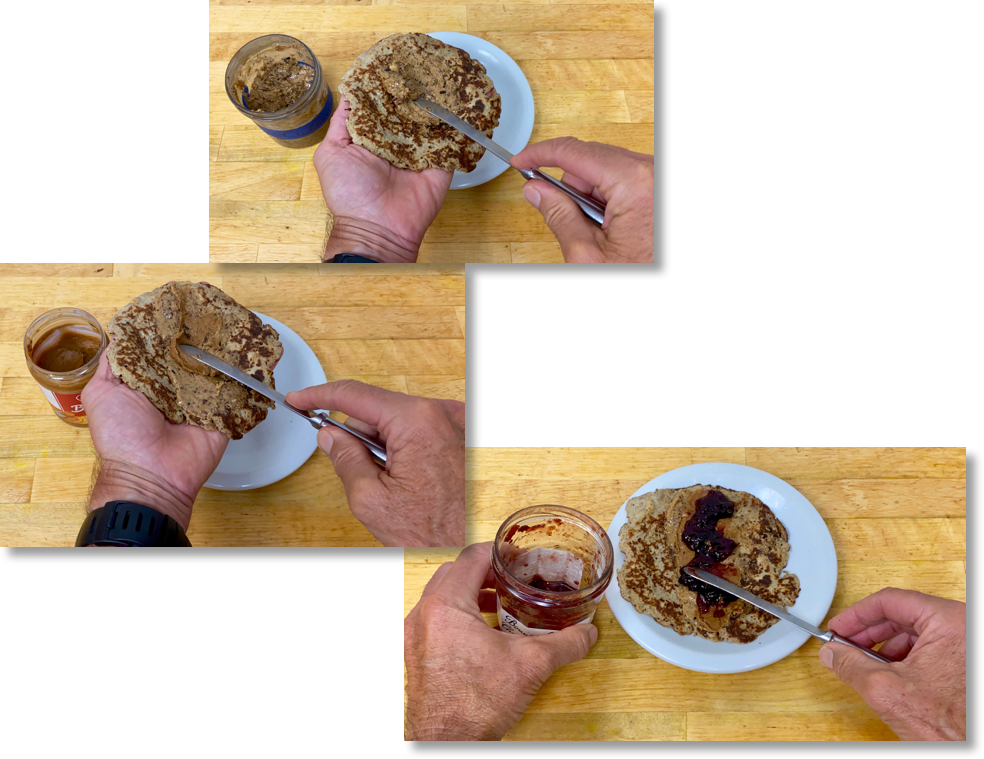
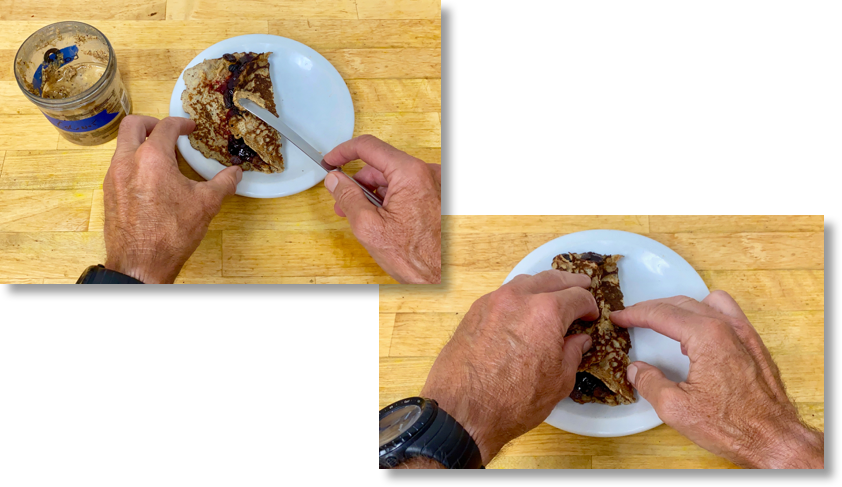
Start by spreading nut butter, cookie spread (optional) and jam down the middle of the crepe.

Spreading nut butter, cookie spread and jam down the middle of a crepe

I fold over one of the crepe thirds and add a dab of nut butter to the middle of that third and then fold over the opposing third, as shown below, to keep the crepe folded in place when I warm it in the microwave oven.

Using nut butter to keep the folded crepe thirds together when warmed in the microwave oven

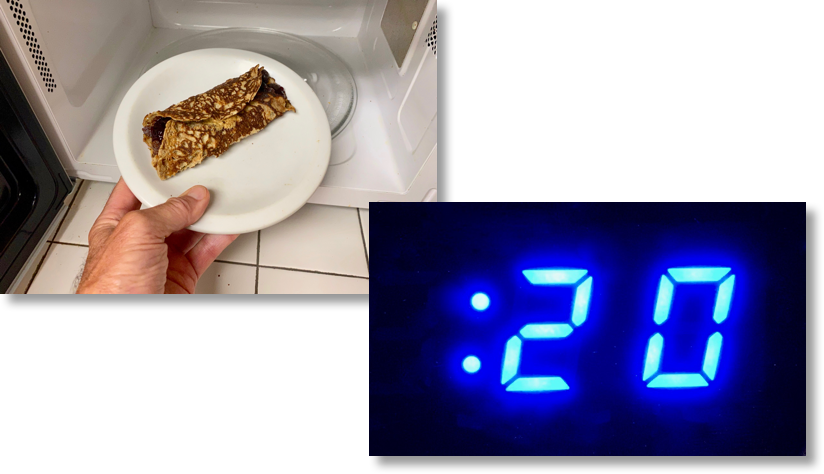
Warm the filled crepe in the microwave oven for 20 seconds.

Warming the filled crepe for 20 seconds in the microwave oven

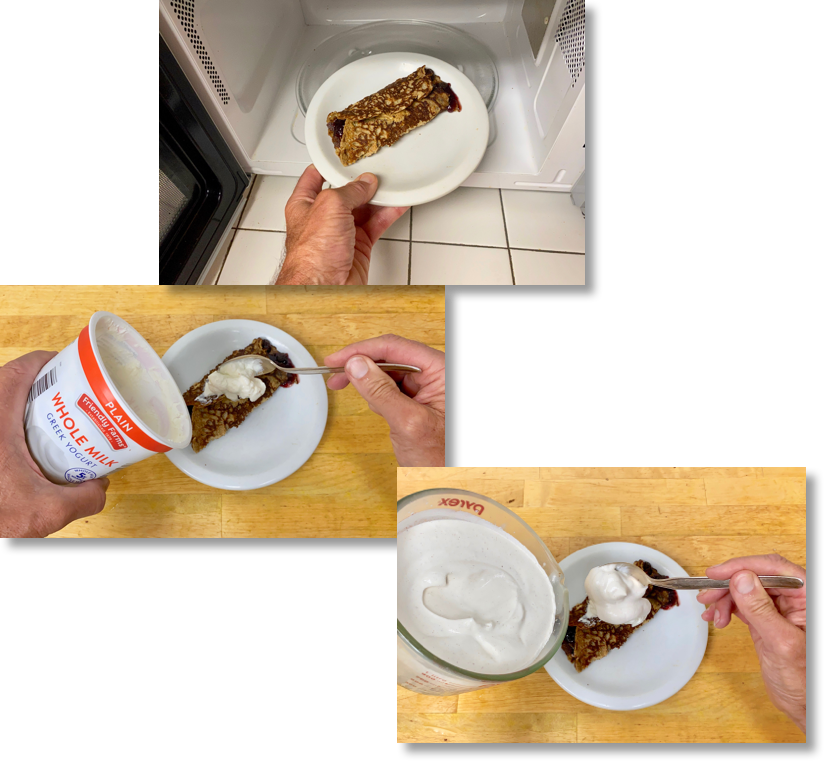
Finish buy topping the warmed crepe with yogurt and whipped cream.

Finishing with a good shot of yogurt and whipped cream

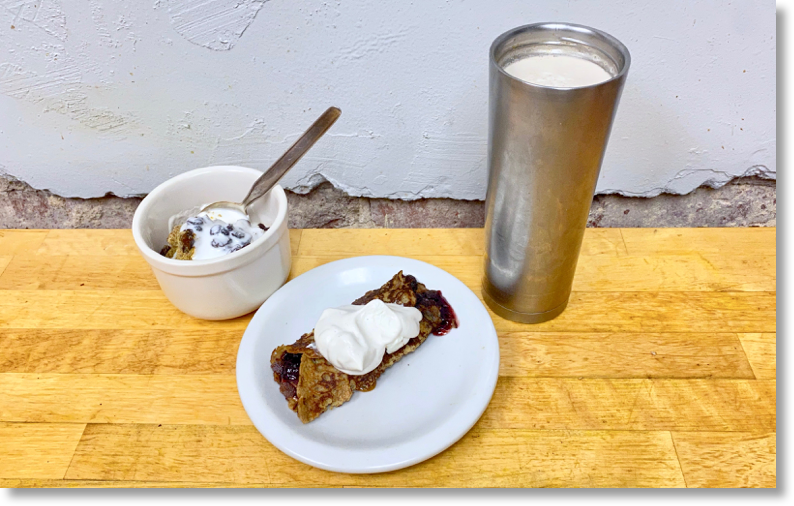
This crepe just by itself is great. Here’s how I have it before a good crunch on the bike that keeps me satisfied completely with no need to refuel on the fly for distances of 30-50+ miles with plenty of North Carolina hills along the way.

Pre-ride crepe with nut butter, cookie spread, jam, yogurt and whipped cream

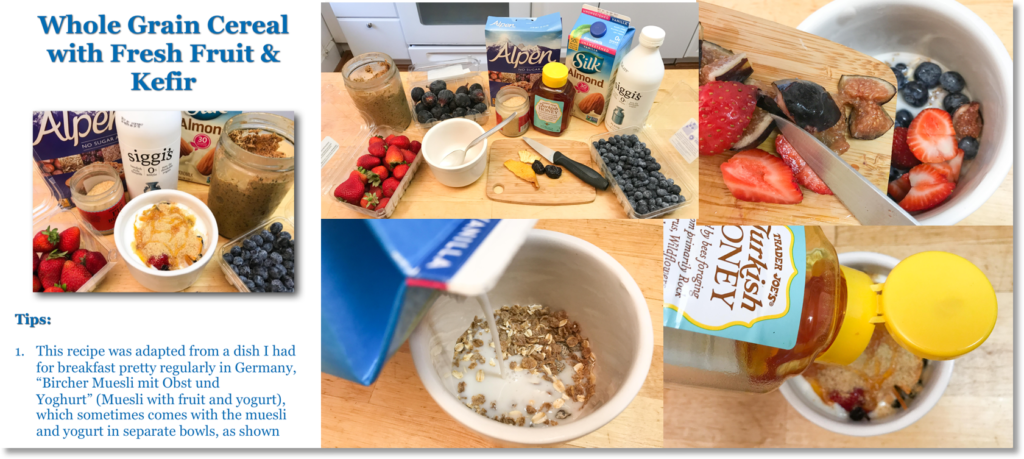
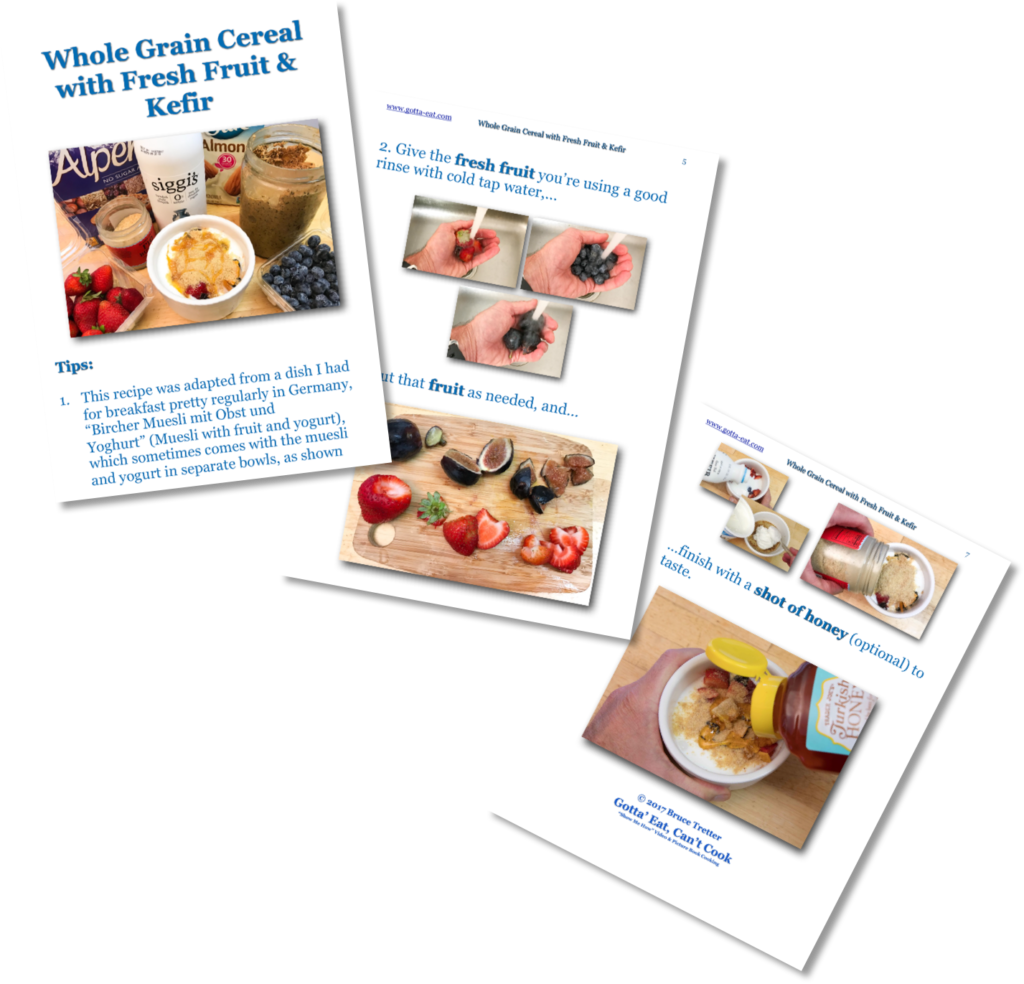
Whole Grain Cereal with Fresh Fruit & Kefir Picture Book Recipe

Last post showed how to use Chocolate, Grain & Nut Butter Cereal to put together a fully flavorful energy igniting/energy sustaining breakfast bowl. In that post I mentioned that recipes are just suggested guides that can be altered to meet your specific taste and dietary needs.

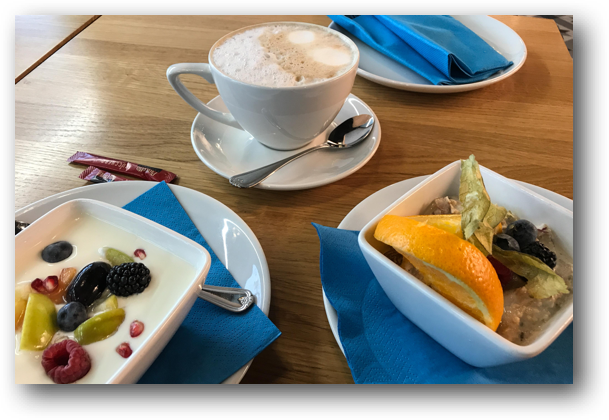
And, even though that post featured Chocolate, Grain & Nut Butter Cereal as the main ingredient, you certainly can make that recipe – or something very much like it – using any cereal you like. True to that word, here’s what I’ll call a “twist on a twist” based on a breakfast I had in Germany years ago, “Bircher Muesli mit Obst und Yoghurt” (Muesli with fruit and yogurt), that usually comes in two separate bowls, as shown here.

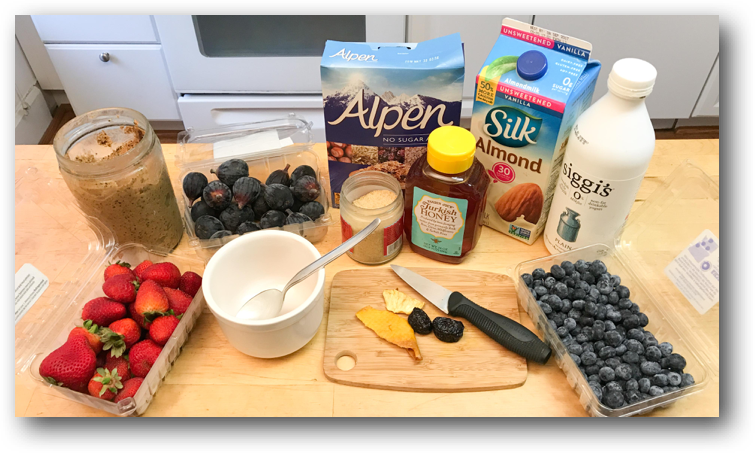
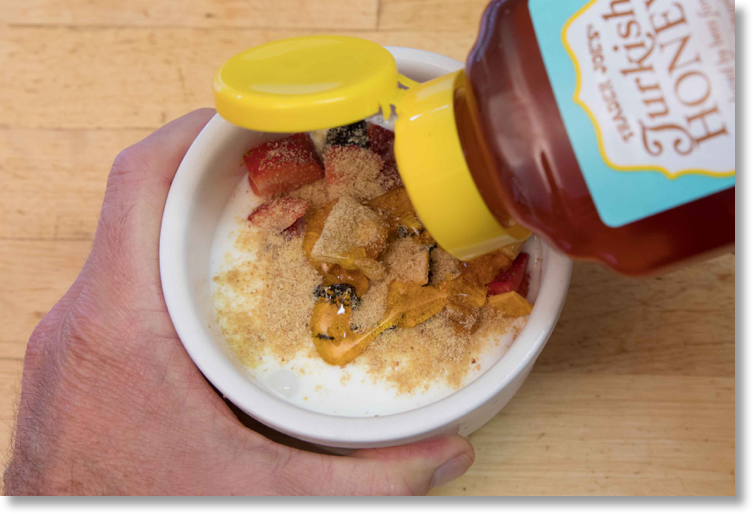
It is certainly easy to see from the ingredients I use below to make what I call Whole Grain Cereal with Fresh Fruit & Kefir that my interpretation of the recipe is quite a bit different than what I had in Germany.

And, that’s exactly where the fun comes in – and all it takes is a little imagination and, sure, some risk taking, to make the most of that fun.

Click this link or any picture on this page for the Whole Grain Cereal with Fresh Fruit & Kefir Picture Book Recipe that you can use as is or vary however you like.

Next post: what exactly is kefir and why do I feature it so much?

Turning a Recipe Failure into Fully Flavorful Success

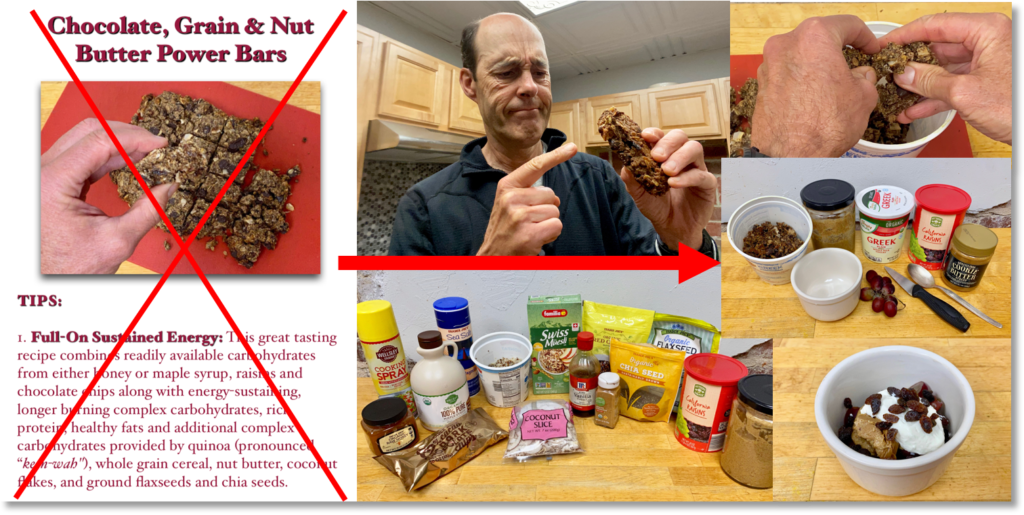
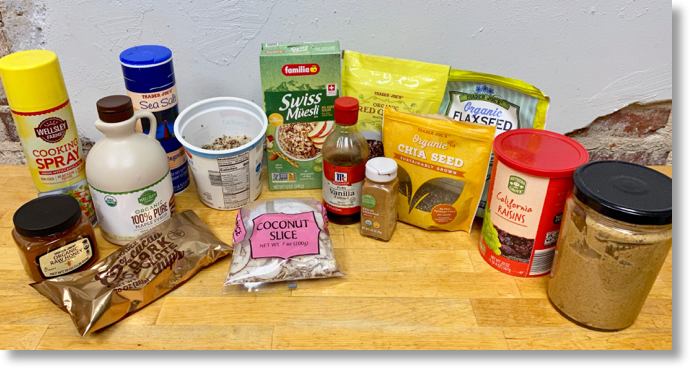
Mistakes? Ha! That’s just part of learning no matter how skilled you are in any field. And, no way to sugar coat it, the Chocolate, Grain & Nut Butter Power Bars I made recently, and intended to add to the recipe lineup here, just didn’t work out as planned – not even with the terrifically flavorful ingredients shown here.

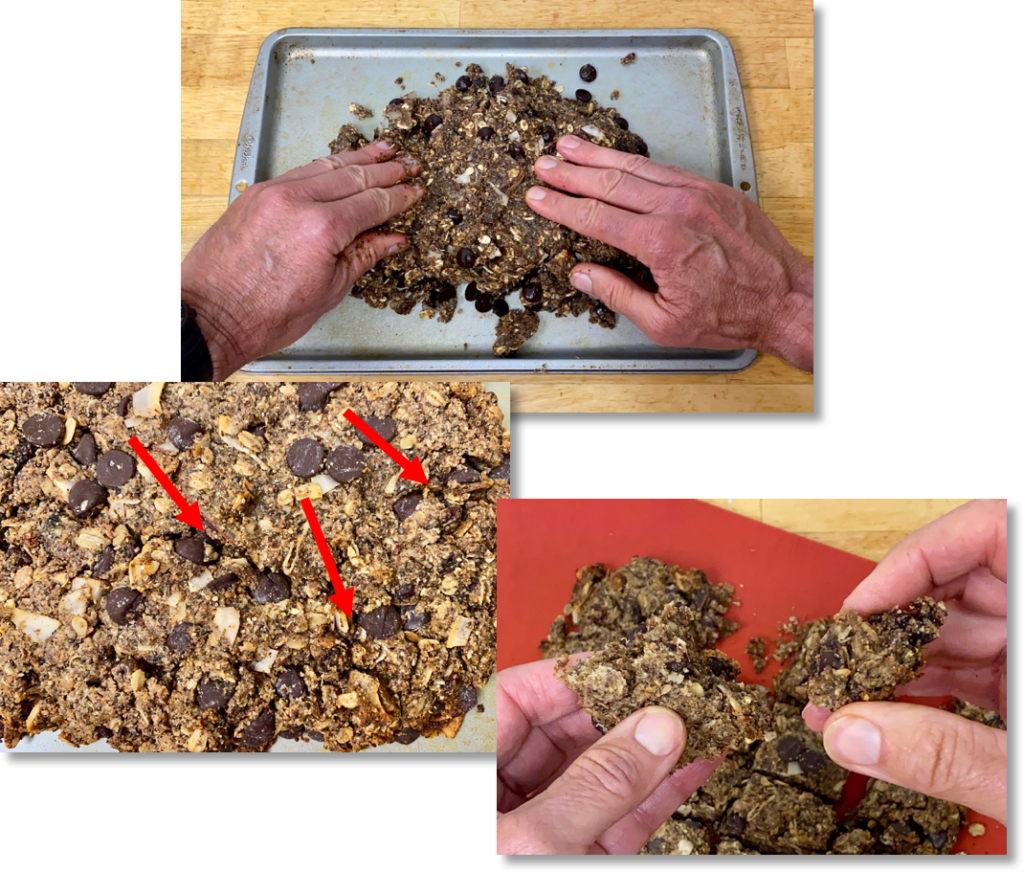
The first signs regarding intended purpose as power bars: crumbling dough when I formed it a baking sheet. Then, cracks in the finished loaf (see the red arrows below), which was a clear sign the bars would fall apart easily, especially if tucked in a pocket for a hop on the bike or run.

The worst part: the flavor wasn’t as full on as I’d expected – and that happens.

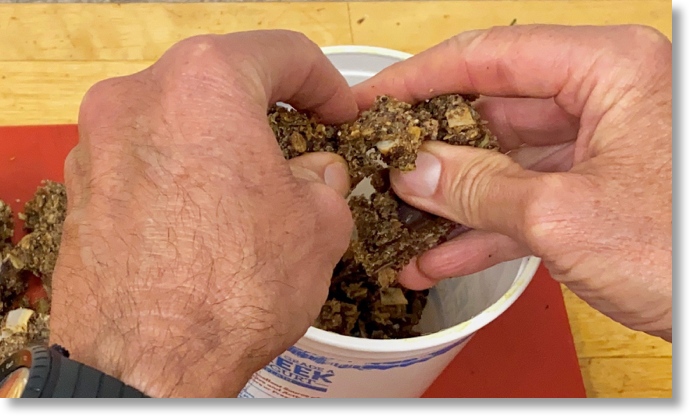
But no way were all those terrific ingredients getting tossed in the trash. Instead, I did what the bars wanted to do anyway and crumbled them into a container to be “repurposed” as a chocolate-granola cereal and then…

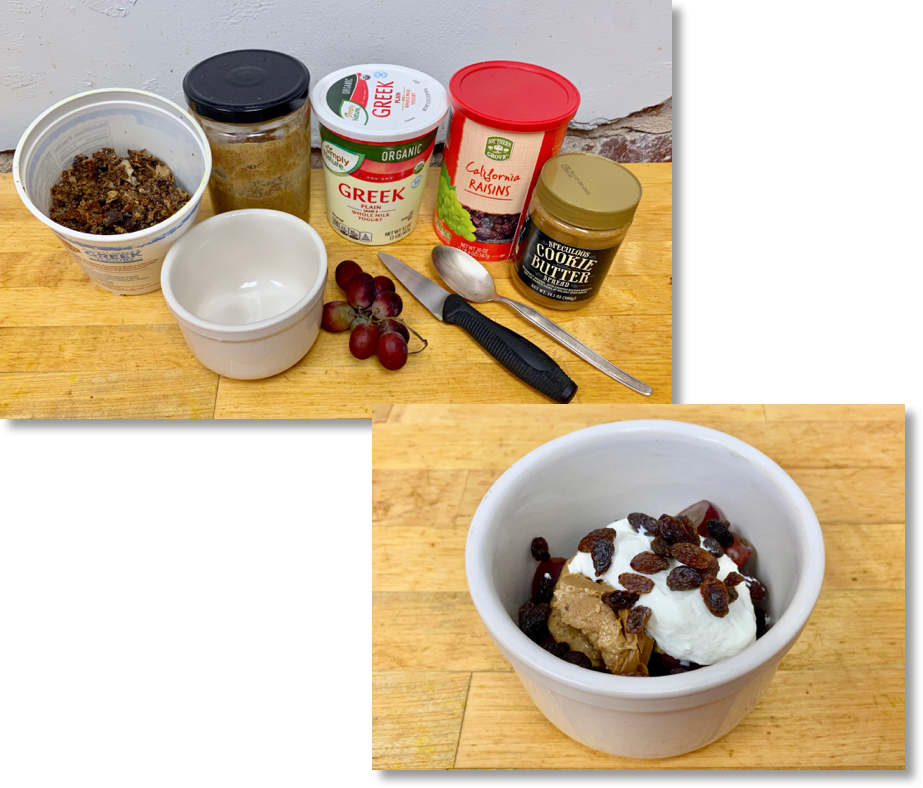
…made this much more full-on flavorful chocolate, grain and nut butter cereal breakfast bowl.

I’ll get that picture book recipe out right after I first put together a purposely made picture book Chocolate, Grain & Nut Butter Power Cereal recipe.

More very soon!

More Specific Banana Nut Butter Bar Ingredient Details

Timing can be great!

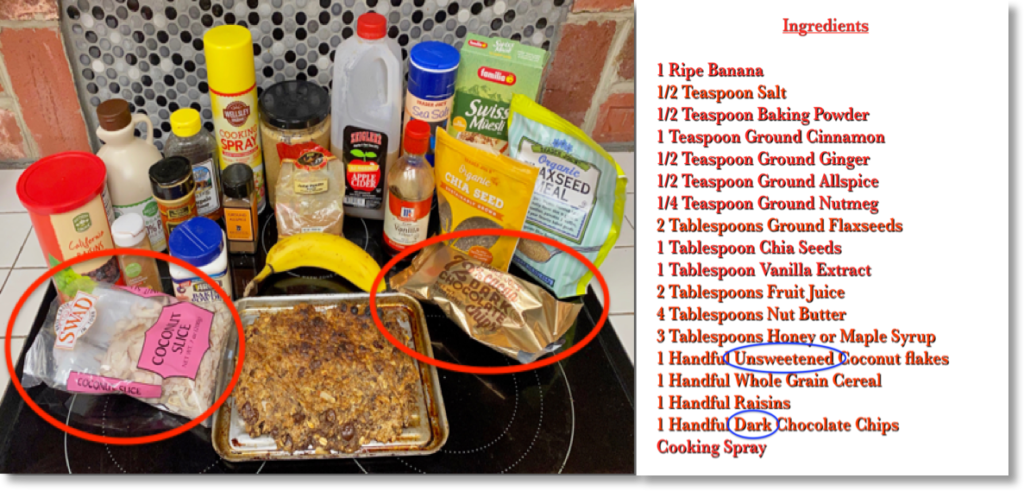
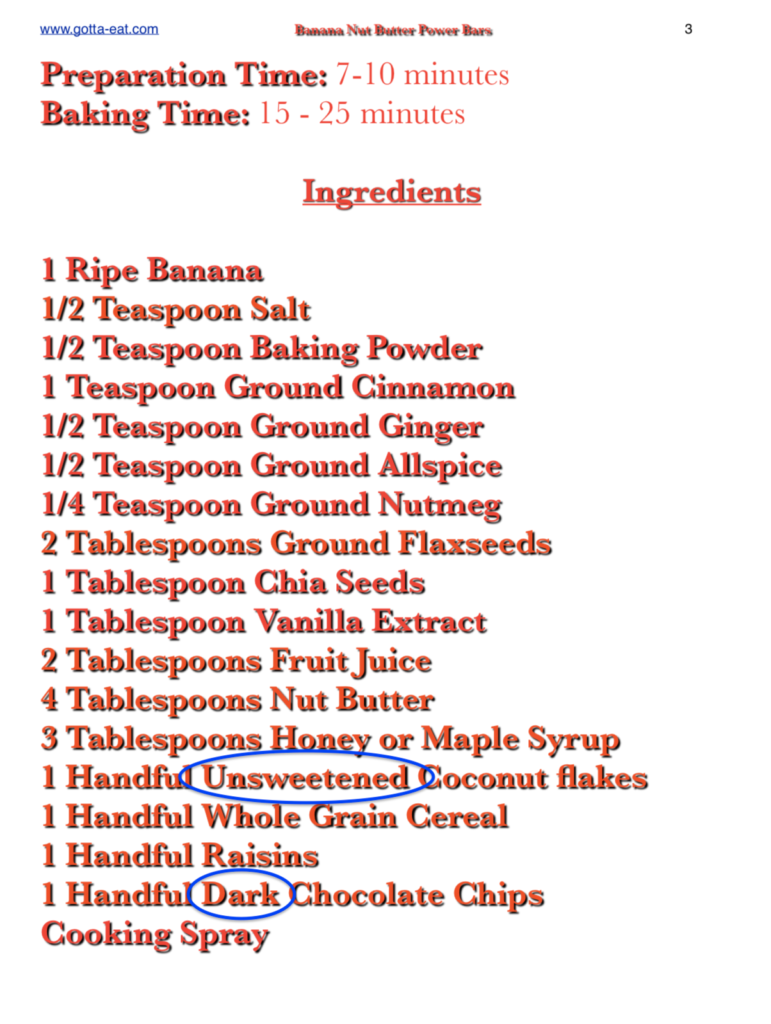
Last post earlier this week discussed what’s really in an ingredient and what that means to you, especially if you have dietary restrictions. Then, entirely coincidentally, this week I got a text from a good cycling bud asking whether to use sweetened or unsweetened coconut flakes and what type of chocolate chips to use to make Banana Nut Butter Power Bars. He couched his question with a note that his skills are pretty much limited to toasting Pop Tarts. Excellent on all fronts!

I loved the question! Right away, I tore down the old recipe to revise it with this more descriptive list of ingredients and…

…these new directions that you can get by clicking this link or any picture on this page.

Always glad to make changes – that’s “learning and adapting” life in action. And what I like best is hearing what works and doesn’t work for people actually using any recipe I put on this site so that I can help make your work – and mine – in the kitchen as easily fully flavorful as possible. That’s life enriched!

Power Bar Sandwich Picture Book Recipe

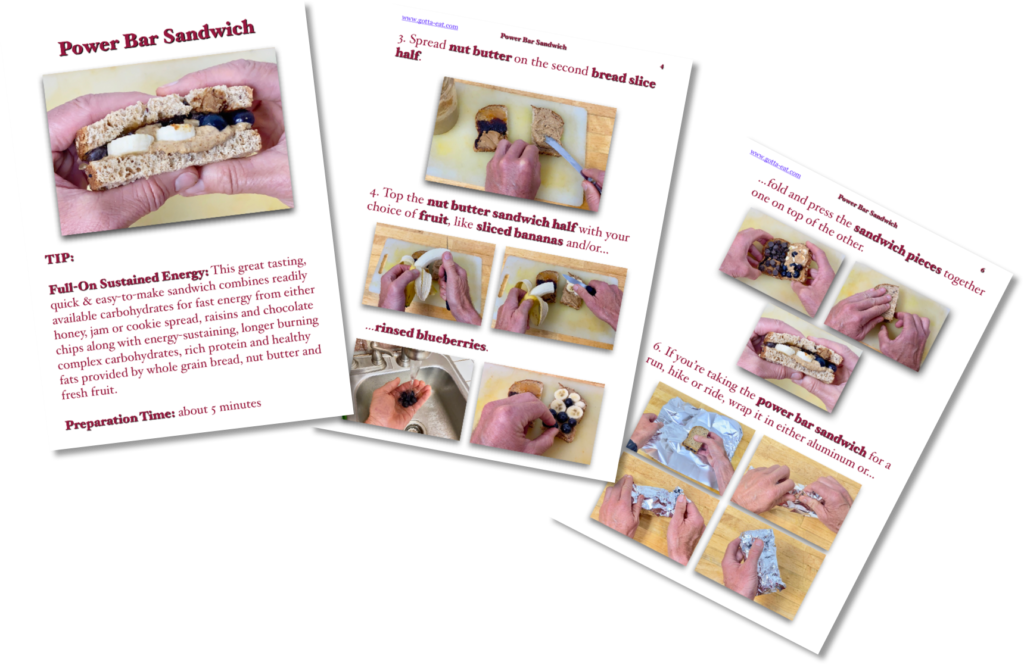
Very easy to make, fully flavorful, energy sustaining power bar sandwich

A good friend, George, popped me this power bar meme the other day.

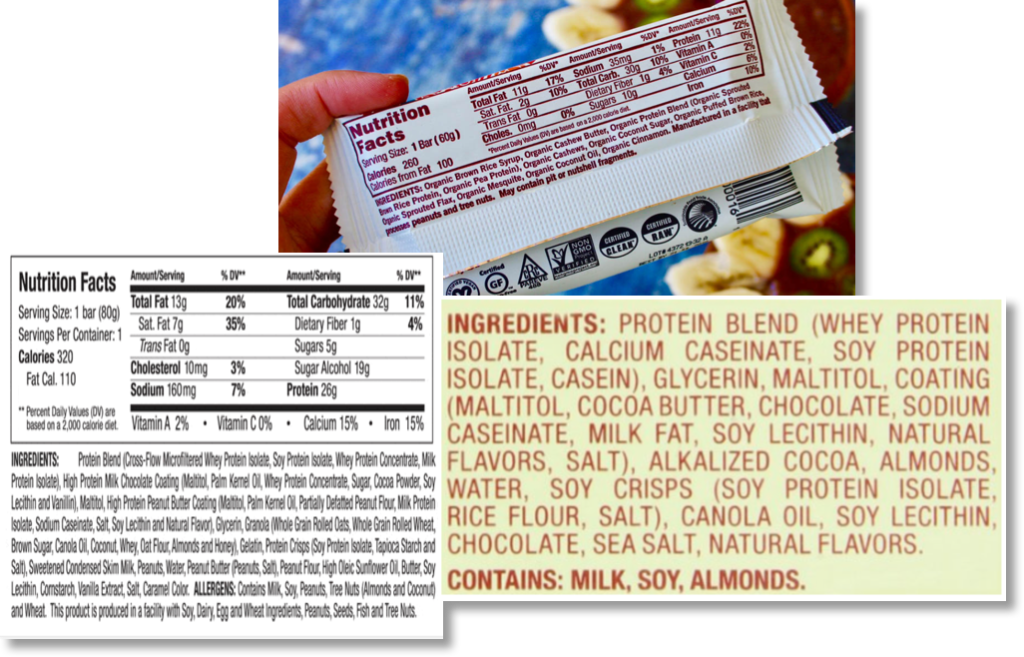
The reason for disappointment: just look at the ingredients listed on a random search for power/protein bar nutrition labels.

Sample of commercially available power bar ingredient labels

About the only flavorful – and potentially real – ingredients in the above three labels combined are organic cashew butter, chocolate, peanuts and peanut butter.

It doesn’t have to be that way.

For the past 2 weeks, since two good cycling buds, Sean and Eddie, asked on a ride about making homemade power bars, I’ve been reworking older power bar recipes and working up new ones – and have sure learned a lot.
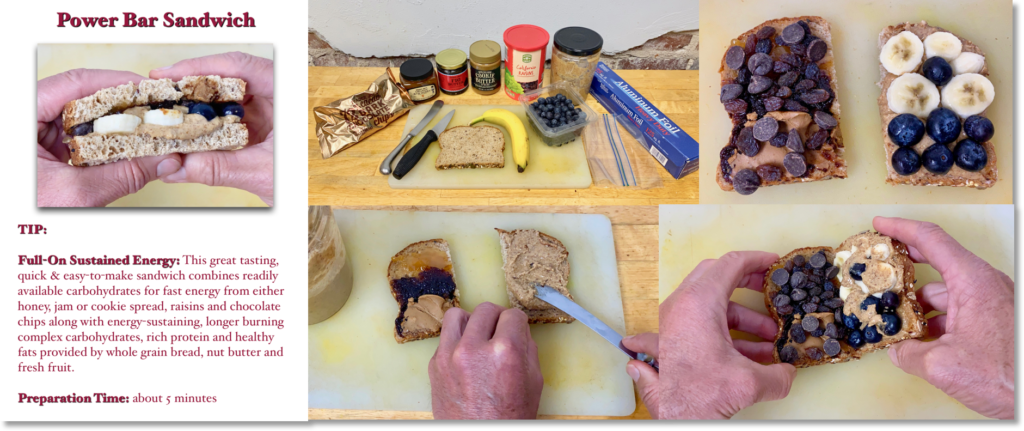
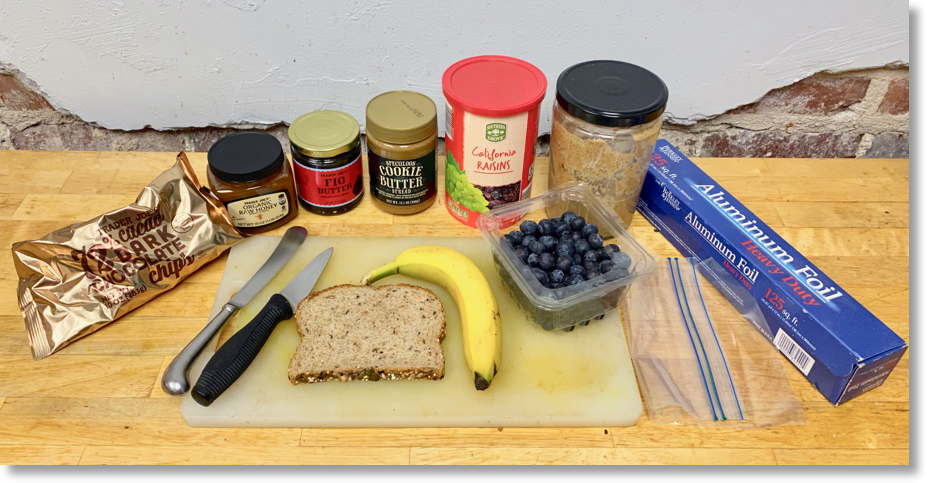
The most important lesson learned – that sometimes came the hard way: make is fully flavorful as quickly and easily as possible. And that’s how I approached this very easy-to-make power bar sandwich made with only the fully flavorful and full-on energy sustaining ingredients shown below: whole grain bread; nut butter; choice of honey, jam (fig butter) or cookie spread; fresh fruit; raisins; and chocolate chips.

Power bar sandwich ingredients

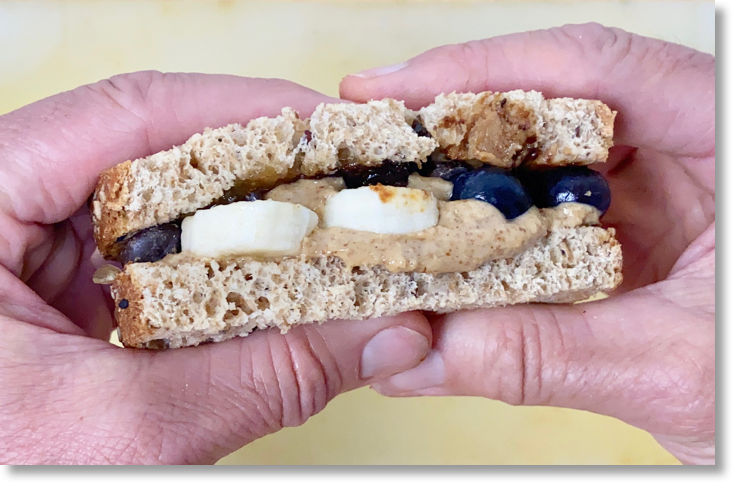
Regarding proof under fire, the power bar sandwich you see here – with coffee -…

Power bar sandwich

…sustained me easily, with no need to refuel on the fly, for a 40+ mile North Carolina bike ride.

Click this link or any picture on this page for power bar sandwich picture book directions.

Quinoa Power Bar Picture Book Directions

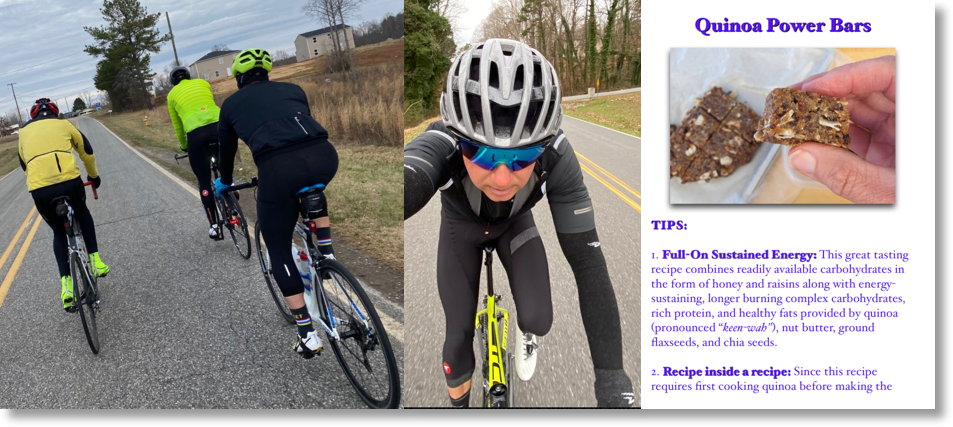
Killer North Carolina cycling & quinoa power bars the 3 to the right of “dude” left (me) haven’t yet tried (next ride, men!)

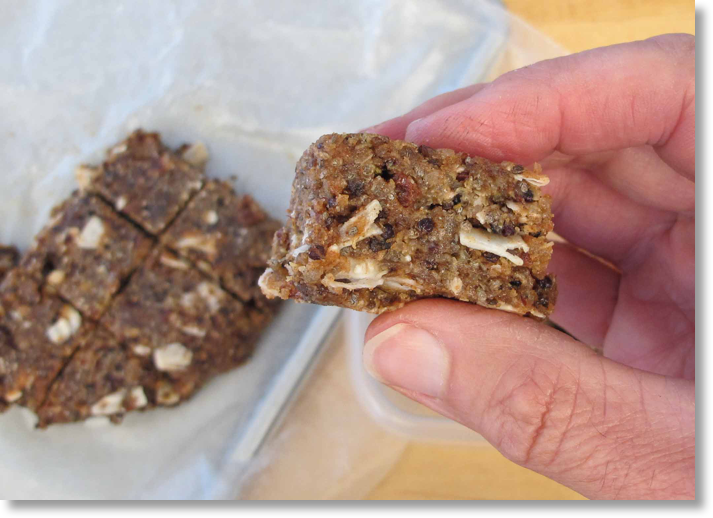
A few terrific cycling buds asked me on a ride this weekend if I have any recipes for power bars. I do: Quinoa Power Bars and Banana Nut Butter Power Bars.

The keys to a good power bar: a mix of simple and complex carbohydrates that your body breaks down quickly for immediate burn, healthy fats and protein that take longer to break down for sustained energy burn – and killer good flavor! Both the quinoa and banana nut butter bars provide exactly that.

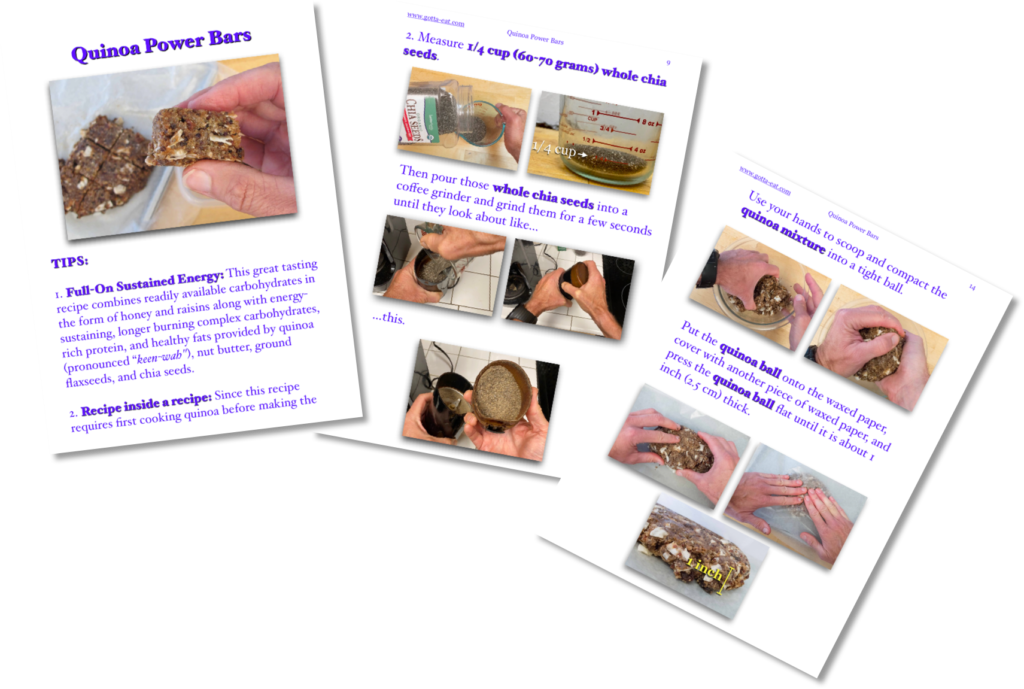
First, quinoa power bars because I just updated that recipe yesterday with relatively new nutritional information and directions showing how to grind whole chia seeds to get the most out of them. I’ll update the banana nut butter bars next.

Click this link or any picture on this page for step-by-step quinoa power bar picture book directions.

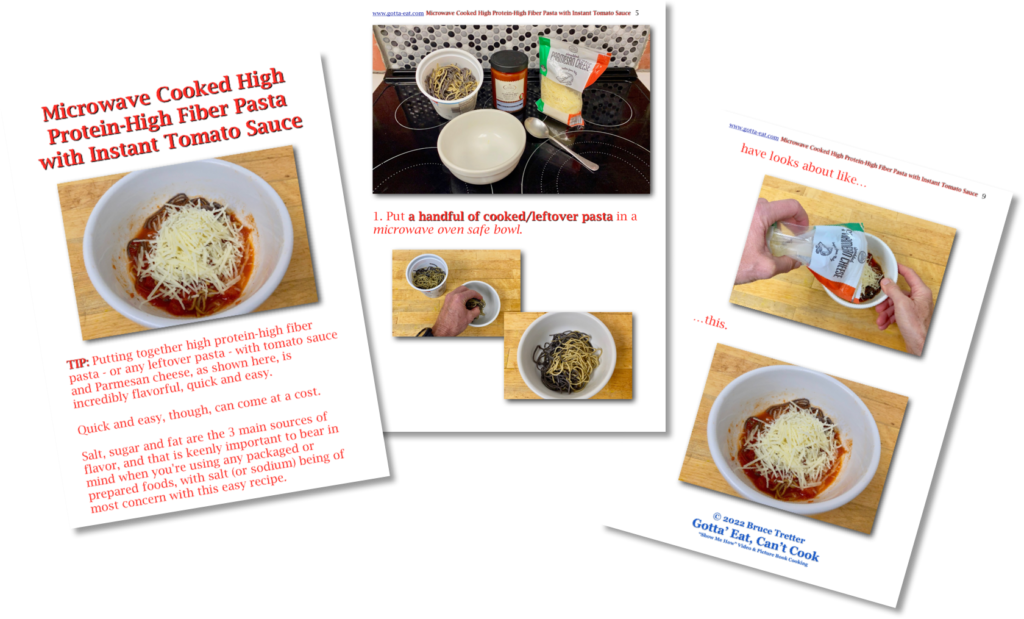
Microwave Cooked High Protein-High Fiber Pasta with Instant Tomato Sauce Picture Book Recipe

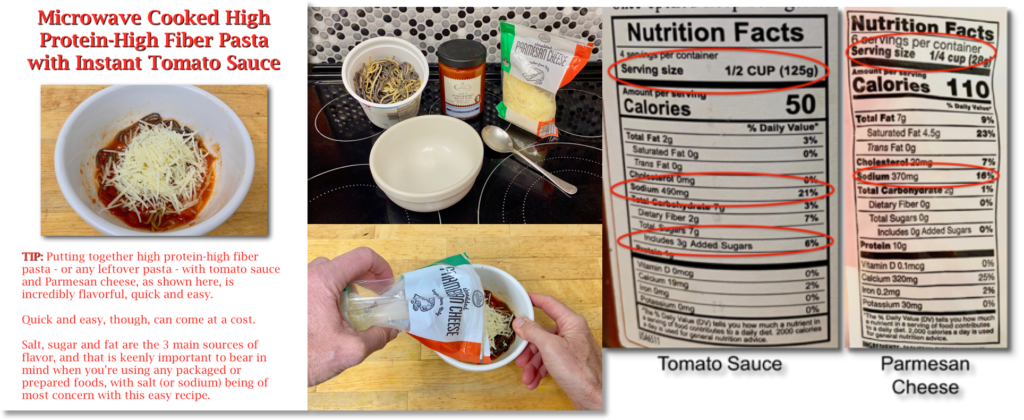
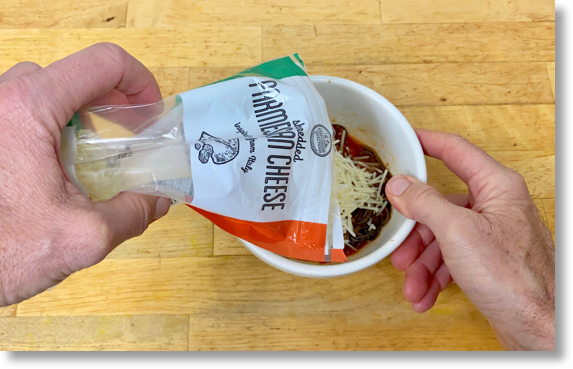
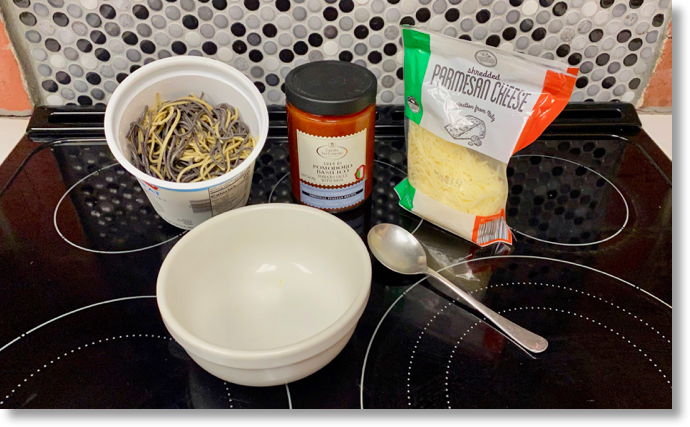
Putting together leftover pasta, tomato sauce and Parmesan cheese as shown here is incredibly flavorful, quick and easy.

Quick and easy, though, can come at a cost.

Salt, sugar and fat are the 3 main sources of flavor, and that is keenly important to bear in mind when you’re using any packaged or prepared foods, with salt (or sodium) being of most concern here for reasons outlined in the pasta and sauce recipe you can download by clicking this link.

Right now, let’s look at the three ingredients regarding their salt, sugar and fat content.

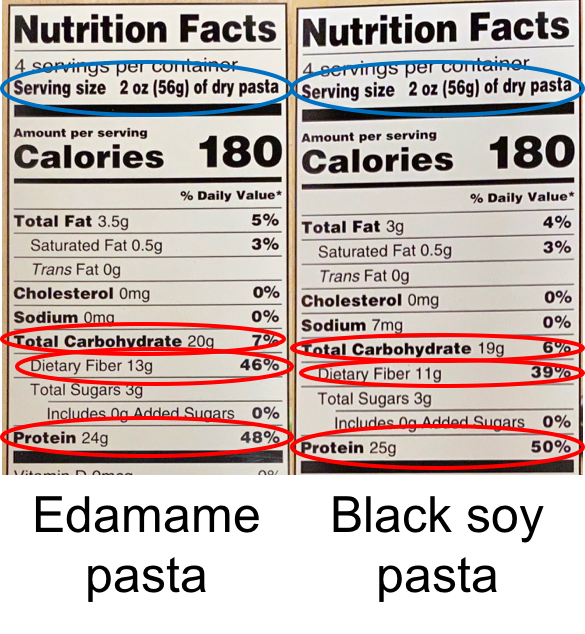
The first thing to look at on a nutrition label is serving size, circled in blue, because that number directly relates to all the quantity of the components (fat, cholesterol, etc.) listed below serving size. As listed on their nutrition labels, the high protein-high fiber soybean pastas I used have no sodium and very little fat. The only sugar comes from sugar in the soybeans. That’s fine.

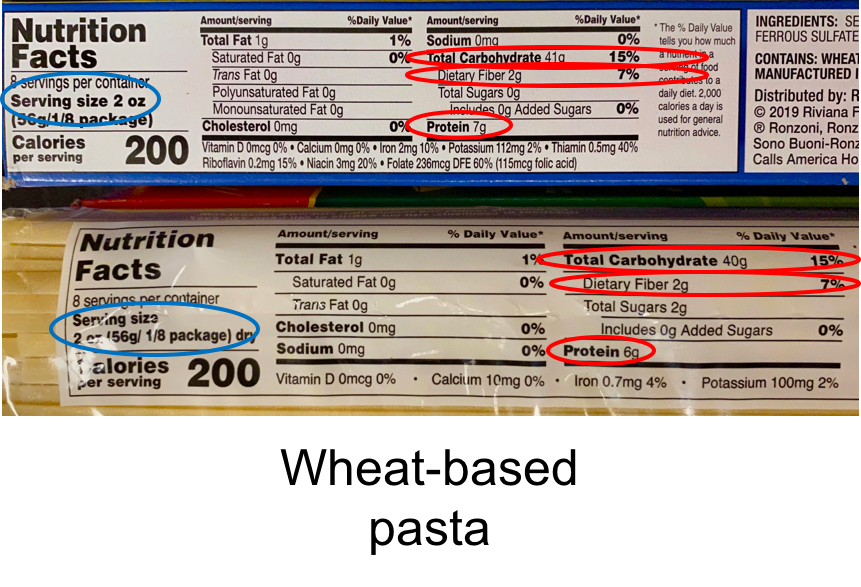
To be fair, here are nutrition labels from two packages of traditional wheat-based pasta. You can see that the fat content for both, 1 gram, is minimal per 2 ounce serving. You can also see that these pastas contain no sodium or sugar. Of course, the biggest difference between the pastas above and below is the significant increase in protein and fiber found in the high protein-high fiber pastas.

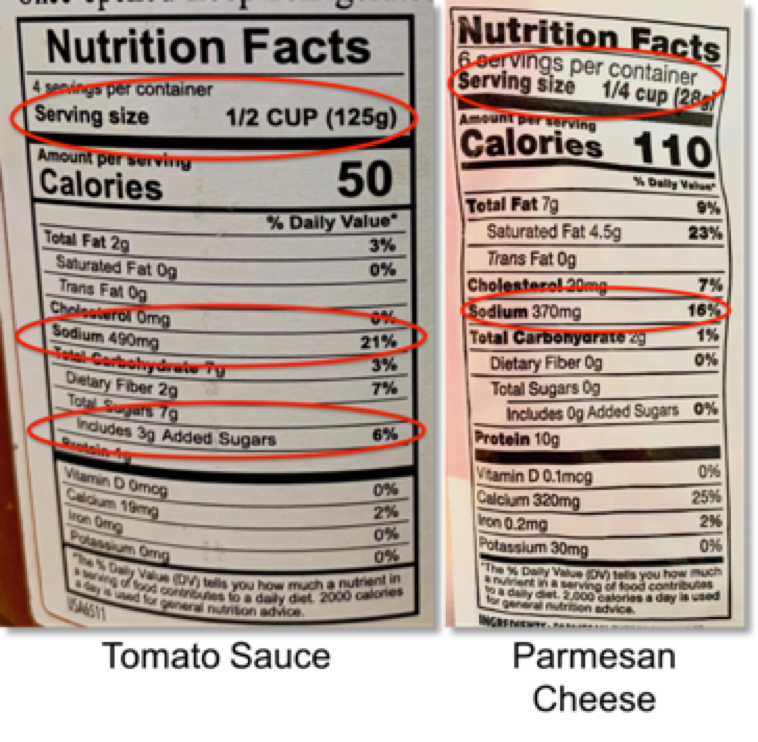
Below are the nutrition labels from the tomato sauce and Parmesan cheese I used. One of the important numbers not listed on any of these nutrition labels is the daily allowed amount/value of sodium, which is 2300 milligrams (mg) per adult.

As shown above, the serving size for the sauce is 1/2 cup. 1/2 cup equals 4 ounces or 8 tablespoons. The serving size for the Parmesan cheese is 1/4 cup, which is the same as 2 ounces or 4 tablespoons. To make the pasta and sauce recipe featured here, I used 3 tablespoons (1 1/2 ounces) of tomato sauce (165 mg sodium) and about 1 tablespoon of Parmesan cheese (95 mg sodium) for a total of 260 mg sodium with both the sauce and cheese combined. 260 mg is 11% of the recommended daily sodium allowance of 2300 mg.

You can also see that the fat in the sauce is almost nothing, but seems to be high with the cheese. Again, serving size is most important. I only used 1 tablespoon of shredded Parmesan cheese, which is 1/4 of the serving size, which then translates to 1.75 grams of total fat or 2.25% of the recommended daily allowance of total fat and 1.1 grams/6% daily allowance of saturated fat.

Finally, the tomato sauce contains almost no sugar, especially in relationship to the 3 tablespoon serving size I used. The cheese contains no sugar at all.

Both the information above and how to use it to determine what you actually take into your body apply to all packaged or prepared foods, which you know from experience make up most of the floor space in a grocery store.

Click this link or the photo below for picture book directions that show how to make high protein-high fiber pasta – or any pasta – with tomato sauce.

Microwave Cooked Pasta with Lighter Alfredo Sauce Picture Book Recipe

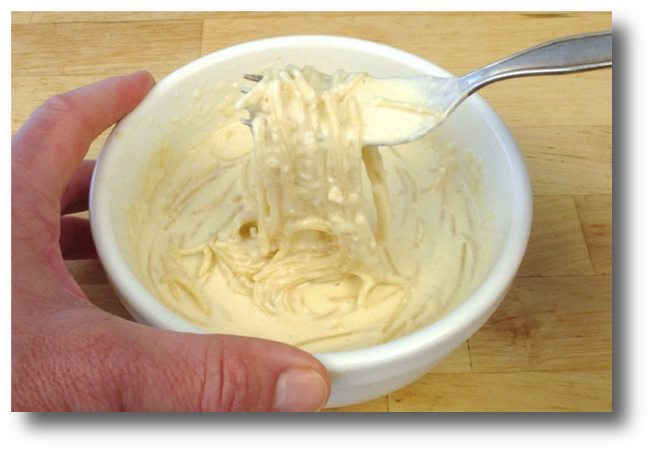
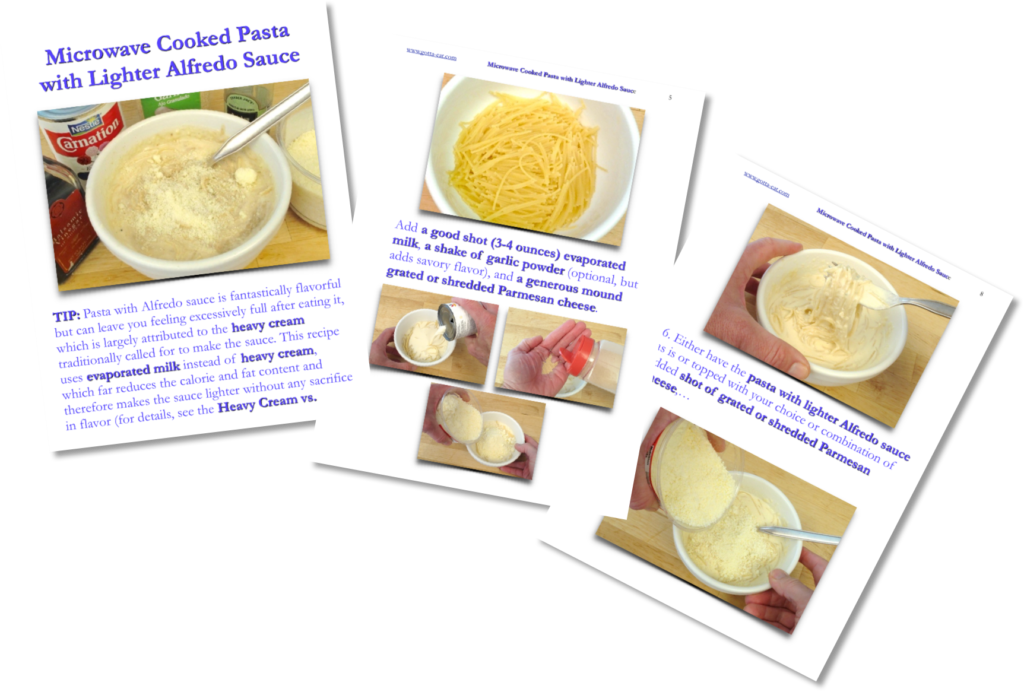
Microwave Cooked Pasta with Lighter Alfredo SaucePasta with Alfredo sauce – great flavor! But, wow, can it leave you feeling full awfully fast, which is mostly due to the heavy cream called for in the traditional recipe. Just like the stove cooked pasta with lighter Alfredo sauce, this very quick and easy microwave cooked version of the same recipe is lighter because it substitutes heavy cream with evaporated milk – with no sacrifice in flavor.

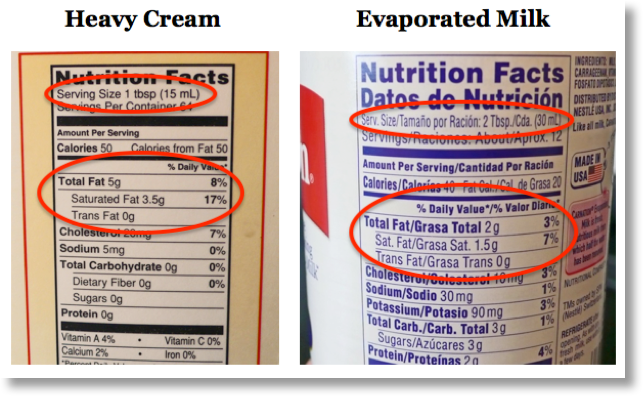
Tablespoon for tablespoon (the circled areas below show that the serving size is twice the serving size of heavy cream), heavy cream has more than twice the calories and five times the fat as evaporated milk.

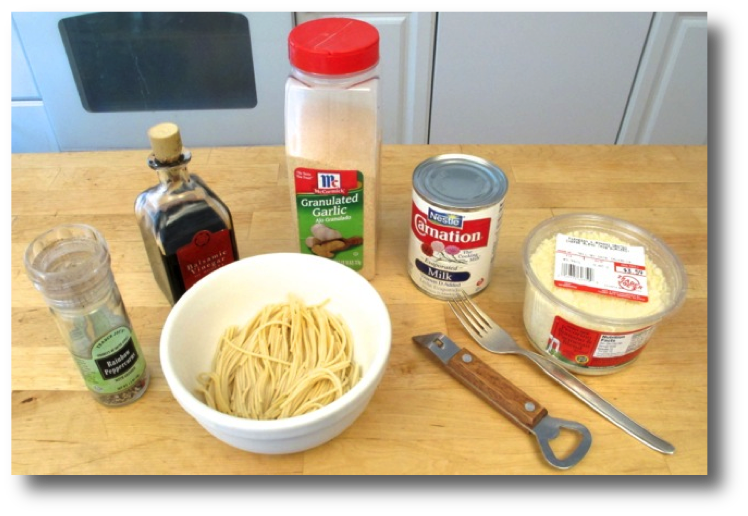
Here’s what I use to make one serving of microwave cooked pasta with lighter Alfredo sauce. All you need are cooked pasta, evaporated milk and grated Parmesan cheese. The ground black pepper, balsamic vinegar and garlic powder are optional but add a good shot of flavor.

Needed to make microwave cooked pasta with lighter Alfredo sauceClick this link or any picture on this page for a complete, easy-to-follow step-by-step picture book recipe.


Scrambled Pancake Picture Directions

The other day I wanted something a little different for breakfast with flavor and substance to power me through a good late winter Hickory, NC, group bike ride. Here’s what I came up with. I call it scrambled pancake because I used most of the ingredients I use to make a fruit pancake but scrambled the batter like scrambled eggs.

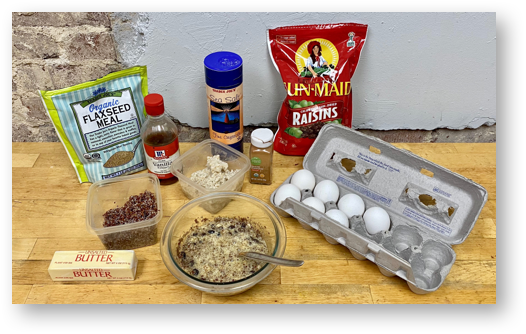
These are the ingredients that I mixed in the bowl you see at the bottom of the picture below.

Those ingredients and rough proportions are (no need to measure precisely: with these ingredients, your result will turn out great): 2 eggs, dash of salt, good shake of ground cinnamon, about 1 teaspoon vanilla extract, 1 big tablespoon of each: ground flaxseed, cooked quinoa (the red grains in the square container above the butter), cooked steel cut oats (the white grains in the square container between the vanilla extract), and a handful of raisins.

Of course, as an improvised recipe, which is just a guide, and I was using what I already had in the fridge, specifically regarding the quinoa and steel cut oats. I can imagine you don’t have those – and possibly not ground flaxseed also – ready to grab and go. No problem: just substitute any or all the grains above with any favorite cooked or ready to eat grain, like cold oat cereal, granola or wheat germ. Your imagination is your only limit.

Here’s how to cook what you’ve mixed.

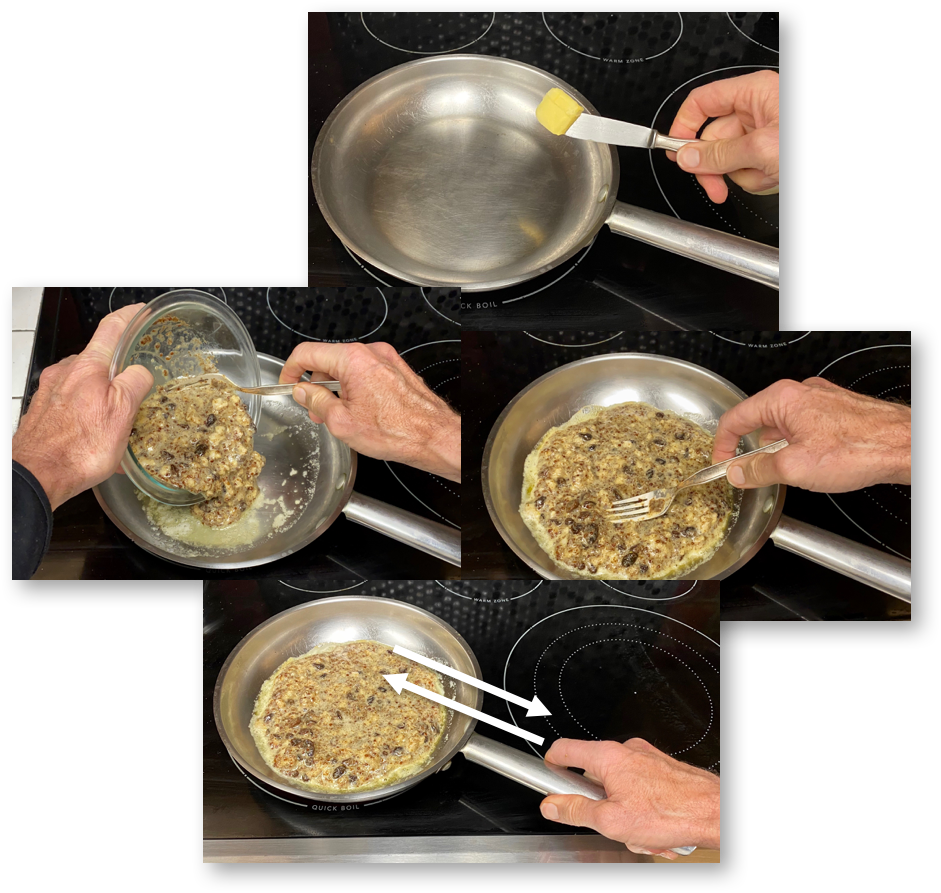
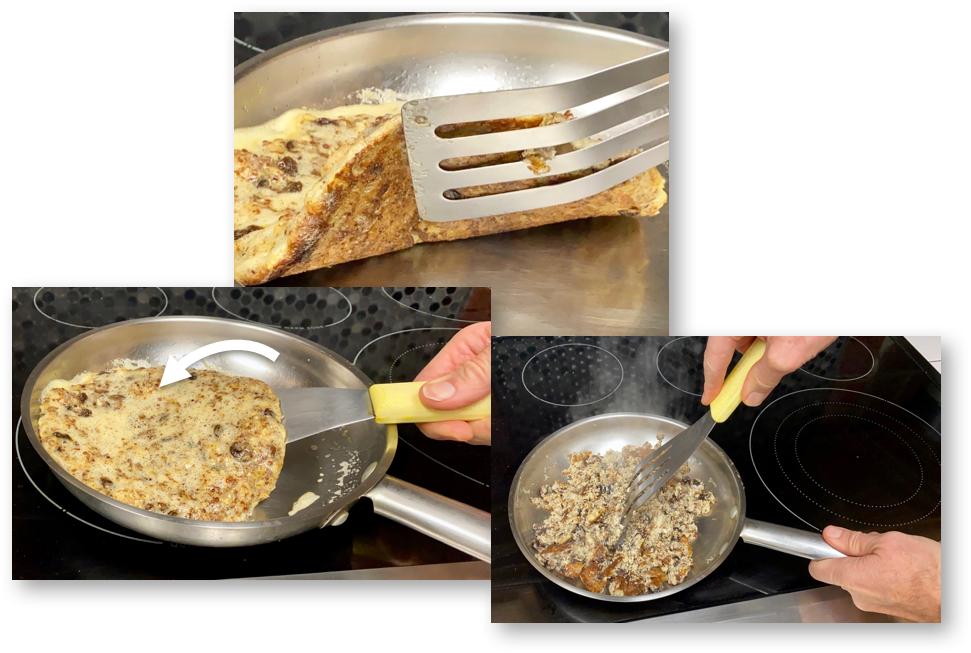
Add about as much butter as you see above to a frying pan warmed to the same temperature needed to make scrambled or fried eggs. Add and spread the batter, and give the pan a good back and forth shuffle like you see in the last picture above to “encourage” the batter not to stick to the pan surface.

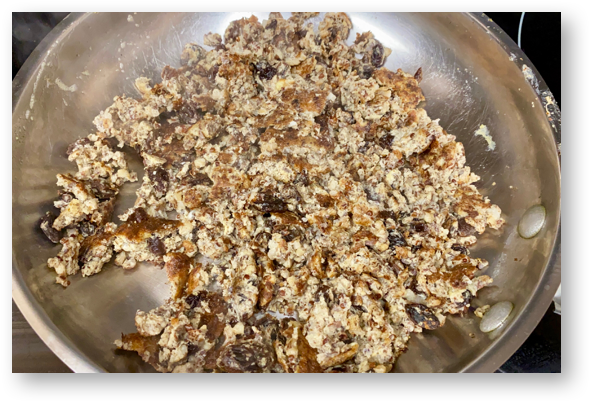
After a 1-3 minutes, when the bottom of the cooked batter looks lightly browned like the top photo above, use a spatula to turn the batter. Don’t worry about trying to turn it all in one piece. (I tried doing that myself – and failed with a smile). Then use the spatula to break and turn the batter, like you would do to make scrambled eggs, until it is cooked through as shown below.

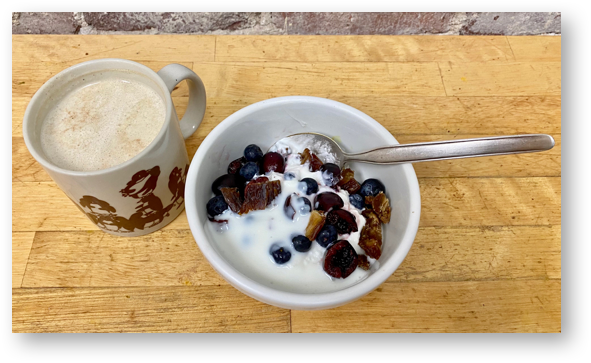
You can then scoop what you’ve cooked into a bowl and add whatever you want want: maple syrup, honey, jam, peanut or any nut butter, yogurt, whipped cream – anything. Next post, I’ll show what I added to make what you see below that easily sustained me for 40 miles on the bike, no problem.

More very soon!

Designed by Free Wordpress Themes and Sponsored by Curry and Spice