By Bruce Tretter with contributions from Chappy
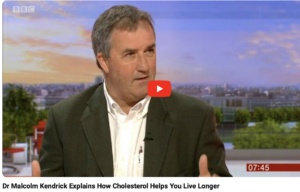
For decades, eggs were wrongly vilified as bad food. Now? They’ve been vindicated, and even lauded, for their incredibly rich nutritional benefits. And that incredible and correct turnaround is largely due to brave scientists like Scottish physician and author, Dr. Malcolm Kendrick, a staunch “show me the evidence” opponent of the “heat-diet hypothesis” that held that dietary fat and cholesterol both raised blood cholesterol and the risk of heart disease.
And I Bought the Program
For years, I believed the heart-diet line and resisted eggs like a disease. That changed suddenly after I read Dr. Kendrick’s The Clot Thickens and then started to see public health experts change their tune – all based on objective science. As a young, active almost 67-year old, to say that Dr. Kendrick’s insight didn’t just enlighten me—it rewired how I think about food and health.
What Went Wrong
Most of the fear about eggs began with in the 1970’s during a debate about the cause of high rates of heart disease, particularly among US men at the time. Two sides faced off: one, with objective science on its side, argued that excessive carbohydrate/sugar intake was causing both arterial scaring and excessive fat production in the liver, and the other side arguing the above mentioned heart-diet hypothesis – funded largely by the sugar industry.
There was also a compounding political wrinkle. The Nixon administration was trying to drive down food prices as part of an effort to improve re-election odds.
The result: fat was out, sugar was in – and heart disease rates shot through the roof.
The Turnaround
Recent research and systematic reviews, founded on evidence-based objective science, now supported by the likes of the American Heart Association and Harvard’s School of Public Health, have found no significant link between moderate egg consumption and heart disease in healthy individuals. In fact, eggs can support heart, brain, eye, and muscle health.
Eggs Are Nutritional Powerhouses
- High-quality protein: essential for muscle repair and immune function
- Choline: vital for brain development and memory
- Lutein & Zeaxanthin: antioxidants that support eye health and help prevent macular degeneration
- Vitamin D: bone strength and immune system support
Why This Matters
It’s not just about eggs. It’s about trusting evidence over old fears. It’s about helping people learn to cook, eat well, and live confidently in their kitchens again. For millions who are food insecure or afraid to cook, this truth can be transformative.

Next up: Scrambled Eggs Made Easy

 May 28th, 2025


