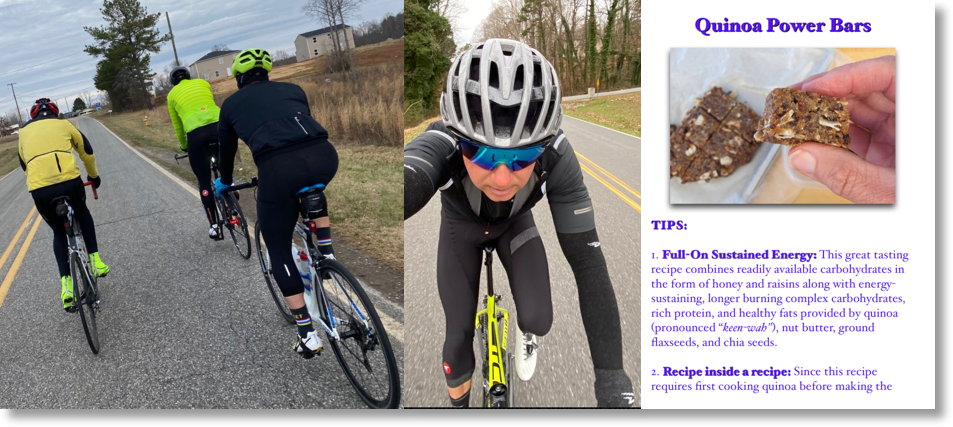
Killer North Carolina cycling & quinoa power bars the 3 to the right of “dude” left (me) haven’t yet tried (next ride, men!)
A few terrific cycling buds asked me on a ride this weekend if I have any recipes for power bars. I do: Quinoa Power Bars and Banana Nut Butter Power Bars.
The keys to a good power bar: a mix of simple and complex carbohydrates that your body breaks down quickly for immediate burn, healthy fats and protein that take longer to break down for sustained energy burn – and killer good flavor! Both the quinoa and banana nut butter bars provide exactly that.
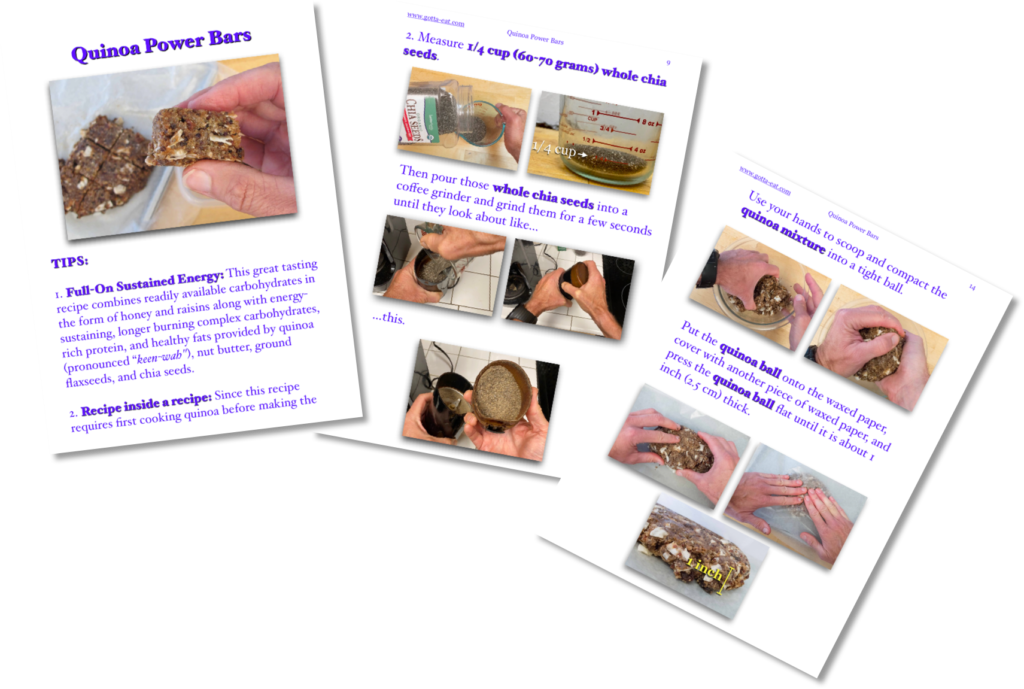
First, quinoa power bars because I just updated that recipe yesterday with relatively new nutritional information and directions showing how to grind whole chia seeds to get the most out of them. I’ll update the banana nut butter bars next.
Click this link or any picture on this page for step-by-step quinoa power bar picture book directions.
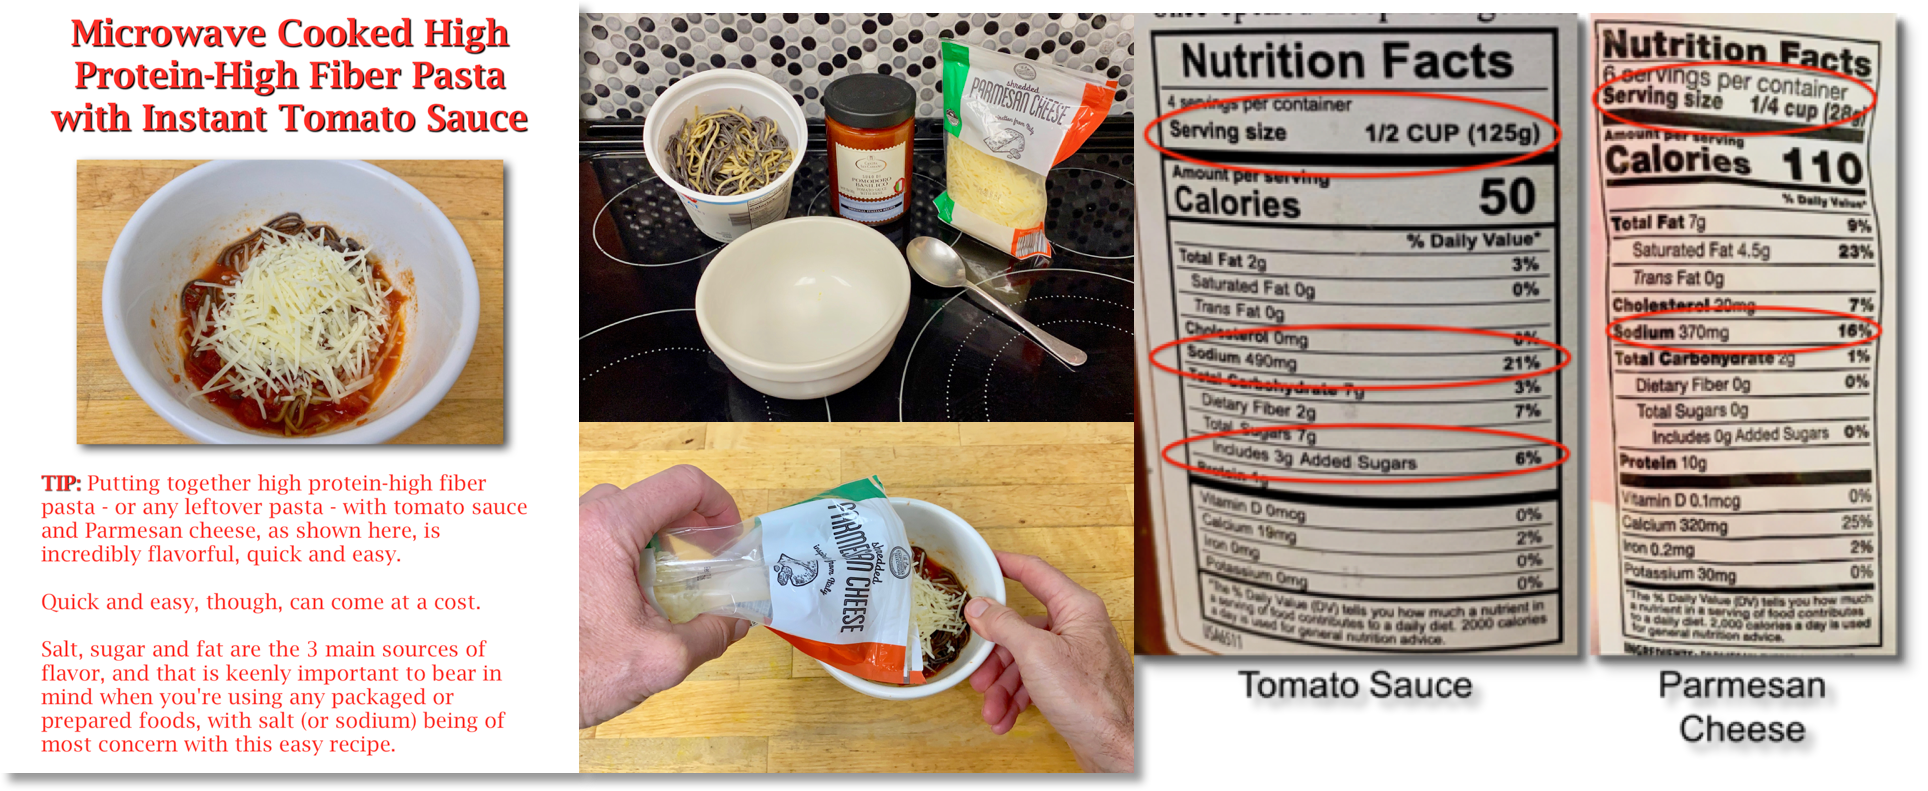
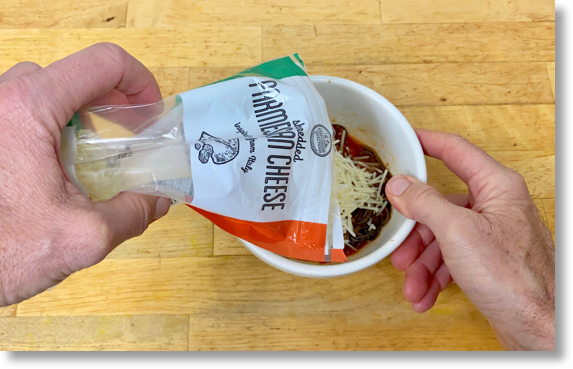
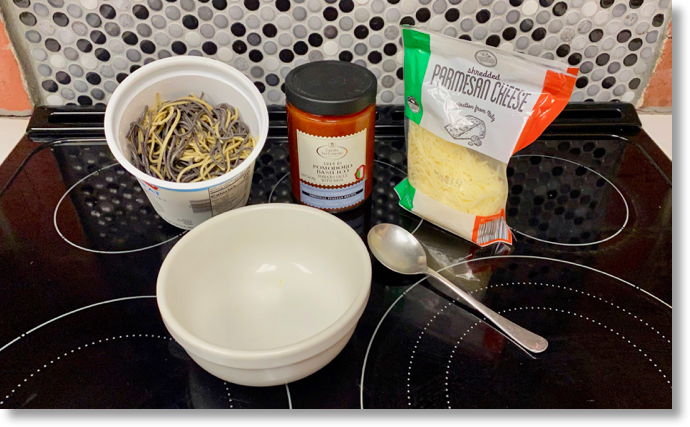
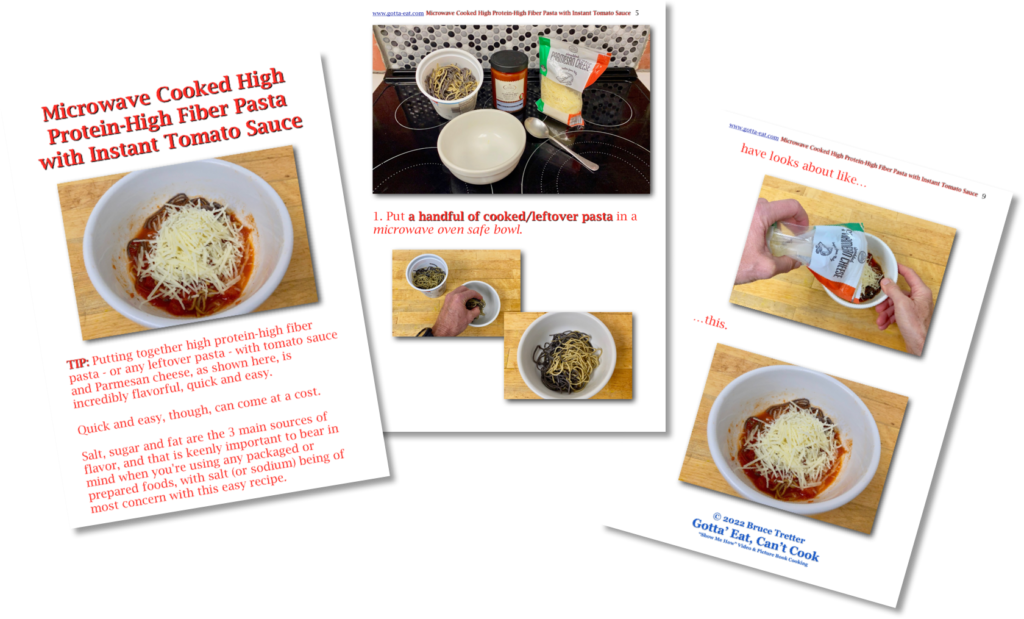
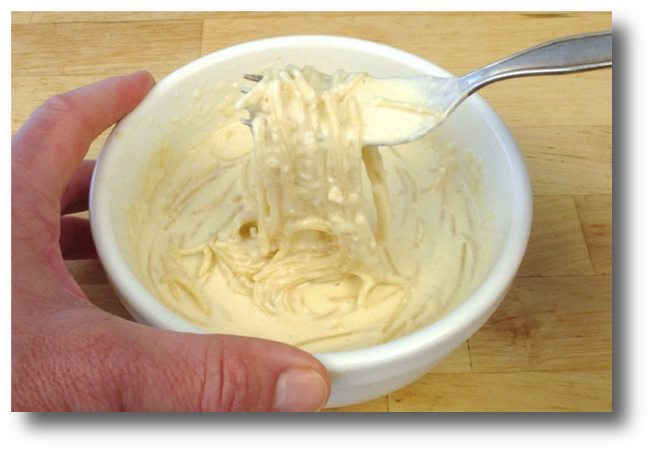
Putting together leftover pasta, tomato sauce and Parmesan cheese as shown here is incredibly flavorful, quick and easy.
Quick and easy, though, can come at a cost.
Salt, sugar and fat are the 3 main sources of flavor, and that is keenly important to bear in mind when you’re using any packaged or prepared foods, with salt (or sodium) being of most concern here for reasons outlined in the pasta and sauce recipe you can download by clicking this link.
Right now, let’s look at the three ingredients regarding their salt, sugar and fat content.
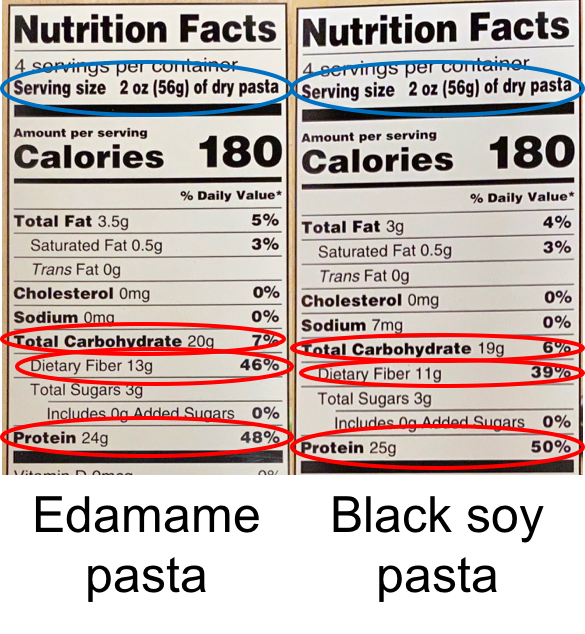
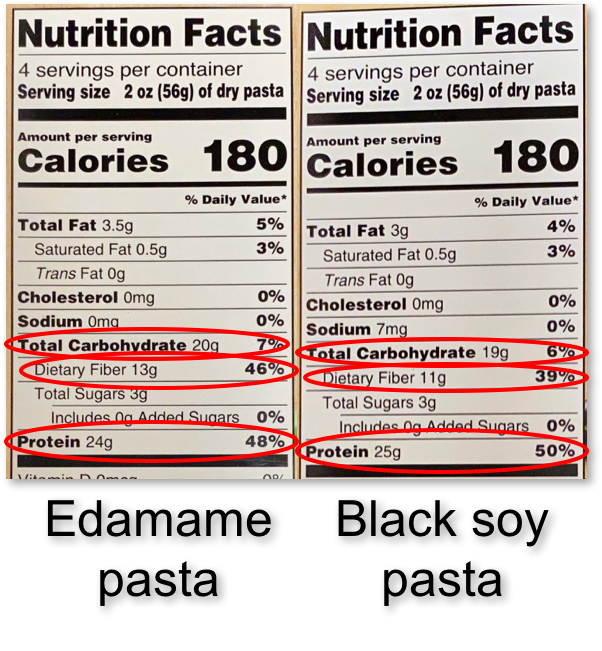
The first thing to look at on a nutrition label is serving size, circled in blue, because that number directly relates to all the quantity of the components (fat, cholesterol, etc.) listed below serving size. As listed on their nutrition labels, the high protein-high fiber soybean pastas I used have no sodium and very little fat. The only sugar comes from sugar in the soybeans. That’s fine.
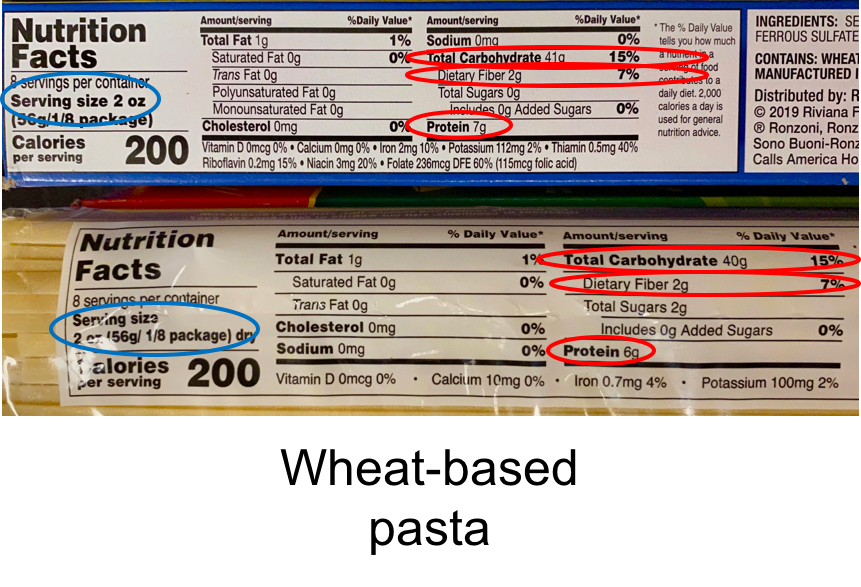
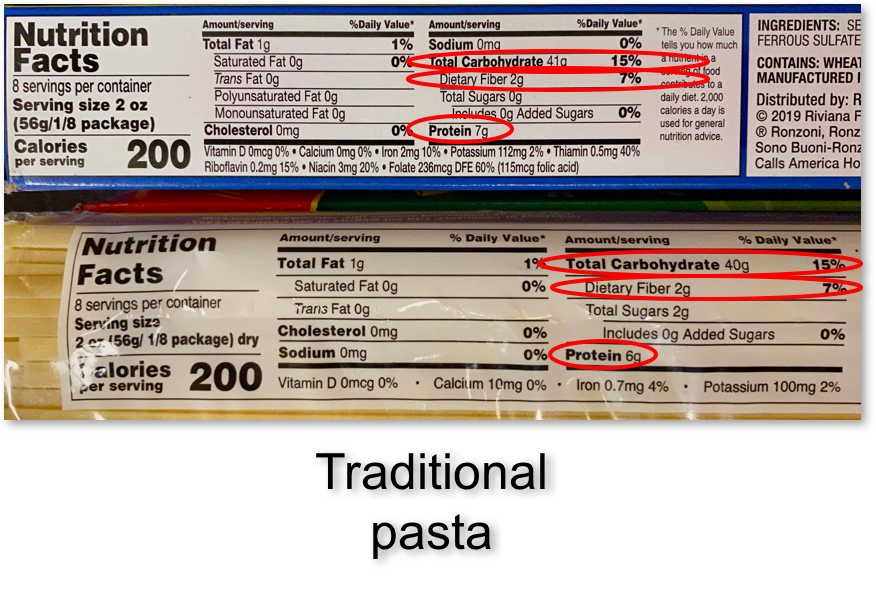
To be fair, here are nutrition labels from two packages of traditional wheat-based pasta. You can see that the fat content for both, 1 gram, is minimal per 2 ounce serving. You can also see that these pastas contain no sodium or sugar. Of course, the biggest difference between the pastas above and below is the significant increase in protein and fiber found in the high protein-high fiber pastas.
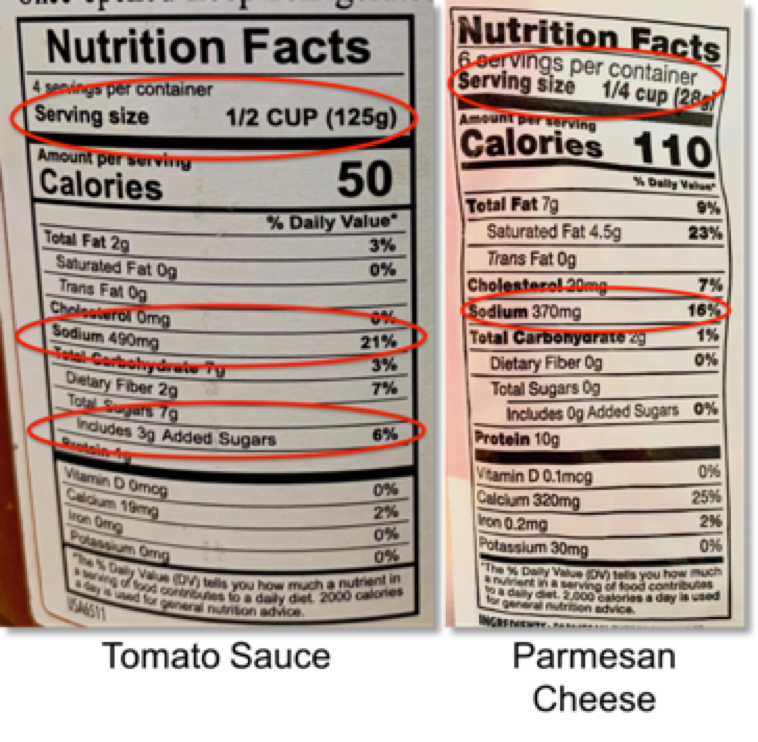
Below are the nutrition labels from the tomato sauce and Parmesan cheese I used. One of the important numbers not listed on any of these nutrition labels is the daily allowed amount/value of sodium, which is 2300 milligrams (mg) per adult.
As shown above, the serving size for the sauce is 1/2 cup. 1/2 cup equals 4 ounces or 8 tablespoons. The serving size for the Parmesan cheese is 1/4 cup, which is the same as 2 ounces or 4 tablespoons. To make the pasta and sauce recipe featured here, I used 3 tablespoons (1 1/2 ounces) of tomato sauce (165 mg sodium) and about 1 tablespoon of Parmesan cheese (95 mg sodium) for a total of 260 mg sodium with both the sauce and cheese combined. 260 mg is 11% of the recommended daily sodium allowance of 2300 mg.
You can also see that the fat in the sauce is almost nothing, but seems to be high with the cheese. Again, serving size is most important. I only used 1 tablespoon of shredded Parmesan cheese, which is 1/4 of the serving size, which then translates to 1.75 grams of total fat or 2.25% of the recommended daily allowance of total fat and 1.1 grams/6% daily allowance of saturated fat.
Finally, the tomato sauce contains almost no sugar, especially in relationship to the 3 tablespoon serving size I used. The cheese contains no sugar at all.
Both the information above and how to use it to determine what you actually take into your body apply to all packaged or prepared foods, which you know from experience make up most of the floor space in a grocery store.
Click this link or the photo below for picture book directions that show how to make high protein-high fiber pasta – or any pasta – with tomato sauce.
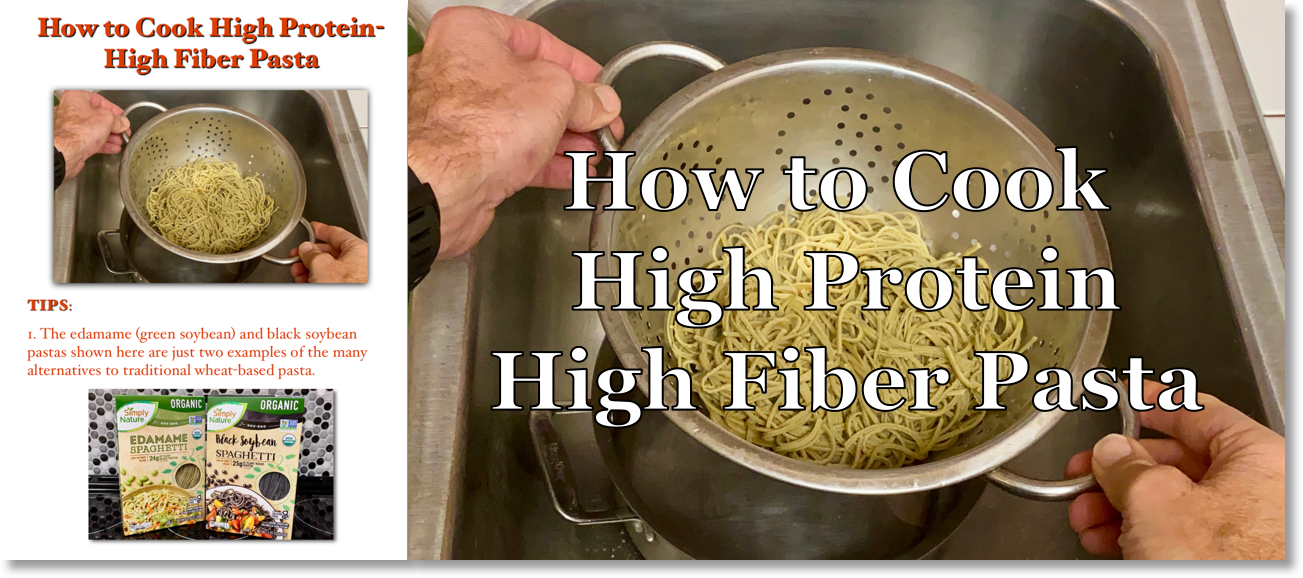
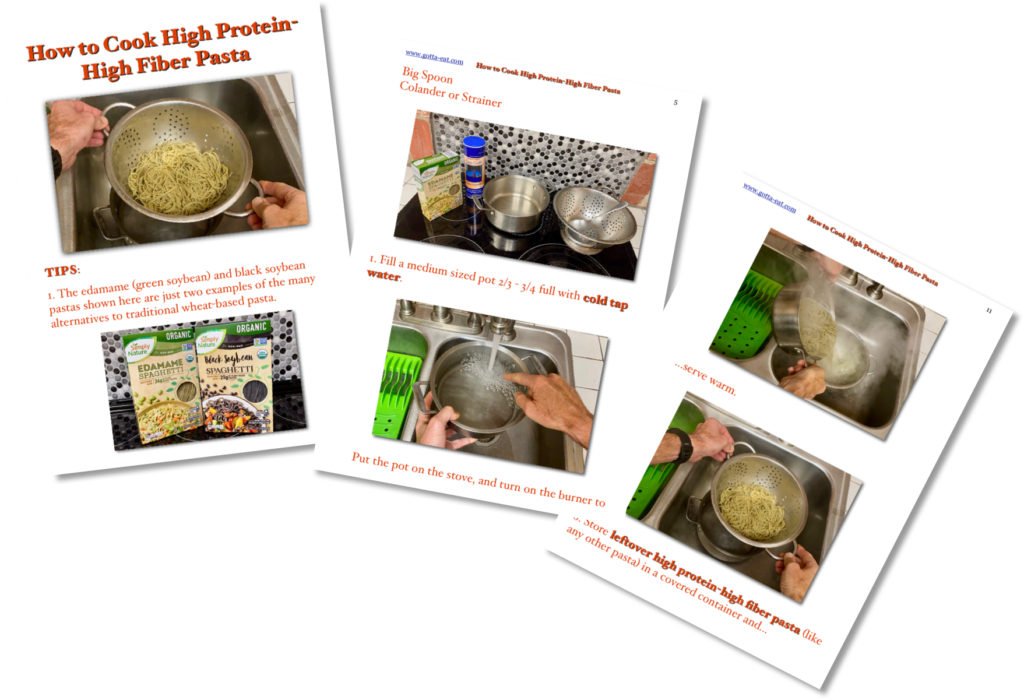
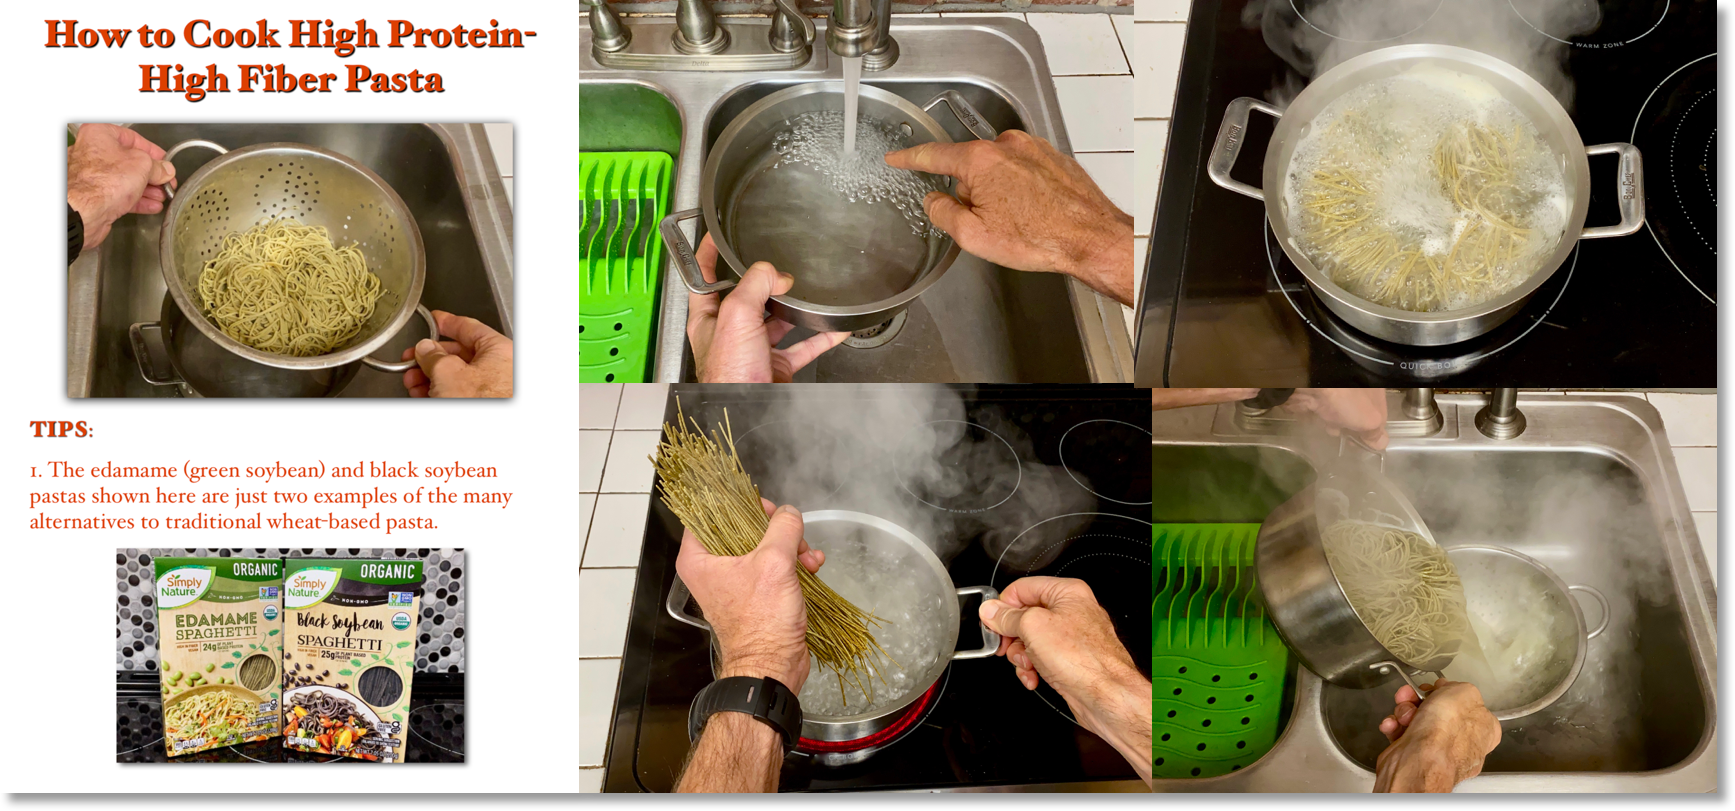
Picture book and video directions show how to cook fantastically versatile high protein-high fiber pasta
Just put out this 4 minute YouTube video showing how to cook high protein-high fiber pasta using a combination of black soy bean and edamame (young, green soybean) pasta.
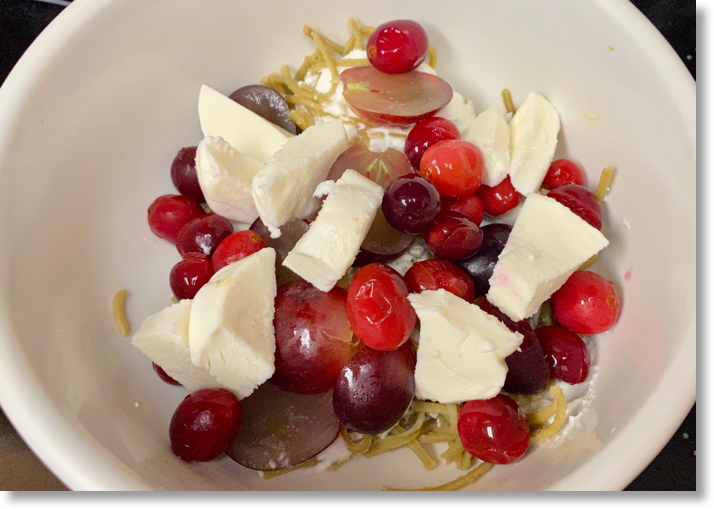
Why high protein-high fiber pasta? First: flavor always rules here, and just like traditional wheat-based pasta, you can add flavor to it any way you like. I’ll show examples in future posts like what you see below: full-on flavorful high protein-high fiber pasta with fruit and mozzarella cheese.
High protein-high fiber pasta with fruit and mozzarella cheese
Second, but most importantly for your body, just about everybody could use more fiber and high quality protein in their diet. Click this link or the picture below for a quick take on fiber and what it does for us.
What is fiber and why do we need it in our diet?
You can also click this link or the picture below for How to Cook High Protein-High Fiber Pasta picture book directions.
How to Cook High Protein-High Fiber Pasta picture book directions
February 14th, 2022 Blog, Cycling Food, One Bowl Meals, PastaComments Off on Microwave Cooked Pasta with Lighter Alfredo Sauce Picture Book Recipe
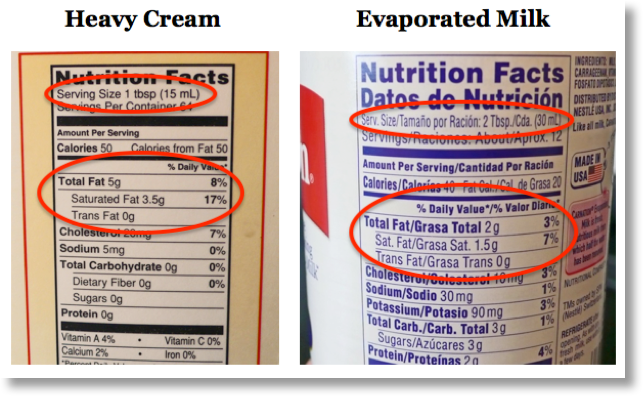
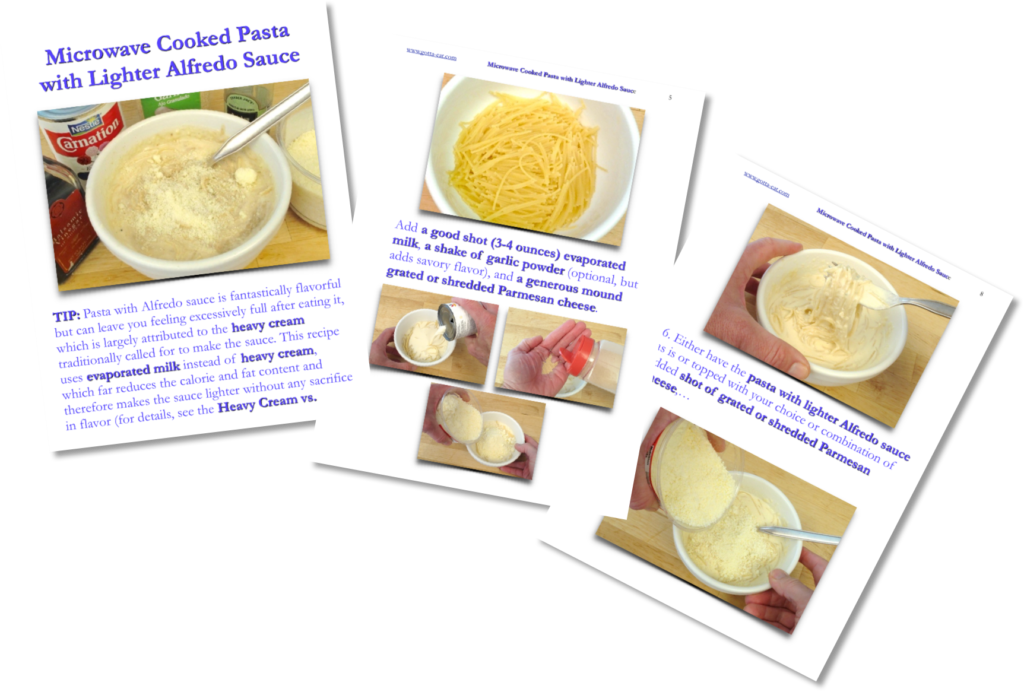
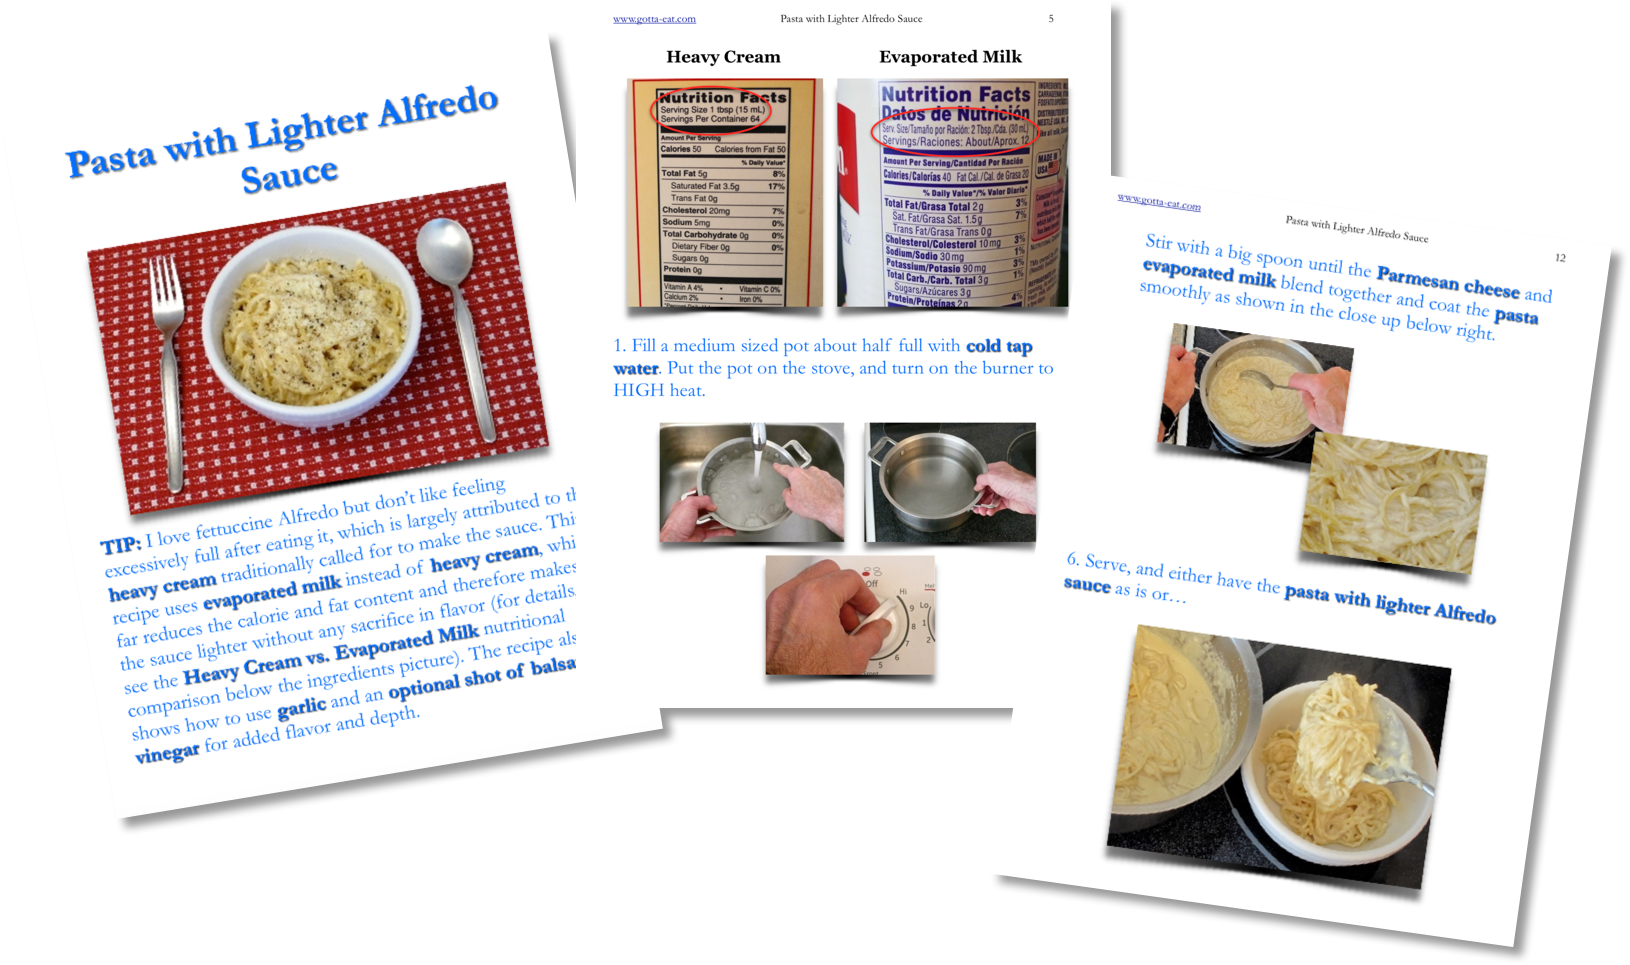
Pasta with Alfredo sauce – great flavor! But, wow, can it leave you feeling full awfully fast, which is mostly due to the heavy cream called for in the traditional recipe. Just like the stove cooked pasta with lighter Alfredo sauce, this very quick and easy microwave cooked version of the same recipe is lighter because it substitutes heavy cream with evaporated milk – with no sacrifice in flavor.
Tablespoon for tablespoon (the circled areas below show that the serving size is twice the serving size of heavy cream), heavy cream has more than twice the calories and five times the fat as evaporated milk.
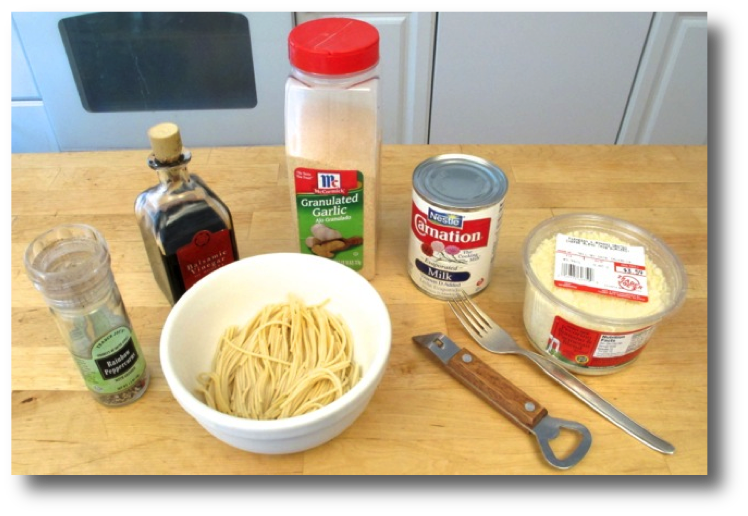
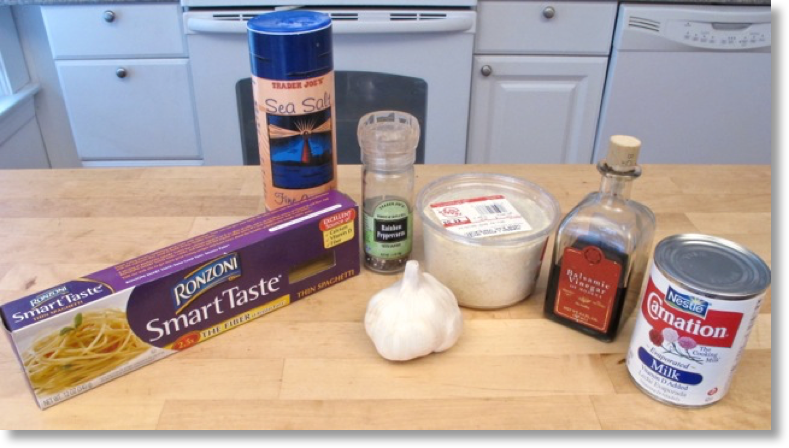
Here’s what I use to make one serving of microwave cooked pasta with lighter Alfredo sauce. All you need are cooked pasta, evaporated milk and grated Parmesan cheese. The ground black pepper, balsamic vinegar and garlic powder are optional but add a good shot of flavor.
Click this link or any picture on this page for a complete, easy-to-follow step-by-step picture book recipe.
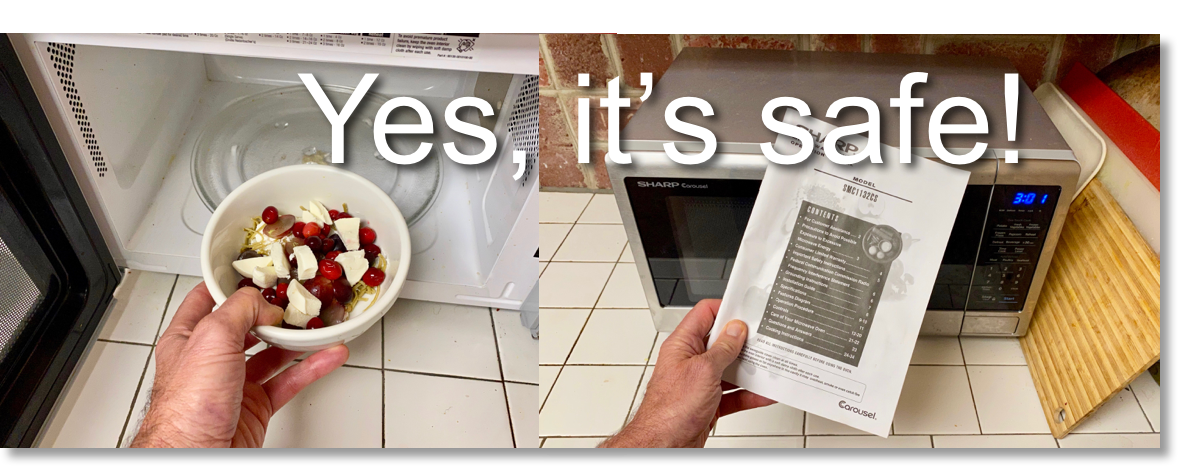
Cooking with a well working microwave oven is quick, easy and safe
Next couple posts – and many more in the future – will show how to warm easy to make pasta meals in the microwave oven. Before actually showing how to make any of those meals, I first want to address a concern some people have about microwave oven cooking safety prompted by a recent comment left on my “How to Make Microwave Cooked Broccoli” video stating that microwave cooking changes vegetable cell structure and therefore makes those microwave cooked vegetables potentially cancerous.
I’ve heard that comment before. I’m sure you have, too. It is not true. Microwave cooking does not change cell structure other than potentially bursting their cell walls as steam builds inside the cells when they are heated the same way vegetable cells can burst through stove top or oven cooking.
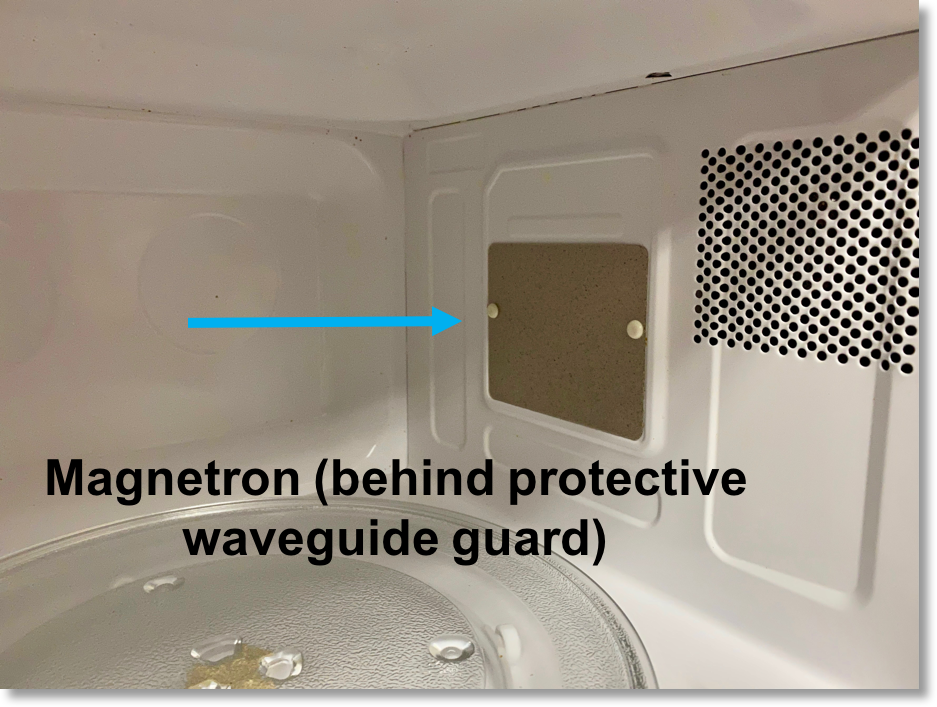
Here is a description explaining how microwave ovens cook food that I paraphrased from the US Department of Agriculture (USDA), Food and Drug Administration (FDA) and World Health Organization (WHO) resources listed at the end of this article: An electronic tube, called a magnetron, inside a microwave oven converts ordinary wall socket electric power into 2450 Megahertz microwaves (electromagnetic waves that are about 5 inches long) that cause molecules in water, fats and sugars in food to vibrate very quickly. That fast vibration and friction, like rapidly rubbing your hands together, causes heat which then cooks the food.
Here’s what the magnetron looks like in my microwave oven.
Microwave oven magnetron
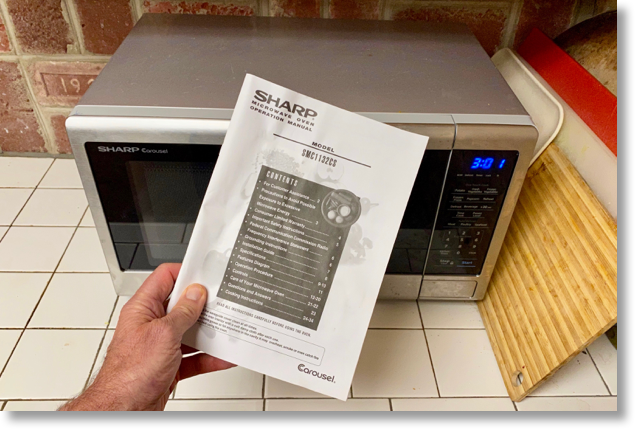
In order the ensure safe cooking, as detailed in your microwave oven owner’s manual,…
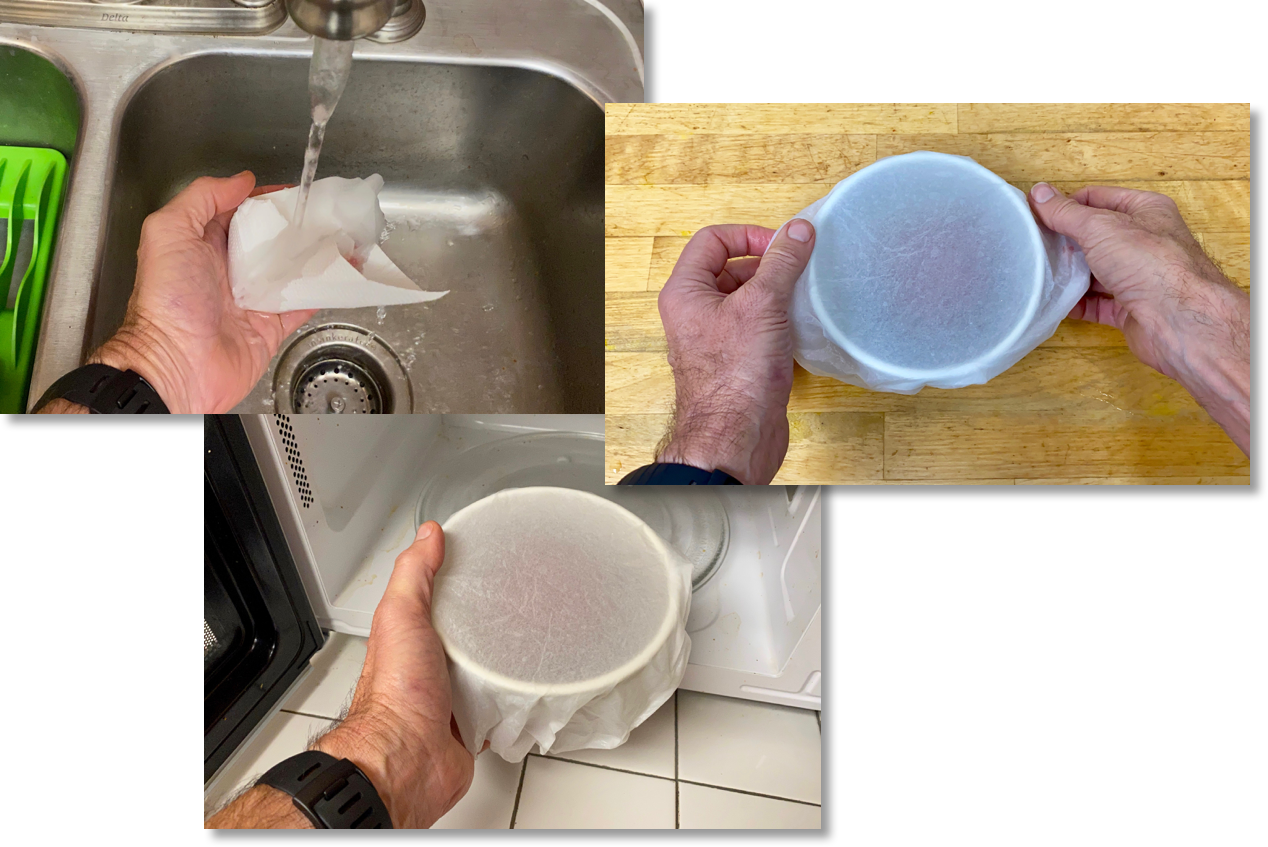
…make sure there are no cracks inside the microwave walls or door seal. Use only microwave safe containers or dishes when cooking food in a microwave oven and don’t cover foods with plastic wrap to prevent splatter because some of the plastic can melt and get into your food. As shown below, I use a wetted paper towel to prevent splatter, which works great!
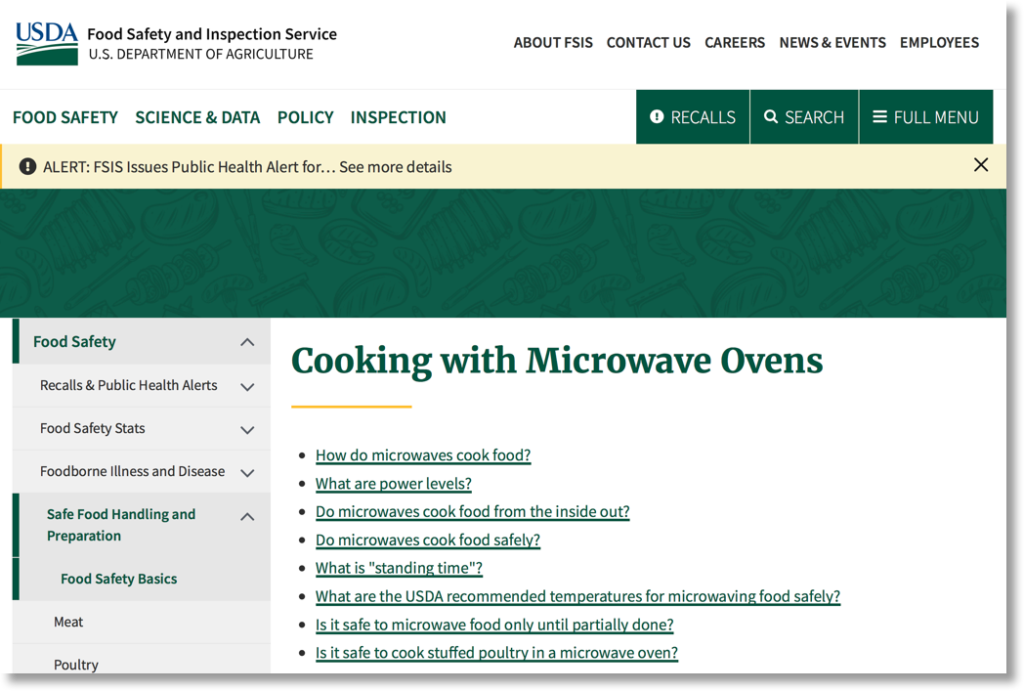
Below are some excellent resources for more detailed information and answers to common microwave oven use questions.
Click this link or the picture below for Cooking with Microwave Ovens from the US Department of Agriculture (USDA).
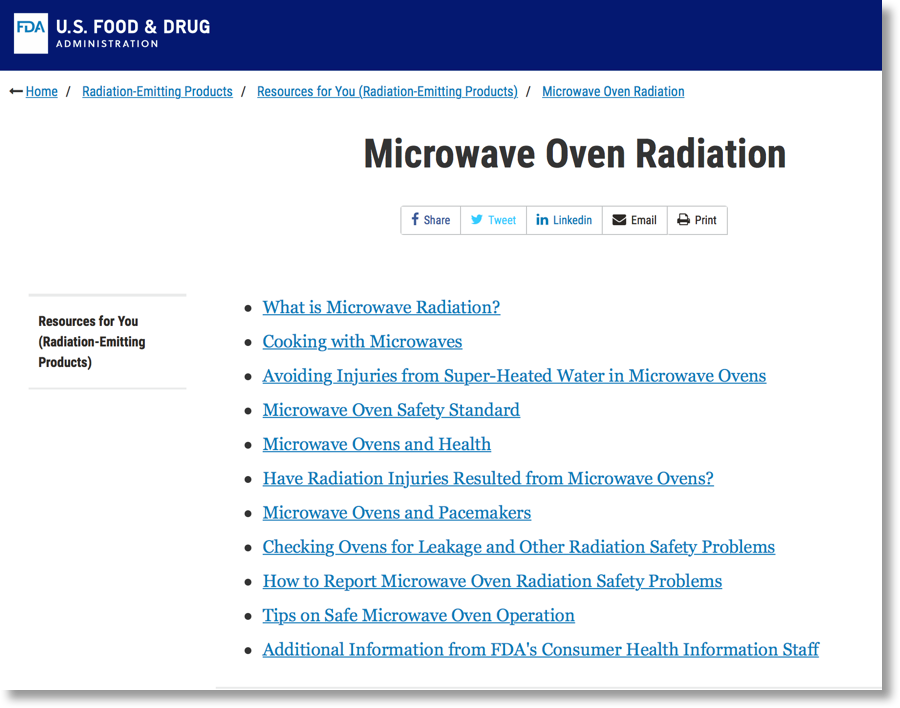
Click this link or the picture below for the US Food & Drug Administration’s Microwave Oven Radiation webpage.
Click this link or the picture below for Questions and Answers about Microwave Radiation by the World Health Organization (WHO).
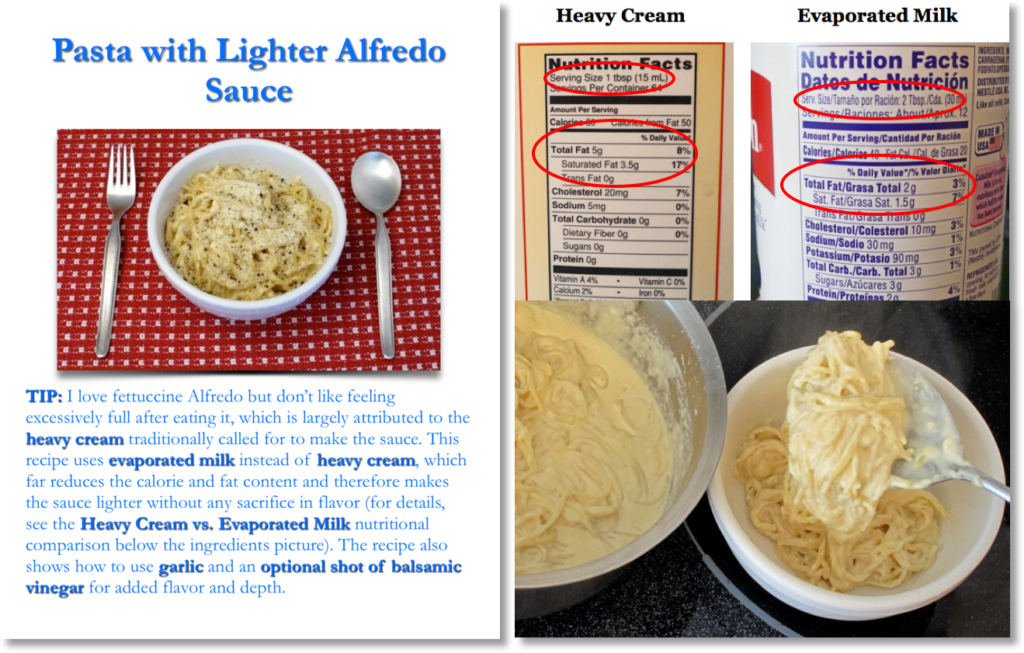
You’re probably well aware that there’s nothing much more flavorful than the combination of freshly cooked pasta, cheese and cream you get with fettuccine – or any shape pasta – Alfredo. The only problem, Alfredo sauce is usually very heavy, and the culprit is heavy cream.
There’s an easy fix to that. Just substitute unsweetened evaporated milk for heavy cream. As shown in the label comparisons below, ounce for ounce (1 ounce = 2 tablespoons), evaporated milk has fewer than half the calories and 1/5th the fat of heavy cream, though I find the cooking properties and flavor qualities to be the same, especially for a dish like this.
You’ll also notice in the ingredients pictured below that I use garlic and a shot of balsamic vinegar to pump up the flavor, which is entirely optional when you make this dish. Flavor always rules!
Click this link or any picture on this page for a complete Lighter Pasta Alfredo picture book recipe.
January 31st, 2022 Blog, Mindfulness, VideosComments Off on What is Mindfulness and What Can It Do For You?
Mindfulness is the key to living a fully aware, fully awake life
Mindfulness is being fully aware, fully conscious, fully awake. Being mindful (aware, conscious, fully awake) is the key to living a more focused, calm and clear life in the midst of the constant chaos of moment-to-moment impulses, thoughts, feelings, emotions and experiences that tend to sweep us away mindlessly.
The difference between mindlessness and mindfulness is the difference between absently bouncing on a hamster wheel while being bombarded with everything life throws at you – with incredible accuracy – and using fully engaged awareness to drop back and see that hamster wheel and all the mayhem that surrounds it for what it really is.
Mindfulness is not checking out of life. Not at all. Mindfulness is checking into life fully engaged with eyes open, razor sharp clarity.
The root of the word “mindfulness” is “mind”, and there’s nothing more important to us than our mind. Our mind is who we are and what we are – always – and it is not our brain. Instead, our mind is an active process. It is all the mental activity going on in our brain all the time that makes up our ability to think and be aware. That ability to be aware, or the state of awareness, is consciousness.
By nature, our minds have been built over millions of years to help us survive in a random world by processing streams of random thoughts and emotions that affect us from a range of a light flicker to a complete attention-consuming fire. We can’t stop that randomness and we never will.
The real problem, though, isn’t the randomness of thoughts and emotions as they appear constantly in our heads.
No, the big problem is our tendency to identify with those thoughts and the emotions connected to them. Identifying means that we let those thoughts and emotions tell us who we are, which then sweeps us away on a mindless hamster wheel run – all at the tremendous expense of missing the feet-on-the-ground, full-on life power of experiencing our here and now present.
The bright side of this story (there’s always a bright side!): everything mentioned above doesn’t have to be that way, and the key is mindfulness.
Sure, I’d heard of mindfulness years ago but never practiced it formally until my good friend, Jay, nudged me to do something about it not once but twice. And I greatly appreciate his persistence!
As Andy Puddicombe says in his very focused and equally entertaining 10-minute TED Talk that you can see by clicking this link or any picture on this page, “We can’t change every little thing that happens to us in life, but we can change the way we experience (them)”. Changing our perspective, relative to moment-to-moment experiences, thoughts and emotions through mindfulness practice and regular application in our lives, is the key to living a more focused, calm and clear life. And, wow, from personal experience, what a difference that makes!
When you watch Andy’s video, you’ll hear him talk about one of the formal methods of achieving mindfulness: meditation. All my life, my response to the idea of meditation was, “There is no way I’m gonna’ take time out to sit crosslegged, eyes closed and say “Ommmm…”. Now, again thanks to my good bud, Jay’s, persistence, I’ve learned that the meditation I now practice daily has everything NOT to do with that and is instead all about waking up and learning how to make the most of my moment-to-moment life as possible. To say that mindfulness and meditation have significantly affected my life is a gross understatement.
But more about that and the specific practice I’ve adopted soon! In the meantime, please give Andy’s video a look. There’s no doubt in my mind that what he says has the power to change your life.
High protein-high fiber pasta is an easy to make great addition to any meal routine
Last post showed how to cook great tasting, highly versatile wheat-based pasta to perfection. Future posts will show how to make fully flavorful easy pasta dishes, though you can certainly get a jump on that by clicking this pasta recipe page.
But, what if you’re wheat intolerant and can’t eat wheat-based pasta? Or, what if you want to add more fiber to your diet, which, as mentioned in another recent post, What is Fiber and Why Do We Need It in Our Diet?, is a great idea?
No problem.
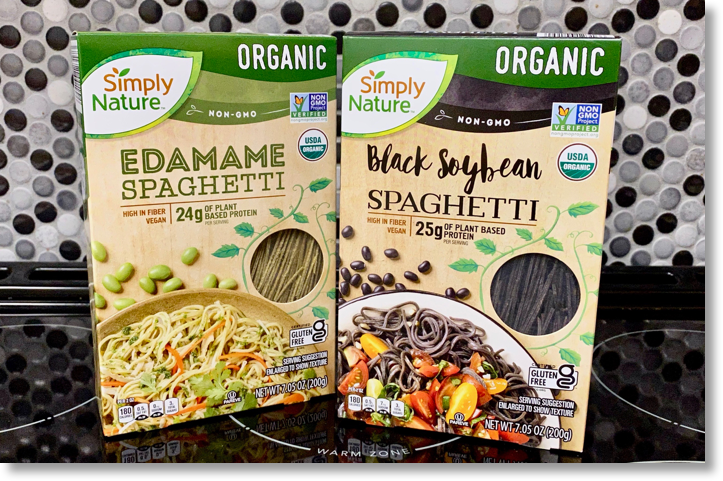
There are now many wheat-based pasta alternatives in stores, and here are two that I use regularly, edamame (green soybean) and black soybean pasta.
Edamame and black soybean pasta
Here’s how these pastas clearly separate themselves from each other regarding carbohydrate, fiber and protein content. Serving for serving, traditional wheat-based pasta has more than twice the carbohydrates, which is no problem if you live an active life, and…
…only a fraction of the fiber and protein content of high protein-high fiber pasta as shown in the nutrition label comparisons above and below.
Click this link or the picture below for easy to follow How to Cook High Protein-High Fiber Pasta picture book directions.
How to Cook High Protein-High Fiber Pasta picture book directions
Next post will be a bit different: What is Mindfulness and What Can It Do For You? I’m a year into daily practice, and it has made a terrific difference. More soon!
Pasta: loved by most, goes with just about anything, and is incredibly easy to make.
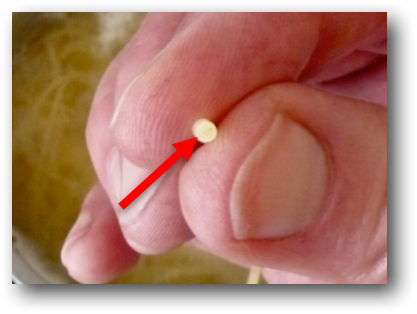
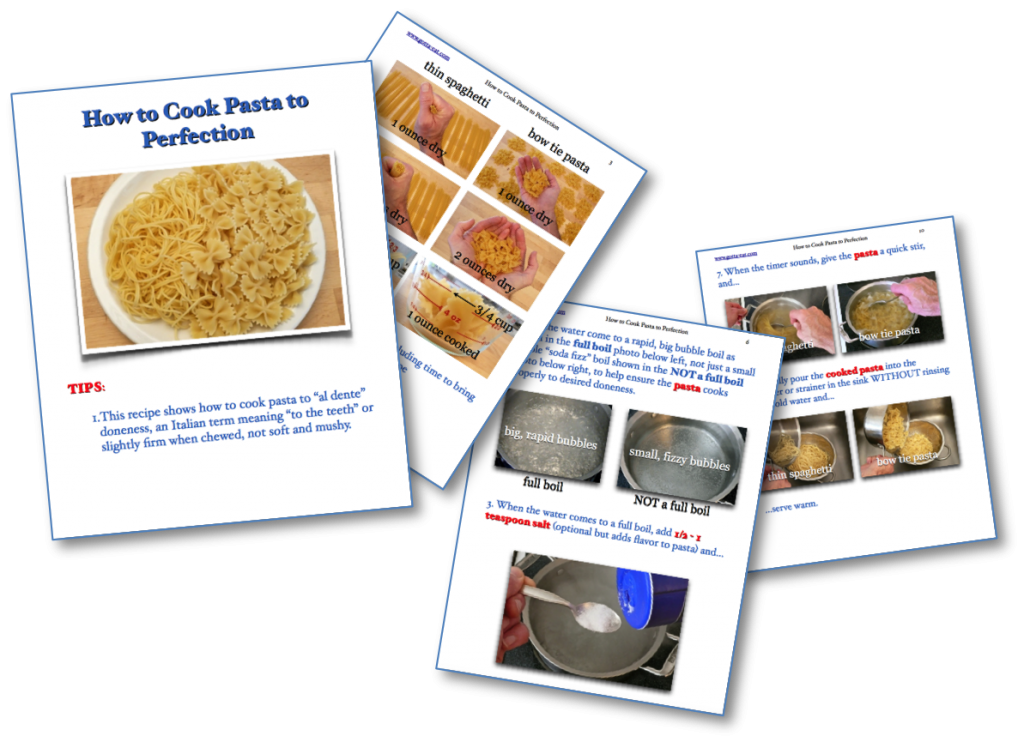
First, what is “perfectly cooked” pasta? It’s pasta that’s cooked “al dente”, which is Italian for “to the teeth” and means that the pasta still has a little uncooked whiteness at the core of the cooked pasta piece, as (almost) shown below, which makes the pasta slightly firm, not mushy, to chew.
Here are the keys to cooking pasta to perfection:
Knowing how to measure pasta serving sizes
Heating water to a rapid boil before adding pasta
Using the correct amount of water and knowing how long to cook the pasta
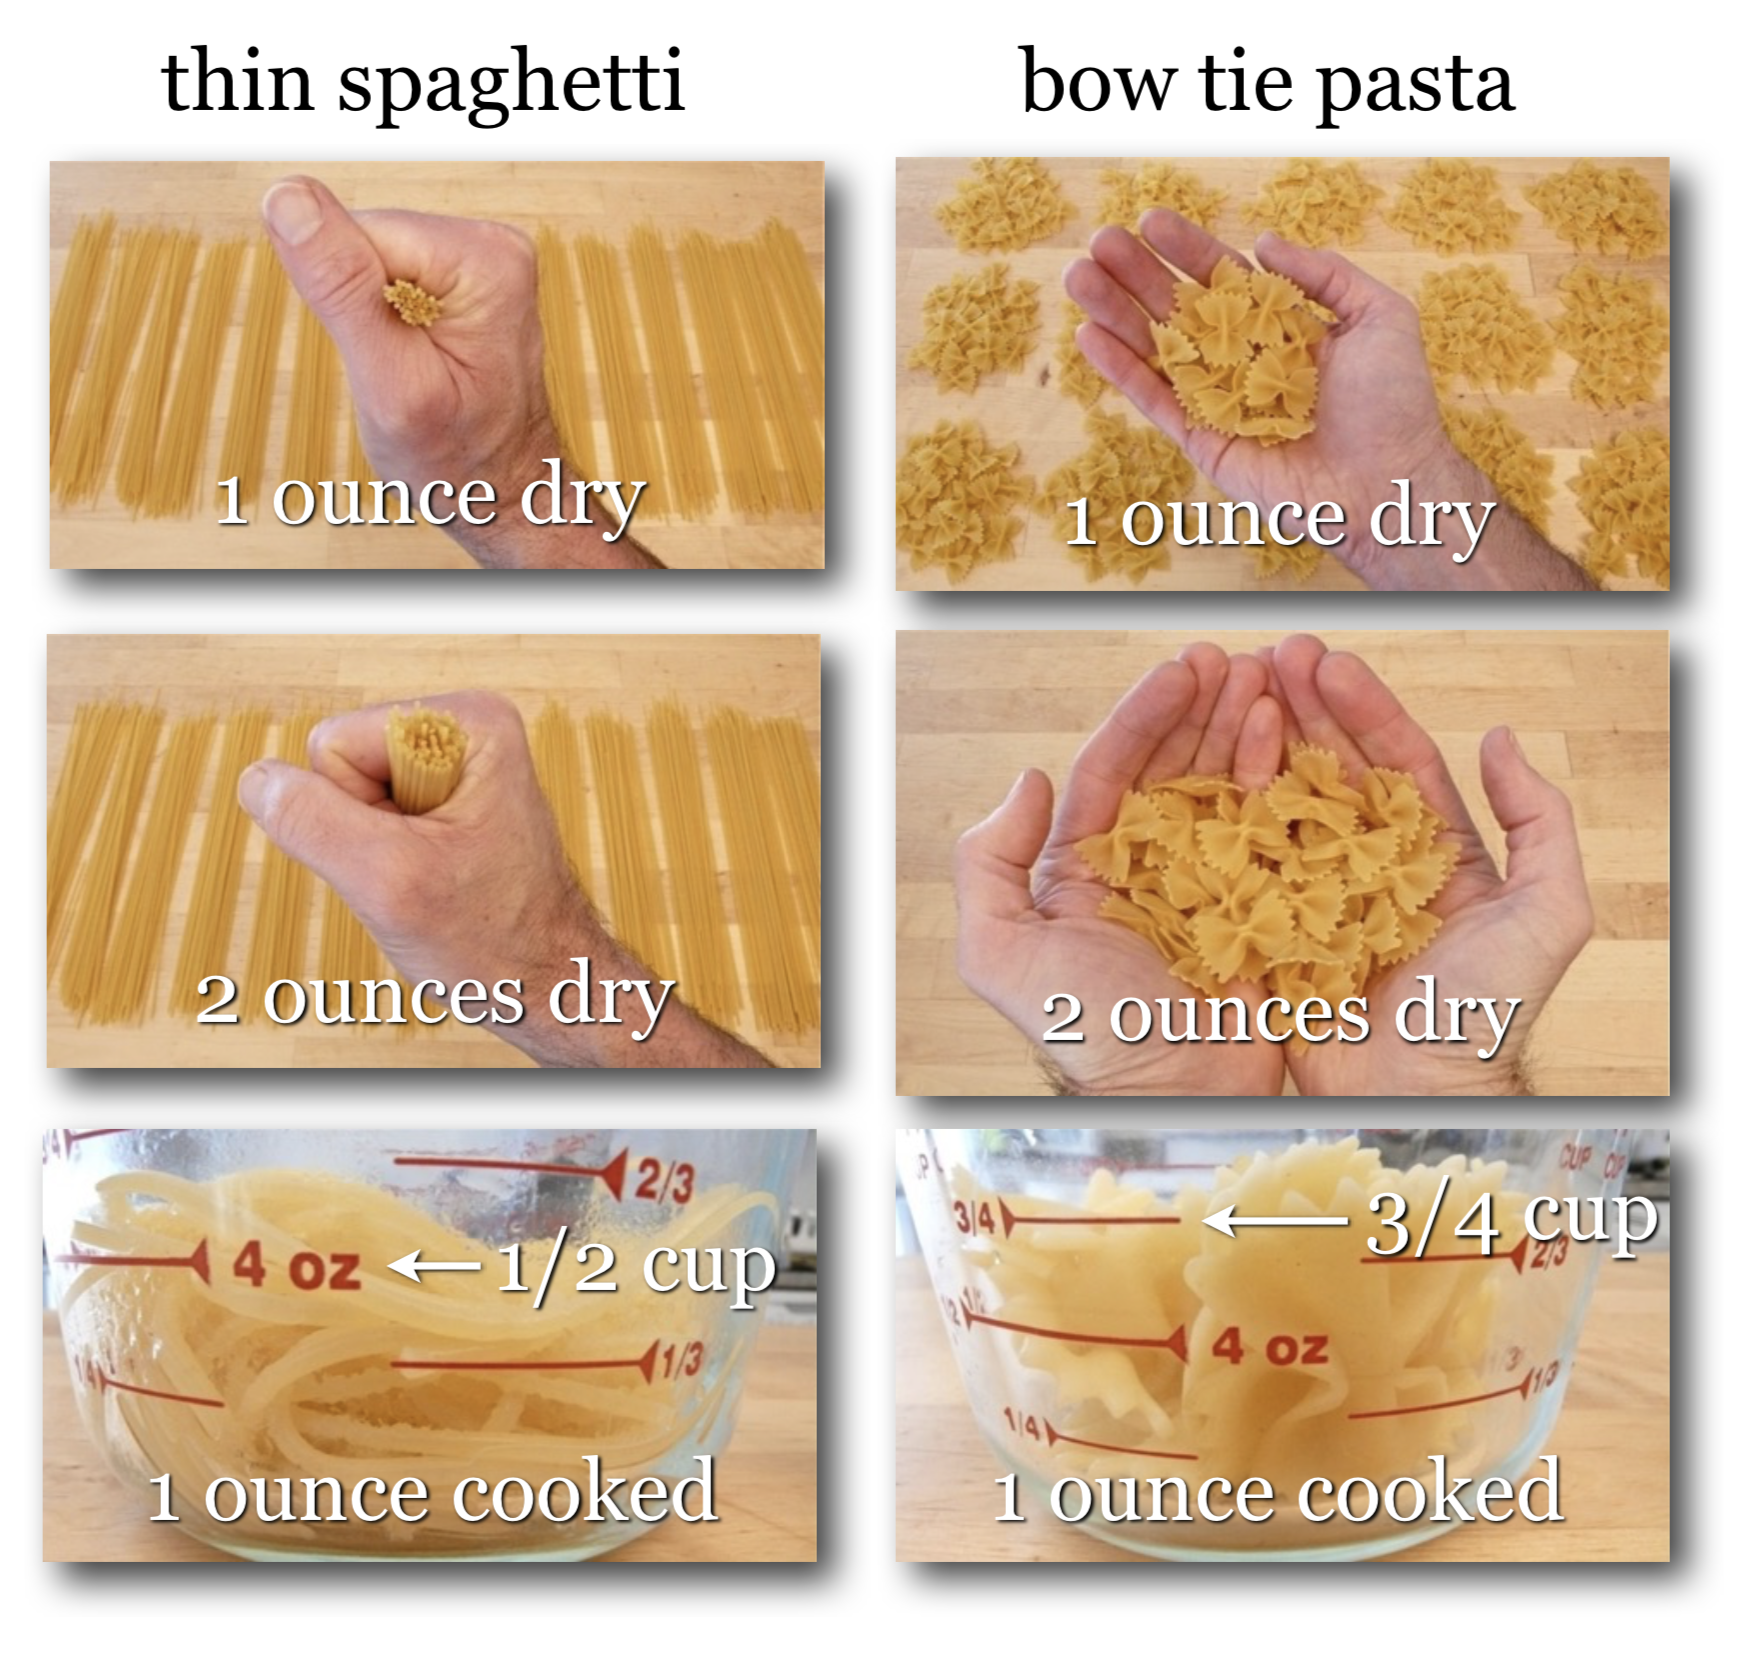
Serving size: Plan to use 1 ounce of dry pasta per person as a side dish and 2 ounces of dry pasta per person as a main dish. To get a visual idea of what 1 or 2 ounces of dry pasta looks like in your hands as well as how much 1 ounce of dry pasta makes when cooked, see the photos directly below.
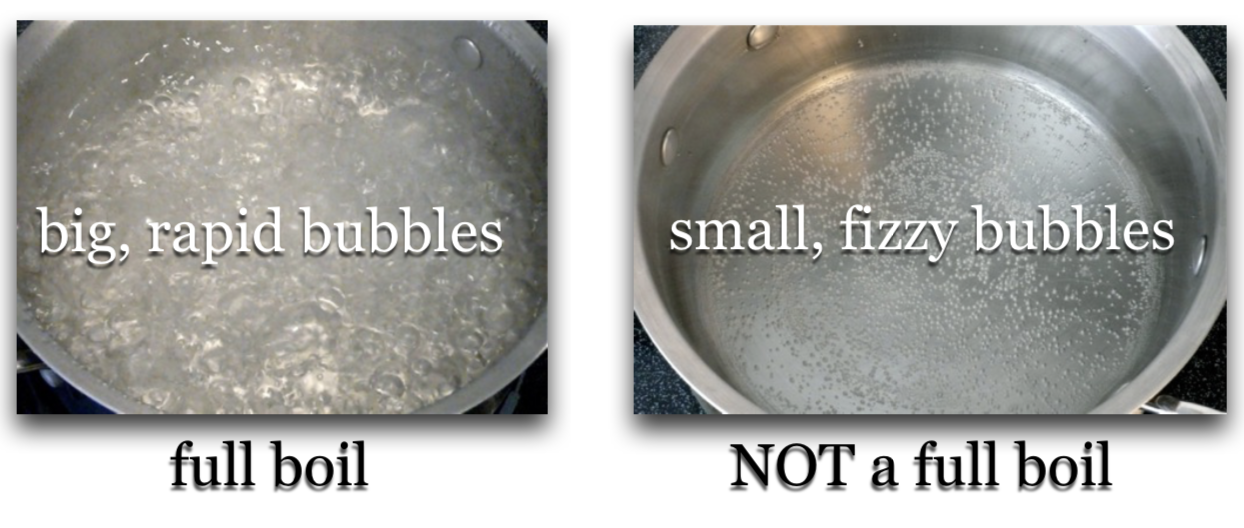
Here’s how rapidly boiling water should look before adding pasta: The photo on the left shows how real rapidly boiling water should look before putting pasta in the pot to ensure that the cooking time you use will give you the result you want. The photo on the right shows what I call a “soda fizz bubble” that is a clear sign the water is not yet hot enough to cook pasta.
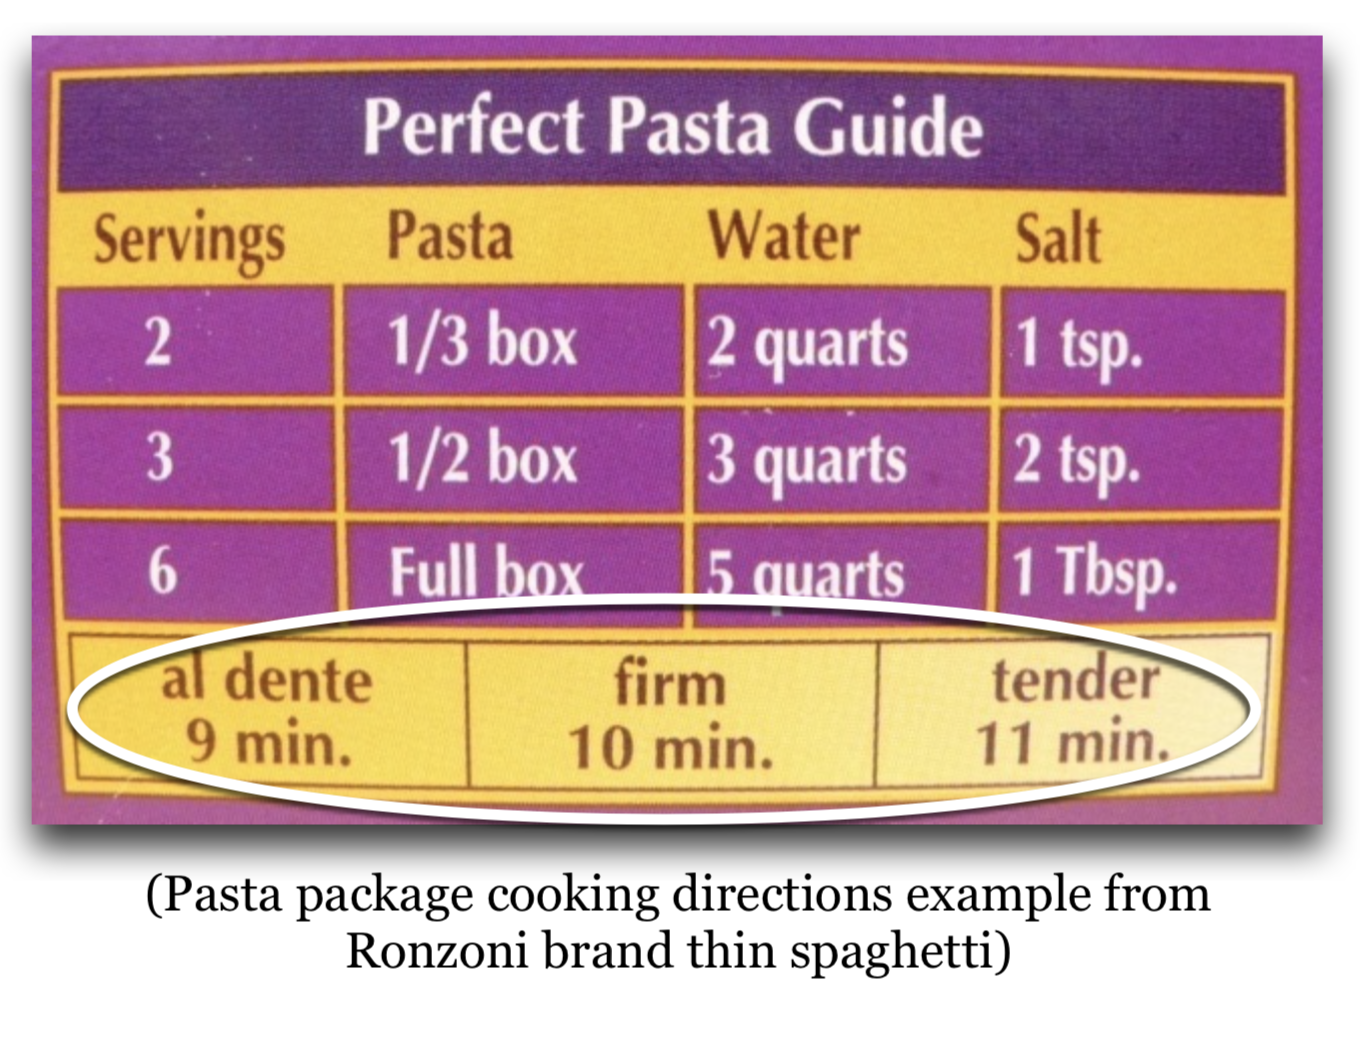
Amount of water needed to cook pasta and pasta cooking time: I use about half the water recommended in the chart below – and have gotten the thumbs up for that from Italian cooks. I also subtract 1 minute from the pasta package recommended cooking time, even if the package cooking instructions, like the one below, specify an “al dente” cooking time, to ensure my pasta still has a “to the teeth” slightly chewy texture.
Click this link or any picture on this page for How to Cook Pasta to Perfection picture book directions.
January 17th, 2022 Bar Drinks, BlogComments Off on Hickory Snow and Glühwein (Mulled Wine) Picture Book Directions
Hickory snow + Glühwein (mulled wine) = great combination
Here’s how it looked in Hickory, NC, yesterday and today.
Hickory, NC
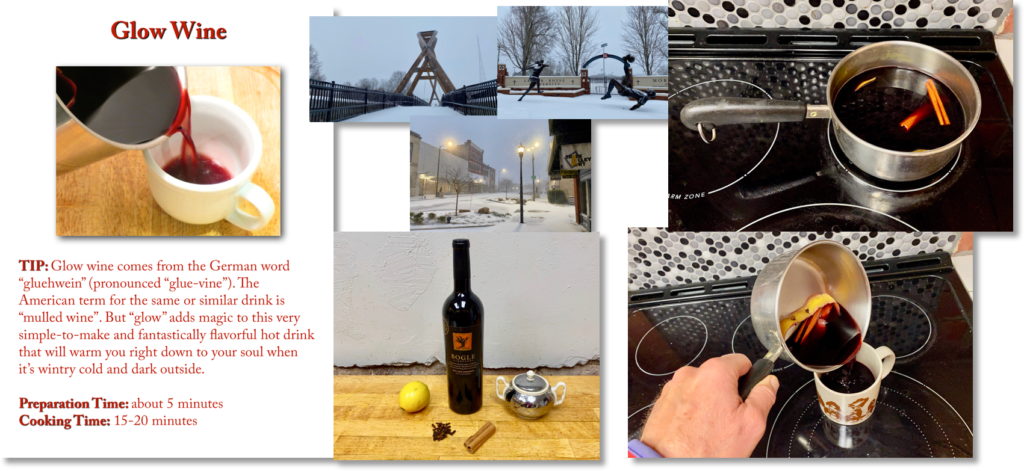
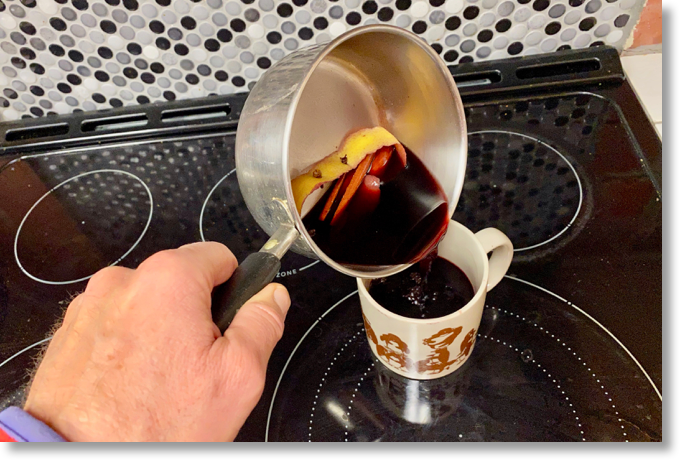
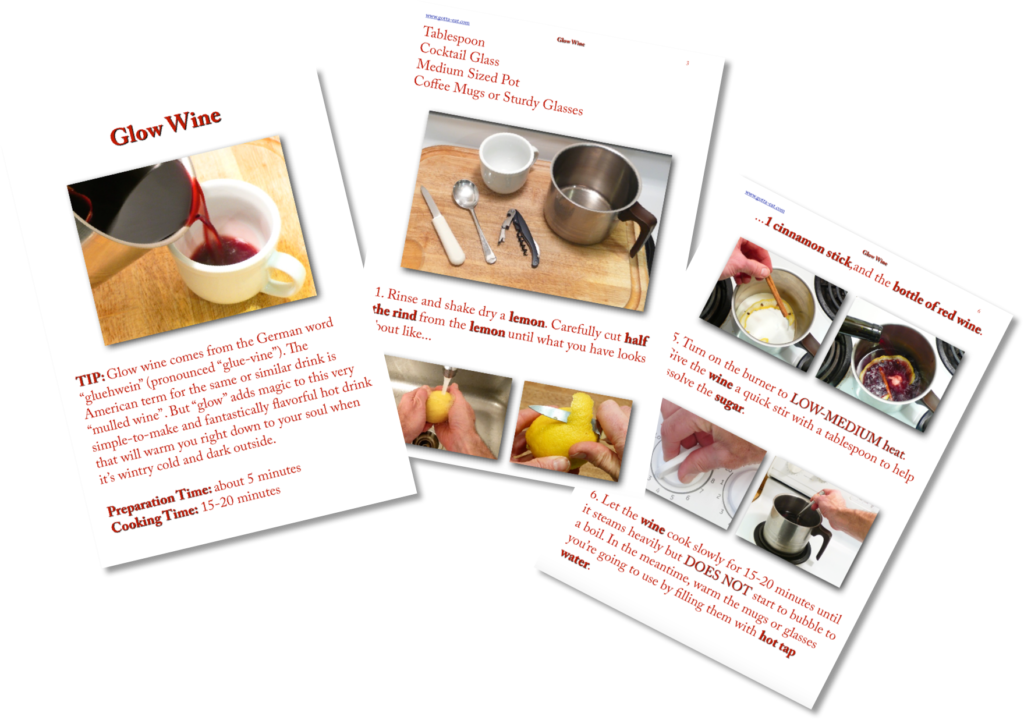
My heart raced the whole day, especially when I was outside, just as it did in my younger childhood days decades ago. I then made this with dinner: Glühwein (pronounced “glue-vine”), which is German for mulled wine – and very easy to make.
Glüwein (mulled wine)
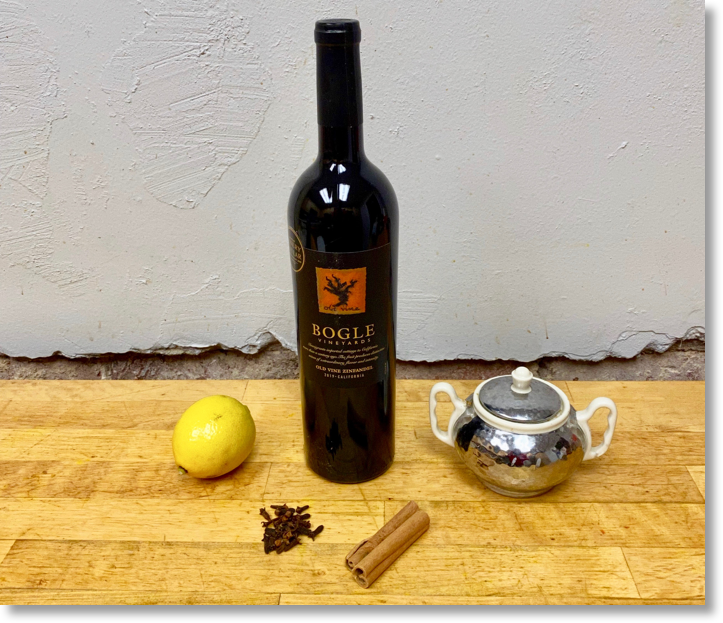
All you need is a robustly flavored red wine, some sugar, lemon rind, cinnamon stick(s) and whole cloves, like what I used last night.
Last night’s Glühwein ingredients
Click this link or any picture on this page for complete picture book directions.

 February 28th, 2022