Easy to Make, Versatile Warm Apple Fruit Topping Picture Recipe

warm apple fruit topping in a serving bowl with links to picture book recipe directions

If you put your ear really close to the device you’re using to read this, you might hear the sound of screeching brakes. And rightly so.

Last post showed how to make a warm apple cranberry fruit topping. Nothing wrong with that recipe. The problem was me jumping ahead of the game – and including an ingredient, that outside of my freezer, is out of season. I should’ve started with the base recipe – with readily accessible ingredients – instead of asking you to improvise right off the bat.

Here is that base warm apple fruit topping recipe that requires these commonly found ingredients: apples, butter, fruit juice, vanilla extract, salt, jam, ground cinnamon.

Warm apple fruit topping ingredients links to picture book recipe directions showing how to make a warm apple fruit topping

Here is all you need for equipment: cutting board, frying pan, sharp knife, tablespoon and large spoon.

Equipment needed to make warm apple fruit topping with link to the picture book recipe

As mentioned in the first tip in the recipe, this topping can be used as a side dish or on hot or cold cereal, waffles, pancakes, French toast, yogurt, or ice cream. Imagination is your only limit!

Here’s how I used it the other day when I made and shot this recipe: as a side dish with pan cooked pork loin. I’d never done that before but what a fantastically flavorful sweet and savory combo…

Warm apple topping with pan cooked pork loin and link to the warm apple topping picture book recipe

…especially with a good shot of feta cheese. Killer!

Warm feta cheese topped apple topping with pan cooked pork loin and link to the warm apple topping picture book recipe

Click this link or any picture on this page for a complete picture book recipe.

Sample pages of warm apple fruit topping picture book recipe

Next up: how to add just a couple different ingredients to improvise on this recipe very easily – and fully flavorfully!

Warm Apple Cranberry Fruit Topping Picture Book Recipe

This easy to make fruit topping tastes great and can be made with different fruit combinations to your taste.

Last group of posts showed how to make quick & easy salad dressings and then how to use them with just as easy to make, fully flavorful microwave warmed spinach & apple or spinach & pear salads.

Considering we still have a good dose of winter ahead of us, let’s stick with the warm fruit theme. And when it comes to the cold, there’s nothing much more comforting than the smell and rich flavor of freshly warmed apples and cinnamon.

And as the the first “Tip” in the recipe says, this fresh, fully flavorful warm apple cranberry fruit topping goes great right out of the pan or chilled on hot or cold cereal, waffles, pancakes, French toast, yogurt, or ice cream. Imagination is your only limit!

Regarding imagination, you’ll see an easy opportunity to improvise. When I shot the warm apple cranberry fruit topping you see here, cranberries were in season. I don’t think you’ll find cranberries in the store now. That means either blow right past the part of the recipe dealing with fresh cranberries and skip them entirely or substitute fresh cranberries with any available berry-type fruit like blueberries, raspberries or blackberries. Just note that if you use any of those berries, toss them in the pan after you’ve started to cook the apples as those berries are much more tender and require less cooking time than fresh cranberries.

Having said that, here’s what I used to make need to make the original recipe:

Here’s the equipment needed:

Equipment needed to make Warm Apple Cranberry Fruit Topping

Click this link or any picture on this page for a complete warm apple cranberry fruit topping picture book recipe.

Next post: an easy variation on this fruit topping. All easy, all flavorful!

Quick & Easy Microwave Warmed Spinach & Pear Salad Picture Recipe

Last post showed how to make a quick and easy microwave warmed spinach and apple salad. This post shows how to make a quick and easy microwave warmed spinach and pear salad, which is an example of improvising by changing only two ingredients.

Here are the ingredients I used to make the warmed spinach and apple salad.

All I did to improvise on that salad was substitute a fresh pear for the apple and use dried apricots instead of dried cranberries, as shown below.

ingredients needed to make quick & easy microwave warmed spinach and pear salad

Nothing changes regarding needed equipment. Here’s all you need: microwave oven, microwave safe bowl, colander or strainer, sharp paring knife and cutting board.

Equipment needed to make quick & easy microwave warmed spinach & pear salad

One of the keys to this recipe, just like the warmed spinach and apple salad, is warming the spinach and pear in the microwave oven only until the spinach leaves just start to wilt as shown below, which took only 1 minute in my 1200 Watt microwave oven. As I say in the recipe itself, cooking time will vary depending on your own microwave oven’s Watt power.

spinach and pear are warmed enough when the spinach leaves just start to wilt

Click any picture on this page for a complete, easy to follow picture book recipe.

Quick & Easy Microwave Warmed Spinach & Pear Salad Recipe Pages

More very soon!

Quick & Easy Microwave Warmed Spinach & Apple Salad Picture Recipe

Finished Quick & Easy Microwave Warmed Spinach & Apple Salad

Yep, it’s still winter, and for some of you, it’s still darn cold. A couple weeks ago, after showing how to make very quick and easy, extraordinarily versatile 5-ingredient salad dressings, I said I’d put together some warm spinach salads. This is the first of those recipes: quick and easy microwave warmed spinach and apple salad.

Here are the ingredients I used: fresh spinach, apple, feta cheese, salad dressing, walnuts and dried cranberries. Of course, you can substitute feta cheese, walnuts and dried cranberries however you like to suit your taste and dietary needs,.

Here’s all you need for equipment: microwave oven, microwave safe bowl, colander or strainer, sharp paring knife and cutting board.

One of the keys to this recipe is warming the spinach and apple in the microwave oven only until the spinach leaves just start to wilt as shown below, which took only 1 minute in my 1200 Watt microwave oven. As I say in the recipe itself, cooking time will vary depending on your own microwave oven’s Watt power.

spinach and apple are warmed enough when the spinach leaves just start to wilt

Click any picture on this page for a complete, easy to follow picture book recipe.

images of 3 pages of quick and easy microwave warmed spinach and apple salad picture book recipe

Next up: how to take this quick, easy and fully flavorful warm spinach and apple salad from simple to exciting. All fun!

The Clot Thickens, Part 2: Further Momentum Against the Diet-Heart Hypothesis

Dr. Malcolm Kendrick and his book, The Clot Thickens

Heart disease is the number one killer in the US, and some of the advice about preventing it has been dead-on wrong.

Here’s an example. I first wrote about the relationship, or really lack of relationship, between eating saturated fat and both cardiovascular disease (CVD) and coronary heart disease (CHD) in July last year after reading and then listening to Dr. Malcolm Kendrick’s extraordinarily practical The Clot Thickens. I’ve recommended that book to many people and certainly recommend it to you as highly informed guidance regarding your cardiovascular and coronary heart health and quality of life maintenance.

I’m writing about The Clot Thickens again now because there seems to be an even further change in perspective based on new and newly revisited evidence, all supported by legitimate science, that shows that the “diet-heart hypothesis”, which Dr. Kendrick strongly opposes, is false. That hypothesis, since it first came about in the 1950’s, adamantly argues that eating saturated fat increases blood cholesterol levels (which we don’t and can’t have because cholesterol is not water or blood soluble) and therefore is one of the causes of cardiovascular disease (disease to the arteries) and coronary heart disease (disease to the arteries surrounding the heart).

If you read The Clot Thickens or the bullets toward the bottom of the July 2024 piece I wrote, you’ll quickly see why eating saturated fat does not increase cholesterol and that cholesterol cannot cause cardiovascular disease or heart disease. At the same time, you’ll also see that eating saturated fat, which is high in calories, in greater amounts than your body needs to maintain metabolism and cellular structural integrity will be stored as fat in your body. It’s always all about balance. 

Regarding balance, here are 2 powerful examples of the continued erosion of the diet-heart hypothesis, both of which were generated by artificial intelligence. A few days ago, I entered this ChatGPT 4o query: “Does eating saturated fat cause heart disease?” and got the summary response shown below. You can get the whole response in a short PDF by clicking this link.

ChatGPT 4o response to "effect of diet-heart hypothesis on heart disease in America"

Two days ago, I entered this Google query: “effect of diet-heart hypothesis on heart disease in America”.

The first answer to pop up was the Google Generative AI response below that was both more hard-edged than the ChatGPT answer above and included a list of solid references. Again, what you see below is a summary. You can get the full answer by either dialing in the query yourself, which might or might not give you the same answer I got, or you can click this link to see the exact the answer I got.

Google Generative AI response to "effect of diet-heart hypothesis on heart disease in America"

I started the piece I wrote in July with this line about common sense. “Common sense isn’t common until you’re introduced to it. After that you’re on the hook.” I believe that entirely – but only when that common-sense introduction comes from a verified source supported by valid evidence. At the same time, that does not mean that “verified sources” and “valid evidence” are etched in stone forever. Life is about learning and adapting to changes happening all the time. I find that exciting. And to see change coming to pass regarding a significant diet, heart health and quality of life recommendation that’s existed all my life, to me, is an example of positive progress, again thanks very much to the efforts and persistence of people like Dr. Kendrick. 

But, you be the judge. Don’t just buy what I’ve written here. To use a car analogy, pop open the hood, kick the tires and see what you find about what I argue here – and more – and then apply what you’ve learned to your life and, most of all, make it fun and fully flavorful doing it! 

Next up:  Quick & Easy Microwave Warmed Spinach & Apple Salad

Fast 5-Ingredient with Fresh Garlic Salad Dressing Picture Book Directions

Picture book recipe shows how to make an easy, richly versatile 5-ingredient salad dressing with fresh garlic

The first post of the year showed how to make an easy, practical and terrifically versatile Instant 5-Ingredient Salad Dressing that required no knife skills. This post raises the bar a bit by substituting garlic powder with fresh garlic, and I’ll show you exactly how both to select and chop fresh garlic as easily as possible.

First, here are the ingredients you’ll need to make this 5-Ingredient Salad Dressing with Fresh Garlic. Yes, you’ll see 6 ingredients below because I sometimes use both cider and balsamic vinegar, but you don’t have to do that.

Ingredients needed to make 5-ingredient salad dressing with fresh garlic: fresh garlic, mustard, ground black pepper, olive oil and vinegar

The trickiest part of this recipe is selecting and chopping fresh garlic – not difficult at all. First, select garlic bulbs (bulb = the whole garlic ball you see below) that have some weight to them, are firm when squeezed, as shown below, and are made up of large, not small, garlic cloves (cloves = individual pieces of garlic that make up a garlic bulb), like those you see in the picture.

How to select a garlic bulb by weight and firmness

Here’s what I call a “3-shot” showing how to remove a garlic clove from a garlic bulb and how to remove the papery skin that encases fresh garlic cloves. (You’ll see how to do this in more detail if you download the recipe.)

3 pictures show how to remove garlic cloves from a garlic bulb and how to break and peel the skin from a garlic clove.

Here’s another 3-shot showing how to chop garlic with curled fingers on the garlic clove-gripping hand. (For more details on knife handling knife sharpening, see last post: 2 Keys to Kitchen Knife Safety: Keeping Knives Sharp and Hand Position While Cutting.)

3 pictures show how to slice and chop garlic.

Once you’ve chopped the fresh garlic, all you have to do is add mustard, ground black pepper, oil and vinegar and shake.

Finishing the salad dressing by adding mustard, ground black pepper, oil and vinegar and shaking the ingredients together..

All very easy – and fully flavorful!

Click this link or any picture on this page for complete step-by-step picture book directions.

Picture of 5-ingredient salad dressing with fresh garlic picture book recipe pages

Next post this week: The Clot Thickens – one of, if not the best, common sense books I’ve ever read about heart and cardiovascular health and what we eat – and much more.

Next food post: microwave warmed spinach salad that I’ll shoot freshly and post here very soon that goes great with the 2 easy to make salad dressings posted here most recently.

2 Keys to Kitchen Knife Safety: Keeping Knives Sharp and Hand Position While Cutting

Kitchen knife safety title shot: sharp knife cutting a tomato and using curled fingers to hold a garlic clove to a cutting board while slicing that clove.

Last post showed how to make Instant 5-Ingredient Salad Dressing that required no kitchen knife skills. Starting with the next post, 5-Ingredient Salad Dressing with Fresh Garlic, knife skills will become important. We’ll start slowly and deliberately, and I’ll help you with pictures, because knowing how to handle a knife safely in the kitchen – and I’ve sure taken my cuts…

Cut finger from not paying attention while cutting with a kitchen knife.

…is the THE most important kitchen skill to have.

There are 2 keys to kitchen knife safety: keeping knife blades sharp and using curled fingers to hold food in place while cutting. 

First, why keep knives sharp? Because a dull knife is the most dangerous kitchen tool. The reason is that you have to apply more pressure to a dull knife to make it cut into whatever it is that you want to cut, as shown in the left picture below. That added pressure increases the likelihood of that knife slipping off what you’re cutting into your food gripping hand. A sharp knife, however, sets an edge into what you’re cutting precisely and with less pressure and is therefore less likely to cause self-injury.

The 3 easiest ways to sharpen a knife are with a sharpening steel (notice that I’m sliding the sharp edge of the knife blade away from me, not toward me, in the picture below), electric knife sharpener and handheld sharpener. I do not include knife sharpening with a sharpening stone, or whetstone, here because that technique, though excellent, is more complicated and time consuming.

3 easiest ways to sharpen a knife are with a sharpening steel, electric knife sharpener andhandheld sharpener

Click this link or the picture below to download your choice of knife sharpening technique.

Link to Gotta' Eat, Can't Cook "How To's" that includes "Kitchen How To's" and Kitchen Knife Sharpening

There’s one more quick, last resort variation on the sharpening steel technique, which uses the squared back of one knife to sharpen a dull knife, as shown below. I’ll put together picture book directions soon and will post them here.

Finally, but equally importantly regarding kitchen knife safety, if you’ve downloaded recipes from the Gotta-Eat site that require any cutting with a knife, you’ve probably noticed that my fingers on the hand holding what I’m cutting to the cutting board are always curled as shown here.  

Cutting food safely with curled fingers on the hand holding food to a cutting board

The reason I do this is not to make me look like a chef – I’m not. I only do it to keep my fingers from getting in the way of the knife blade. Curling your fingers does two things: it gives you the firmest, best anchoring grip on the whatever you’re cutting and also allows your knuckles to work as a knife guide whether you’re using a fat bladed (chef’s) knife as shown above or a short bladed (paring) knife as shown below.

Cutting with Curled Fingers - Paring Knife

If you’re new to this curled finger technique, try it a few times and start slowly. Use both your hands as a unit as you cut from right to left if you’re right handed like me or left to right if you’re left handed. Once you feel comfortable curling your food-gripping fingers and using your hands as a unit deliberately and slowly, you can ramp up the speed.  In no time at all, curling your fingers and moving your hands together while you cut will become a habit – a darned good habit!

Next post: we’ll put this knife skill to use when we make 5-Ingredient Salad Dressing with Fresh Garlic.

Making Your Better Eating New Year’s Resolution Easy to Start with This Instant 5-Ingredient Salad Dressing Picture Book Recipe

I just asked ChatGPT (Open AI’s artificial intelligence source), “What is the most popular new year’s resolution in the USA for 2025?” The answer was interesting. ChatGPT said it did not yet have enough qualitative information to give an accurate answer. I like that answer. But, based on trends over recent years, the AI took what it called “an educated guess” that resolutions to improve mental health would be highest priority followed by resolutions to improve physical health, specifically regarding both diet and exercise. 

That makes a lot of sense. I’ve believed for a long time that the three things we can do to make the best of our quality of life is eat life-promoting foods, move our bodies rigorously and manage stress, all of which go a long way toward regulating our physical, mental and spiritual well-being. 

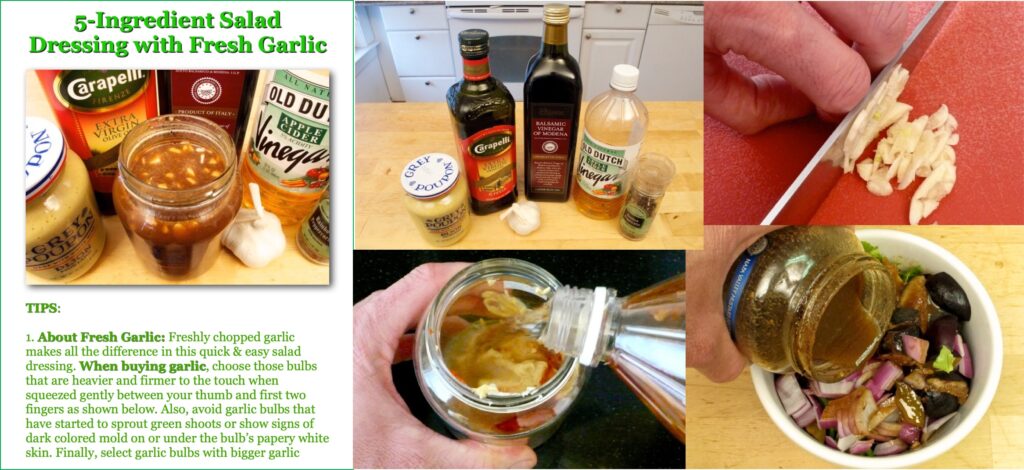
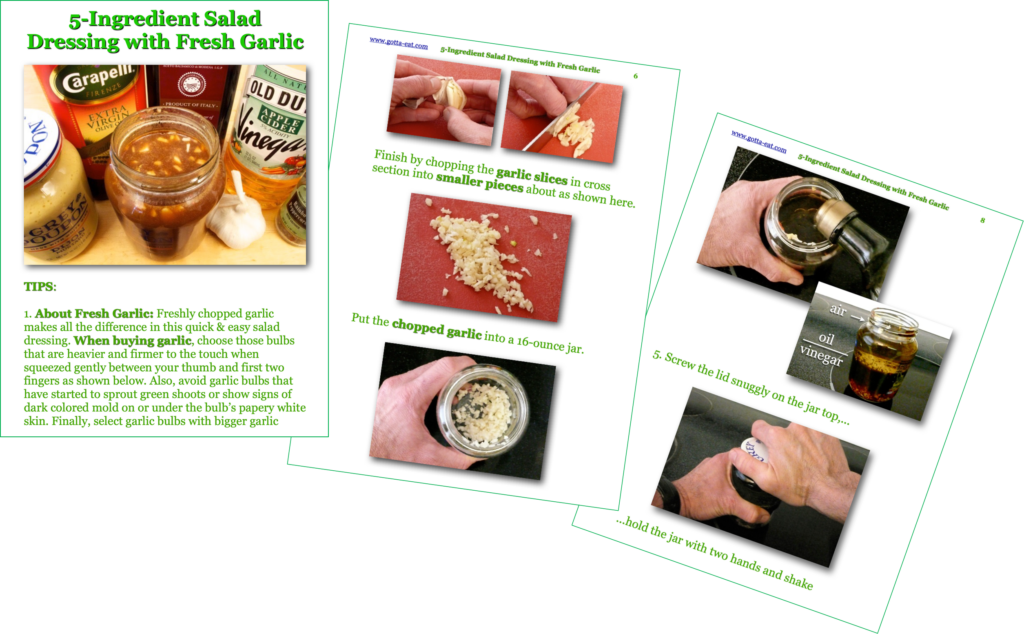
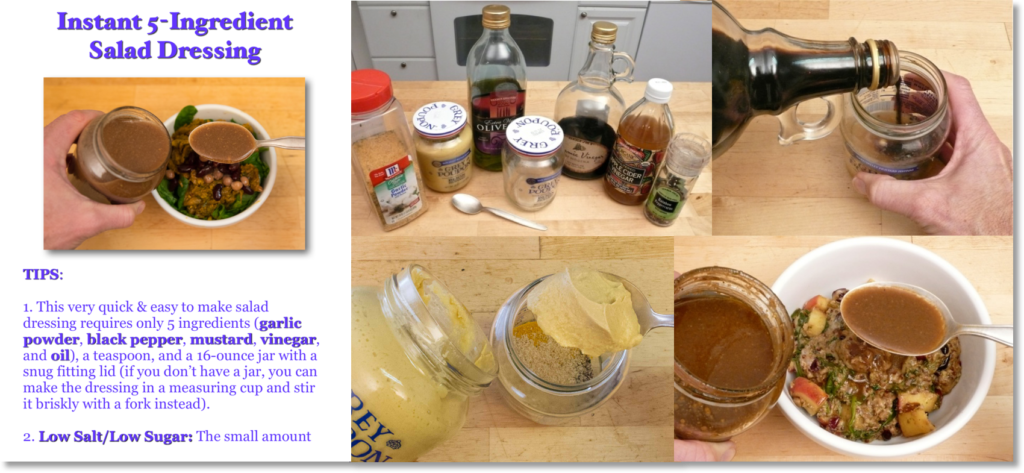
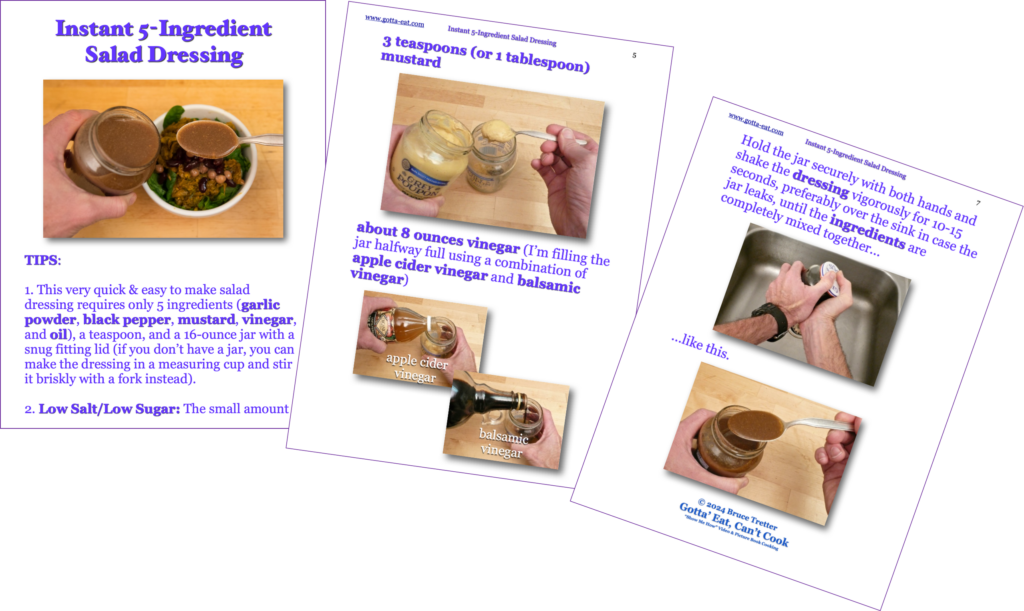
Considering this site is focused on how to prepare life-promoting foods as easily as possible, I asked AI, “What is the easiest recipe to teach a person new to cooking?”. The answer: scrambled eggs and toast, which required 5 needed ingredients plus optional ingredients to taste and 12 steps to complete. I think I have an easier answer and one that’s far easier to make and much more versatile than what AI offered:  Instant 5-Ingredient Salad Dressing.

Helping veterans make life-promoting meals at Veterans Incorporated, Shrewsbury, MA

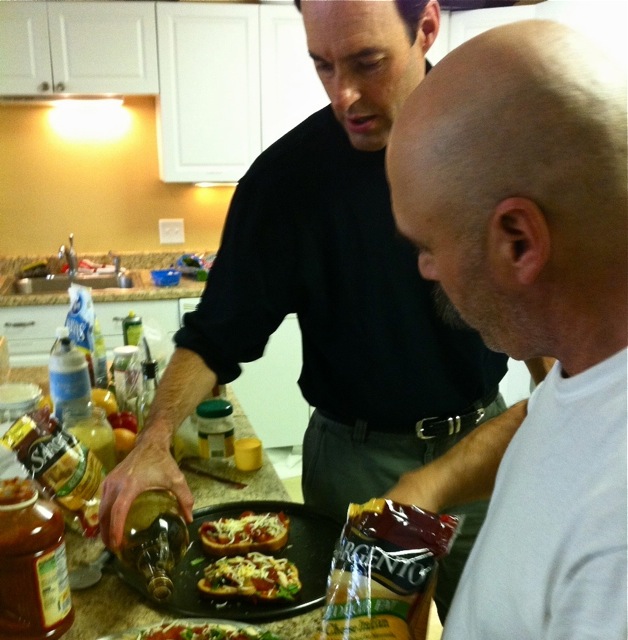
First, a quick back story. The first time I ever made this recipe was with a group of fellow veterans who were turning their lives around through Veterans Incorporated (Vets Inc.) in Shrewsbury, MA. One of the guys in the group, a fellow Navy veteran – not the guy shown above – chimed in when I listed the seven ingredients I intended to use: garlic powder, salt, ground black pepper, mustard, honey, vinegar and oil.

“Why do we need the added salt and sugar? A lot of guys here have diabetes and/or high blood pressure. We don’t need that _____(4-letter word for “stuff”)!

I get blunt great and agreed. But this was the first recipe I was teaching these guys, let alone the first time I’d ever met them. My inner dialog: “Fine, I’ll cut the salt and honey – but, boy, this dressing’s gonna’ taste horrible.”

I quickly made the dressing with just 5 ingredients: garlic powder, ground black pepper, mustard, vinegar and oil and asked the guys to taste a spoon of it before I tasted it myself. The stunner? They loved it, so did I – and I’ve never looked back.

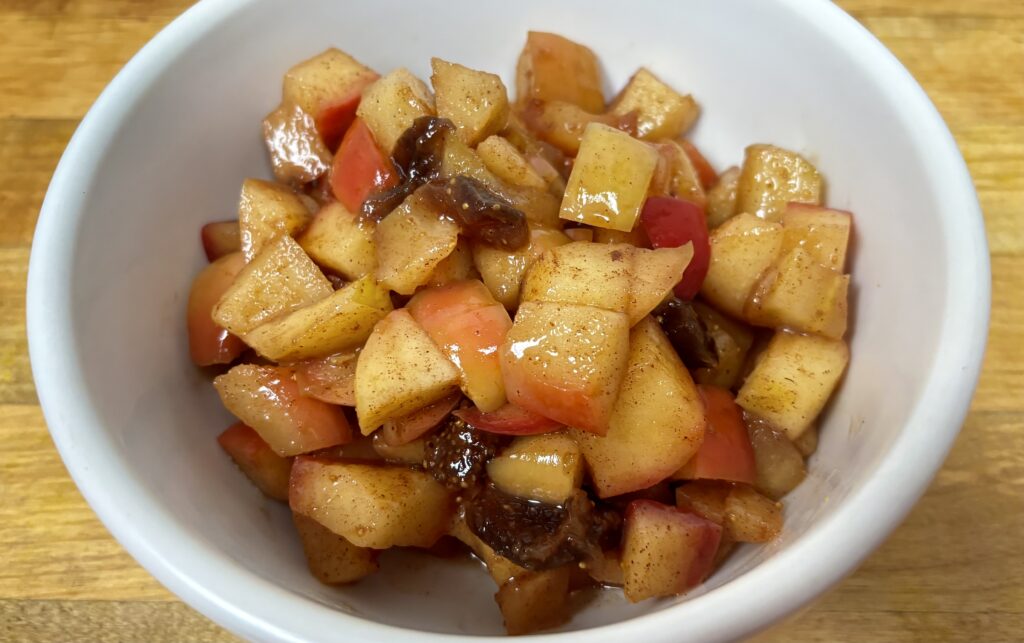
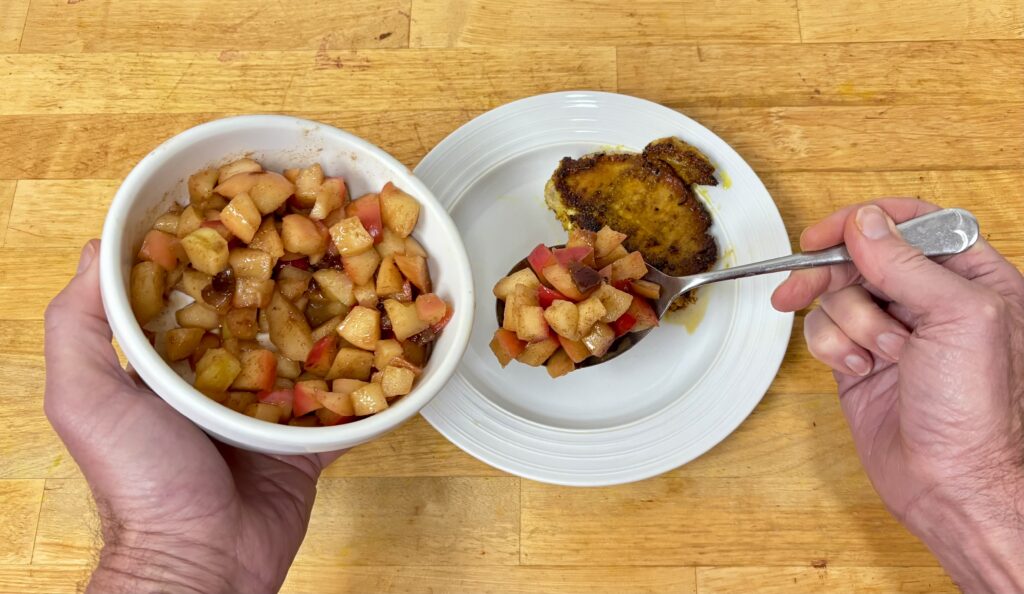
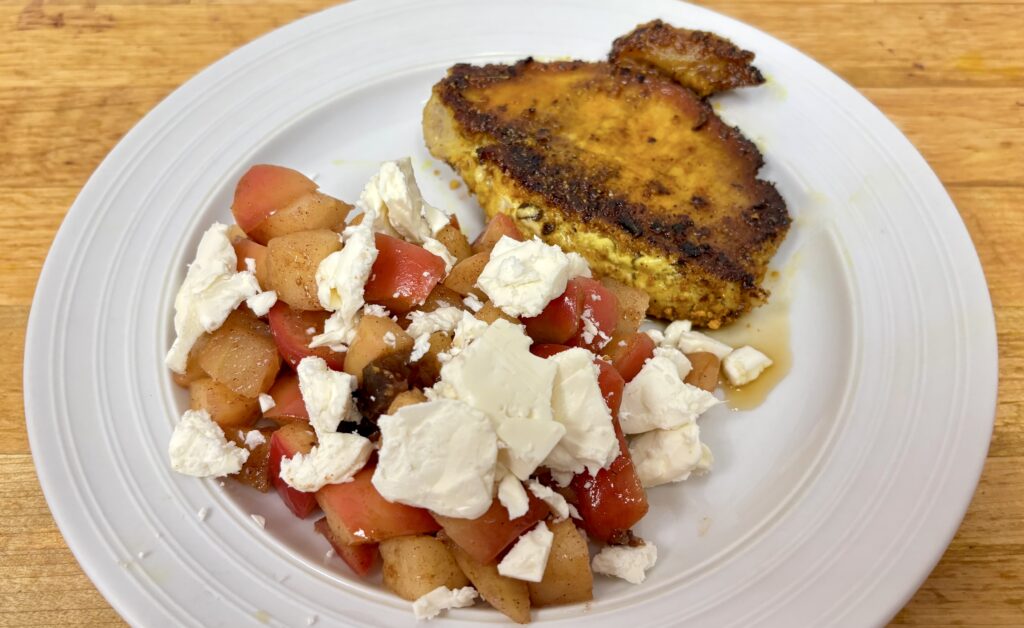
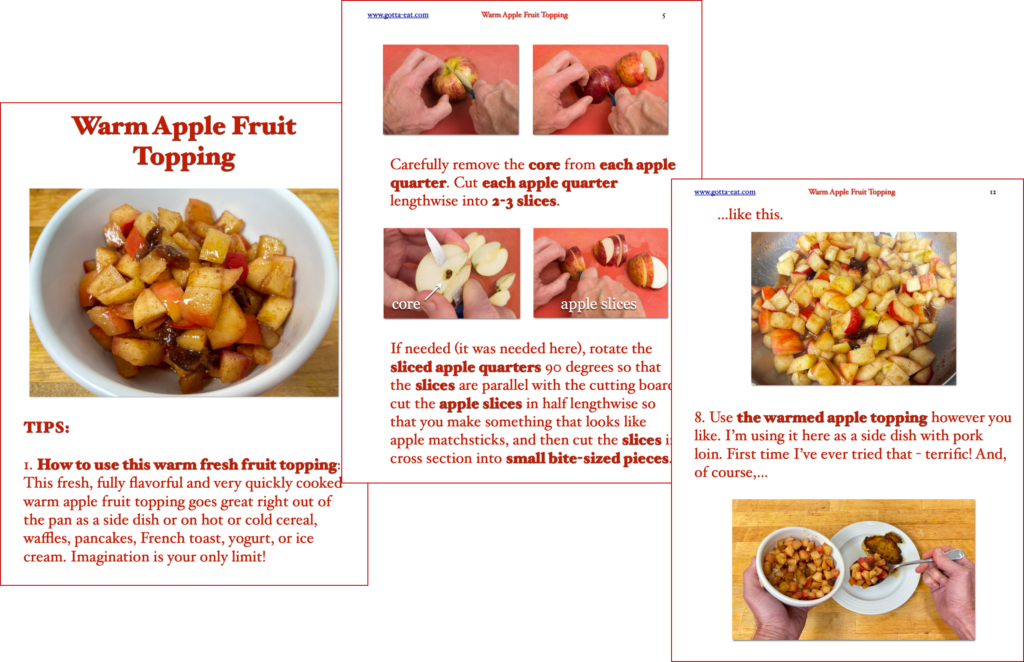
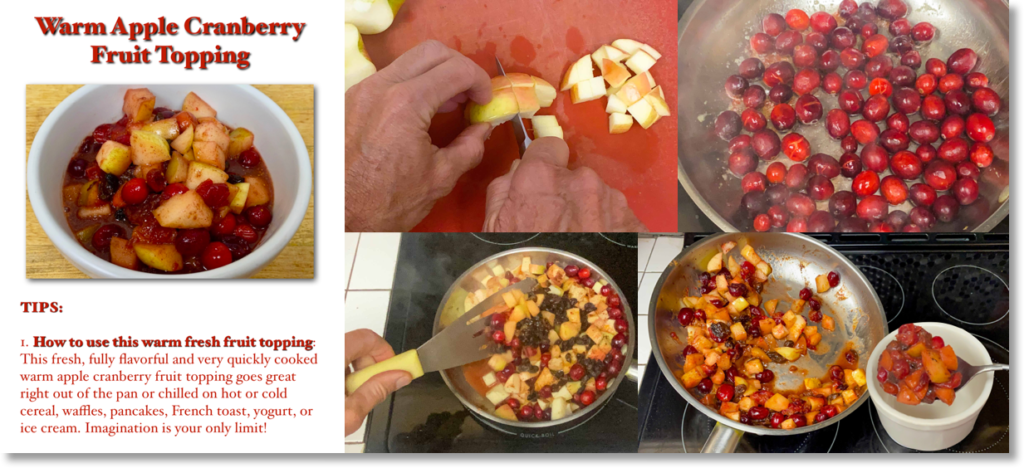
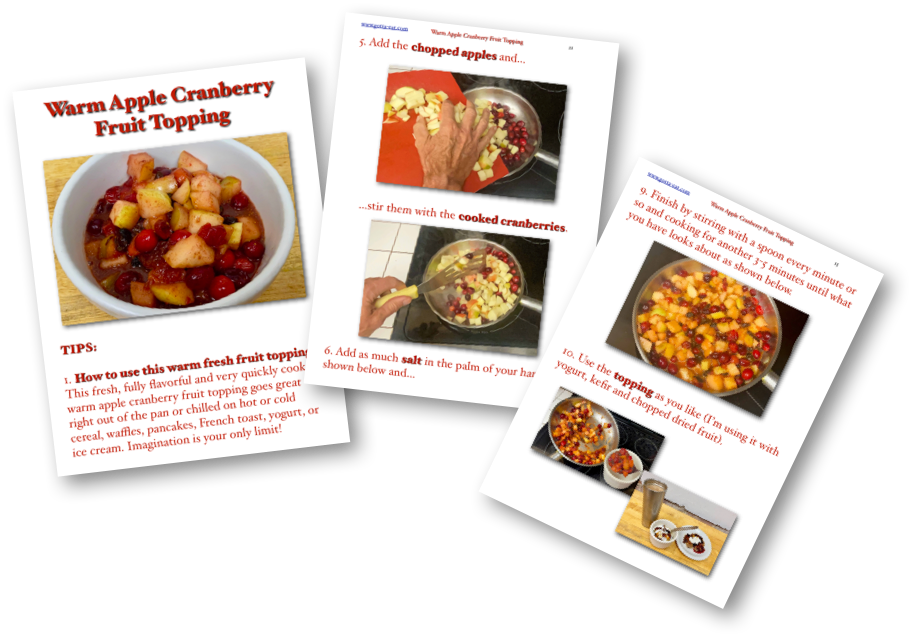
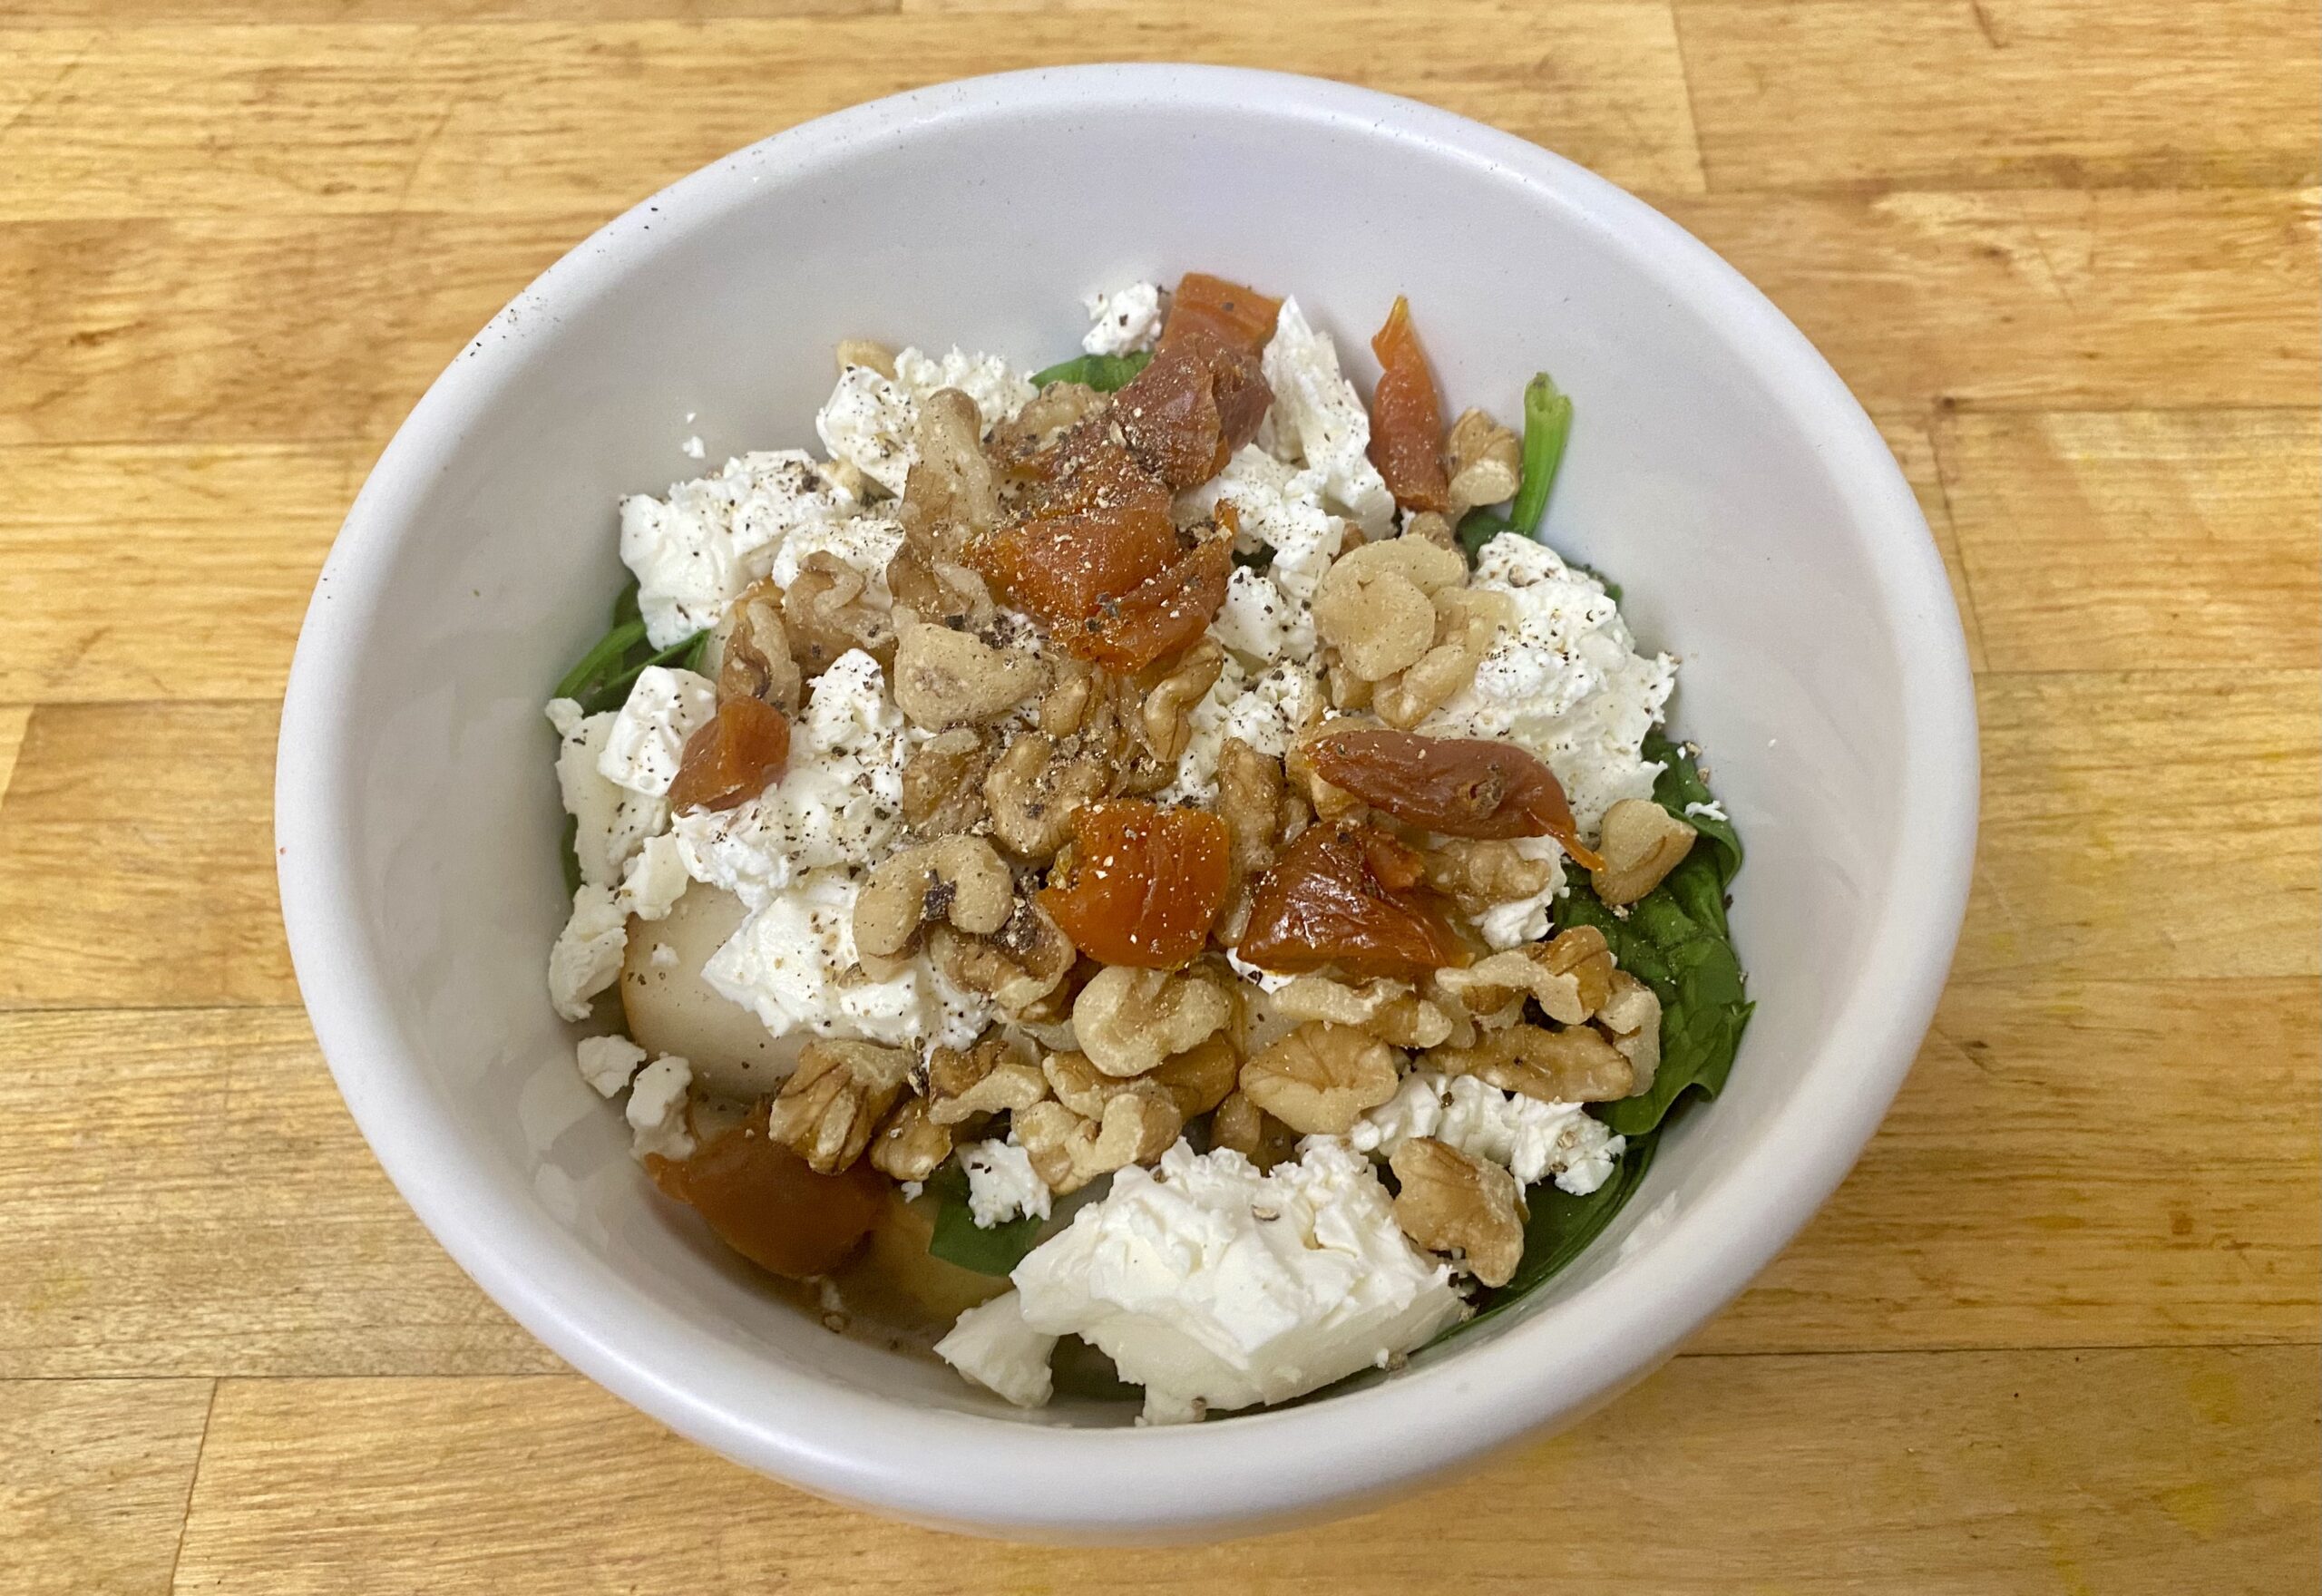
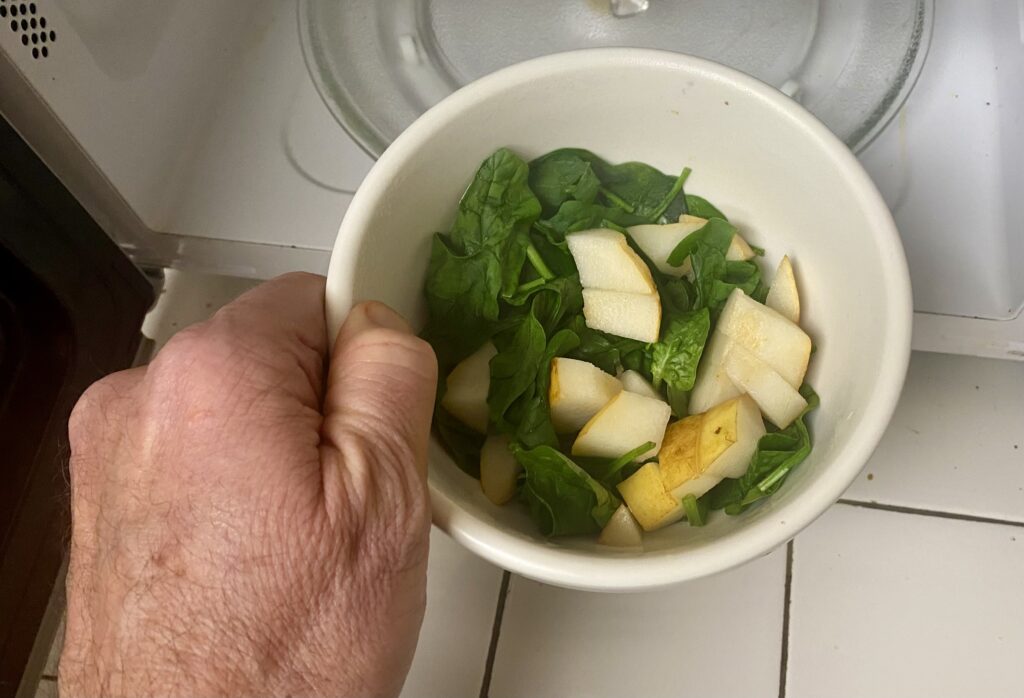
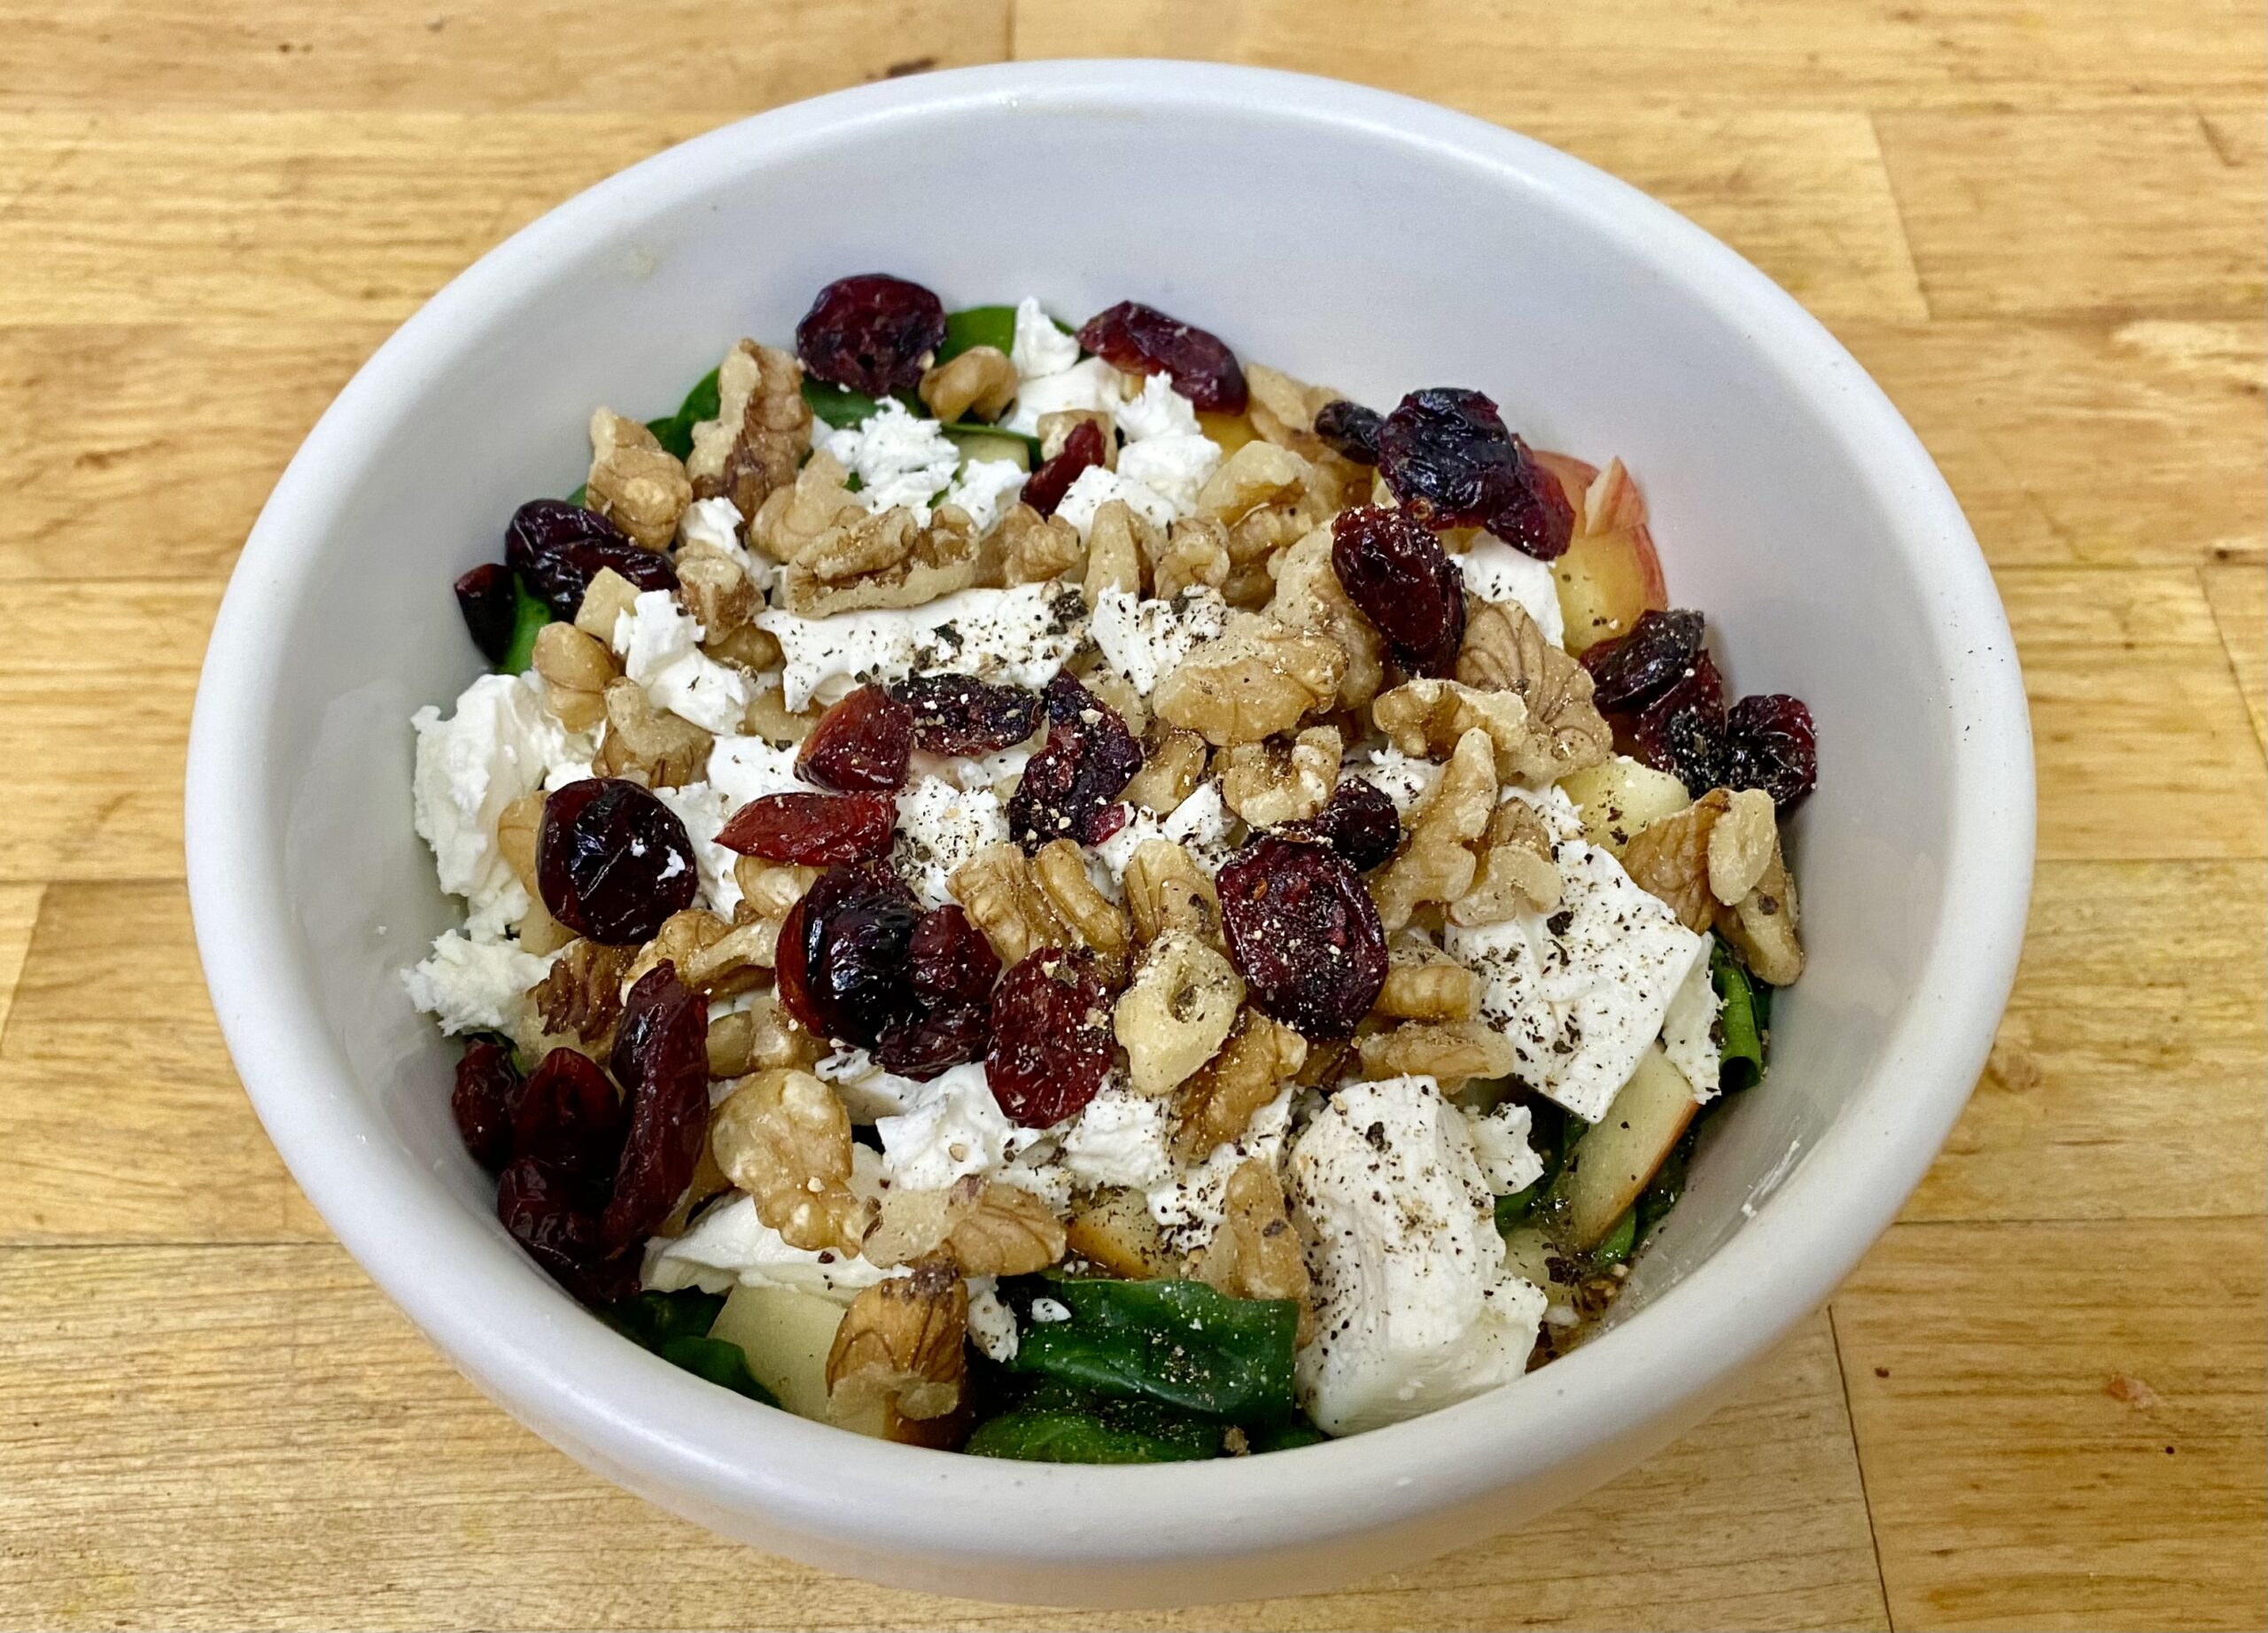
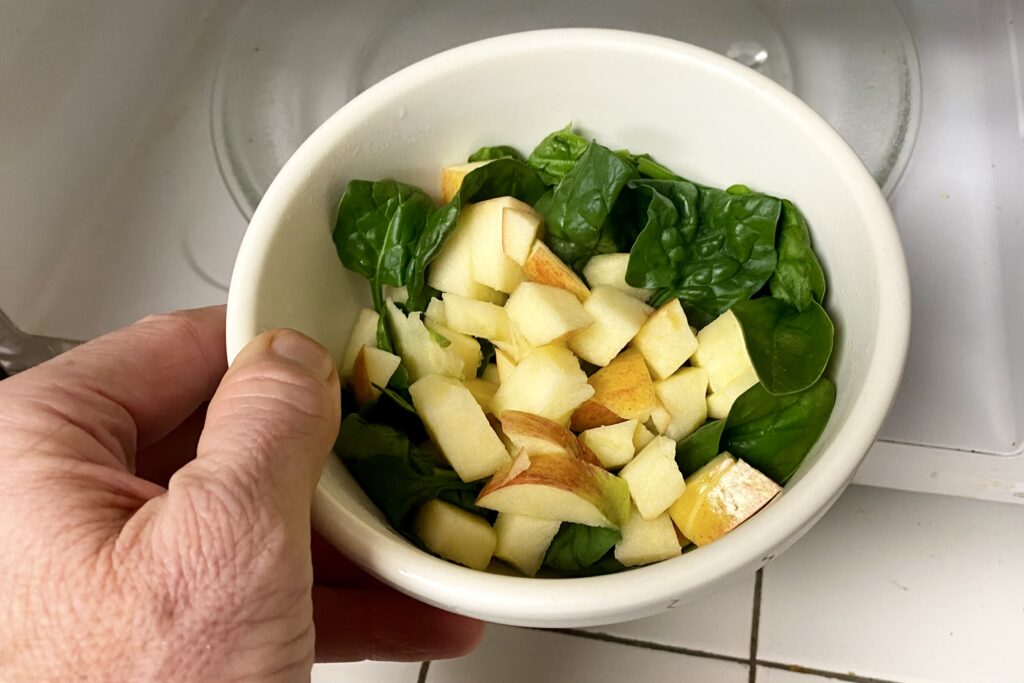
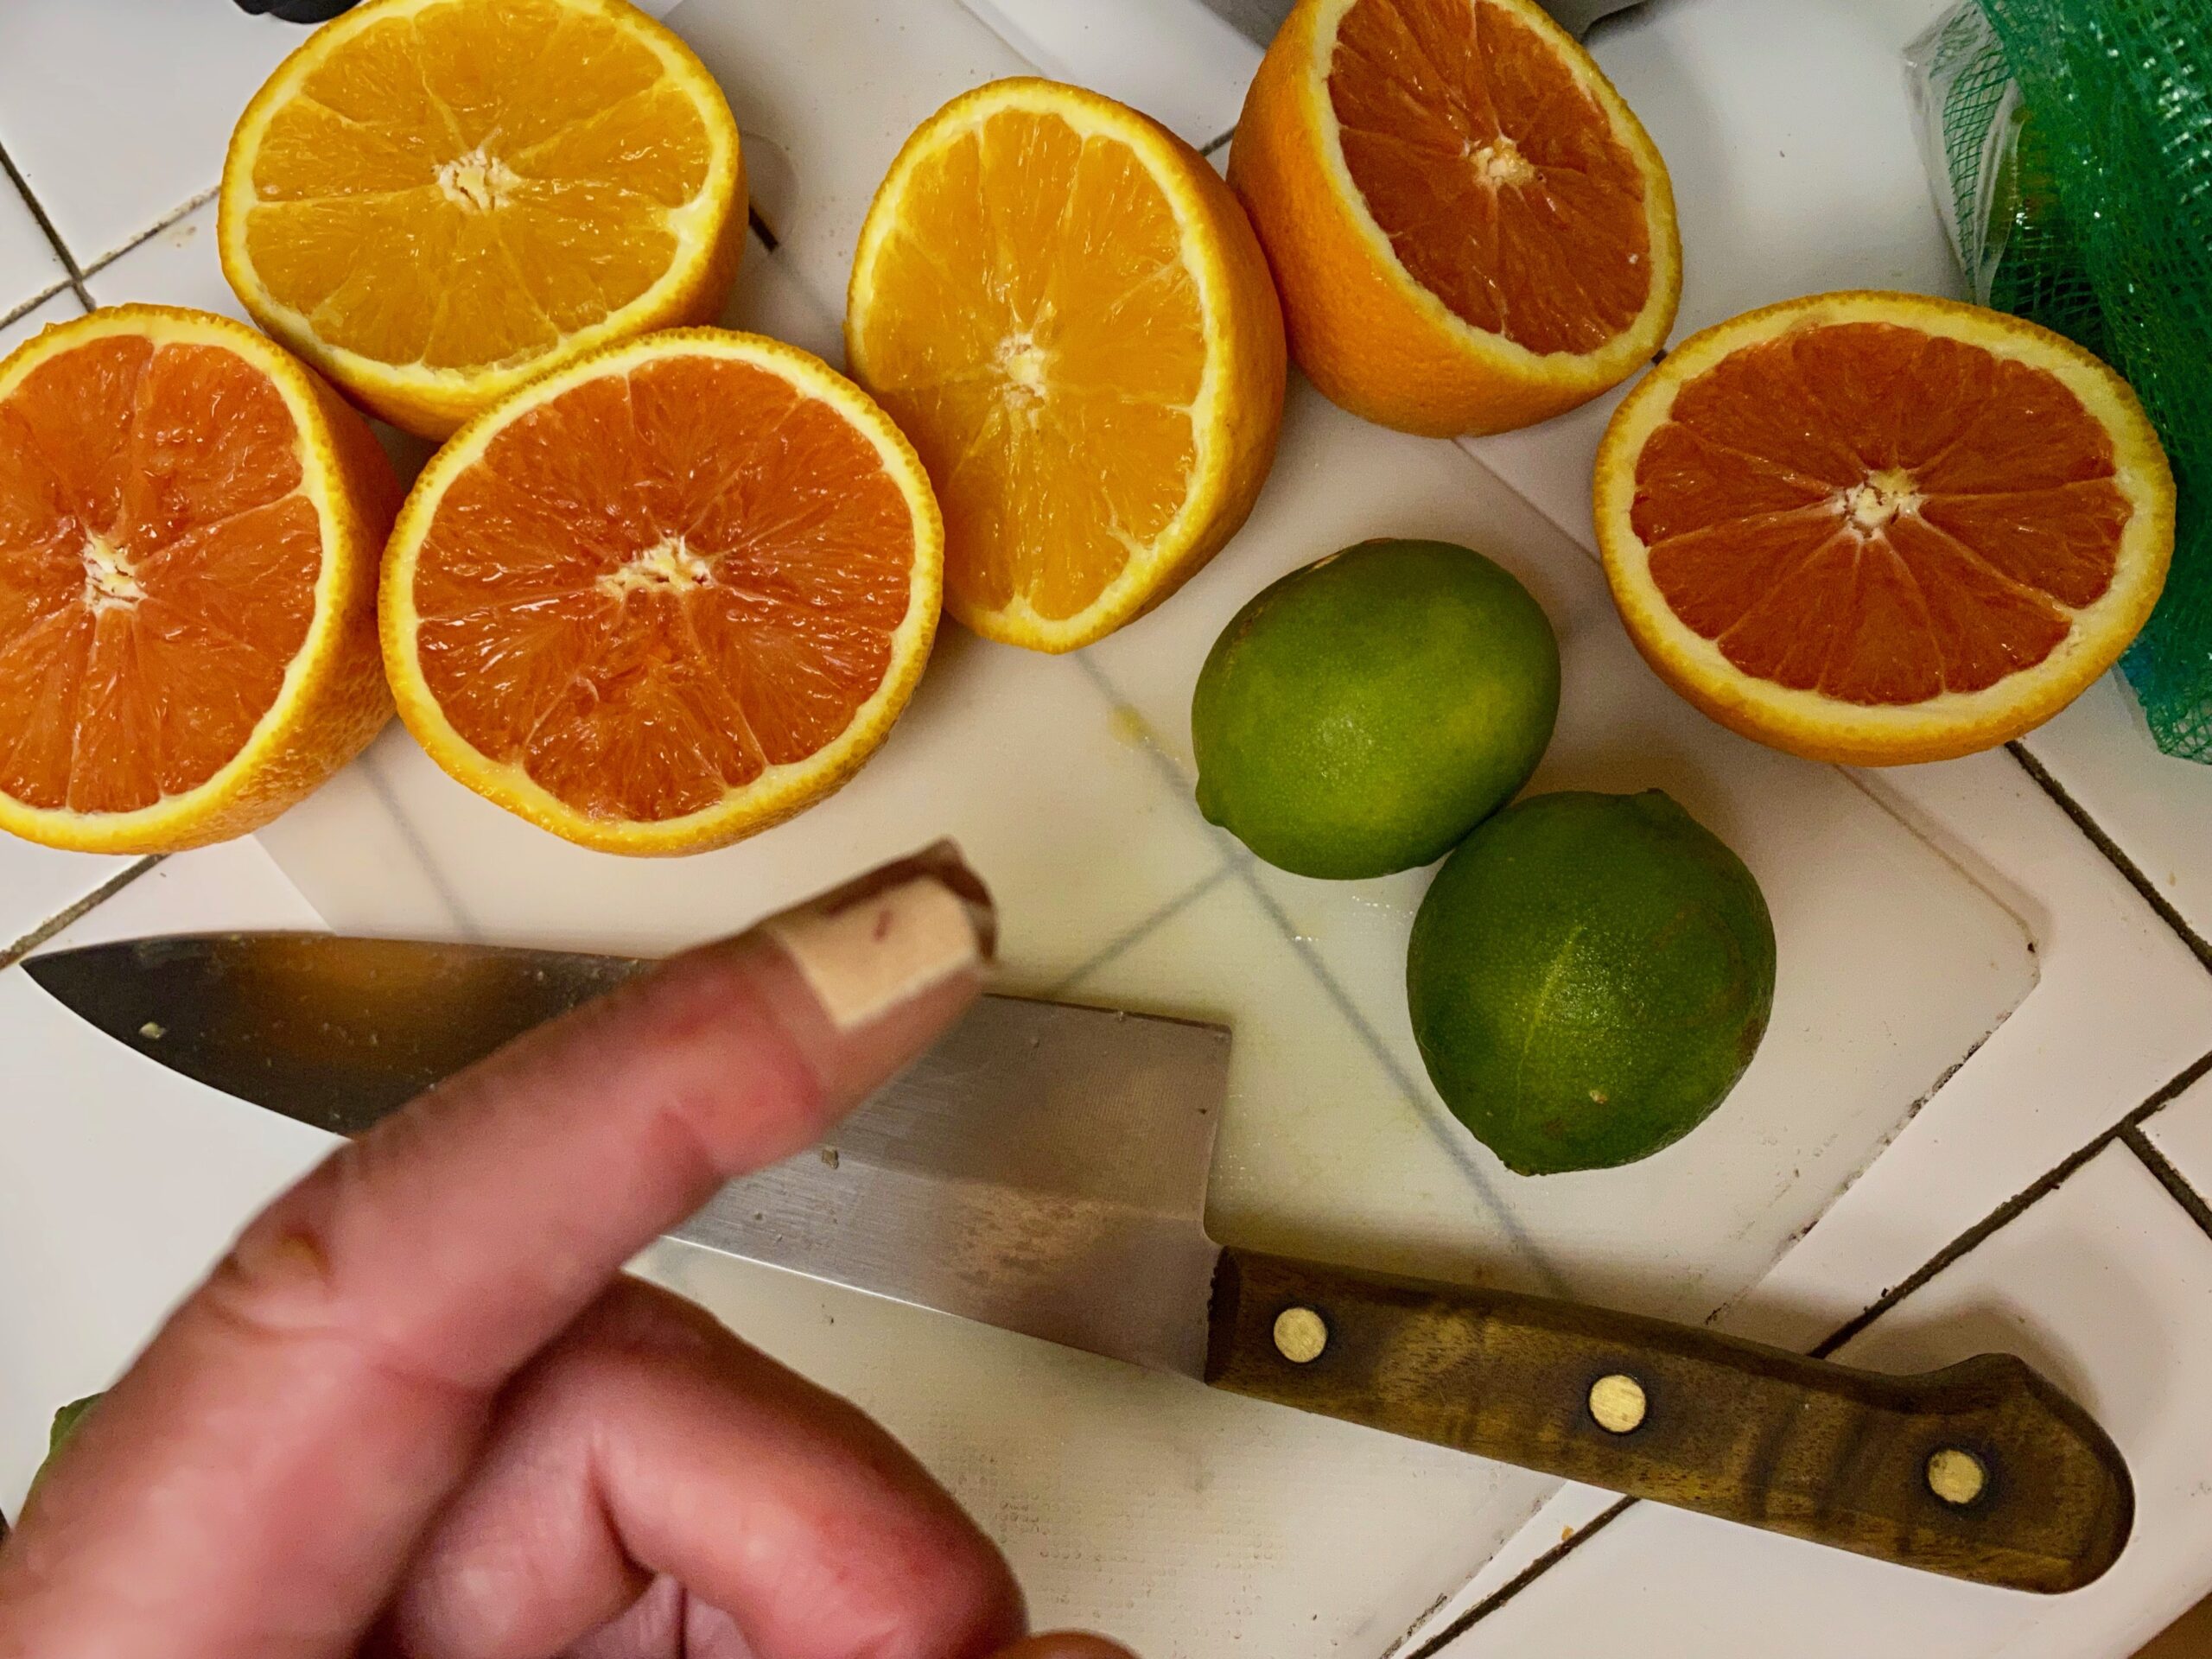
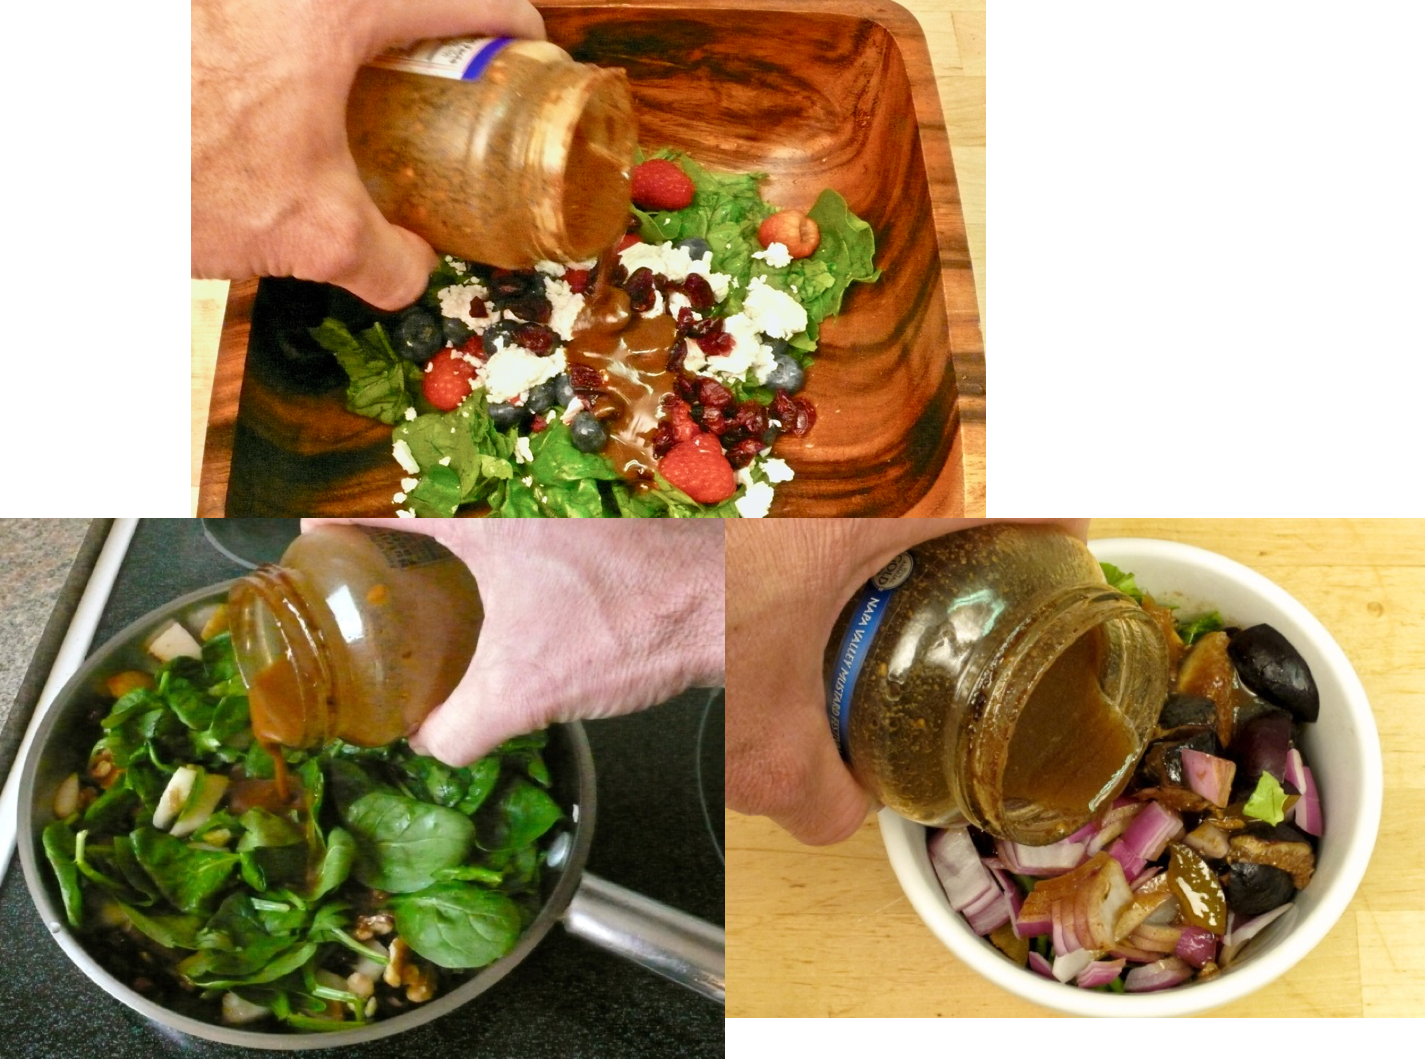
Not only does this dressing taste great (most important), but it’s also incredibly easy to make and versatile. As shown in the few sample pictures below, it goes great on any kind of warm or cold salad, over cooked vegetables, meat, chicken, fish, pasta, rice – imagination is your only limit.

3 photos show examples of how versatile instant 5-ingredient salad dressing can be.

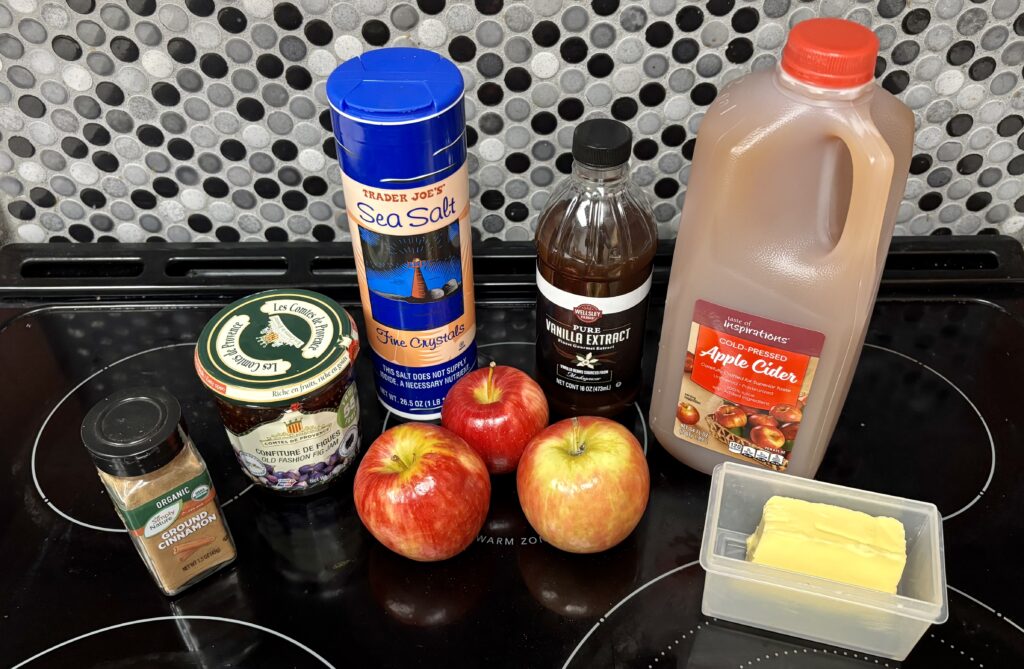
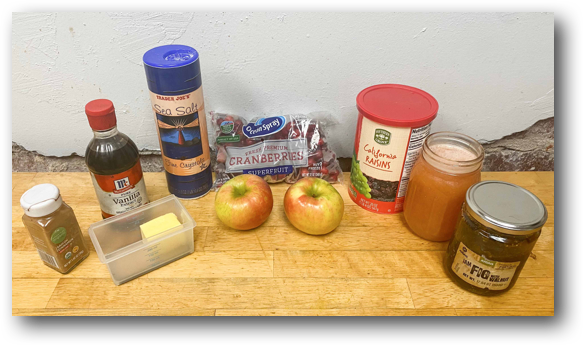
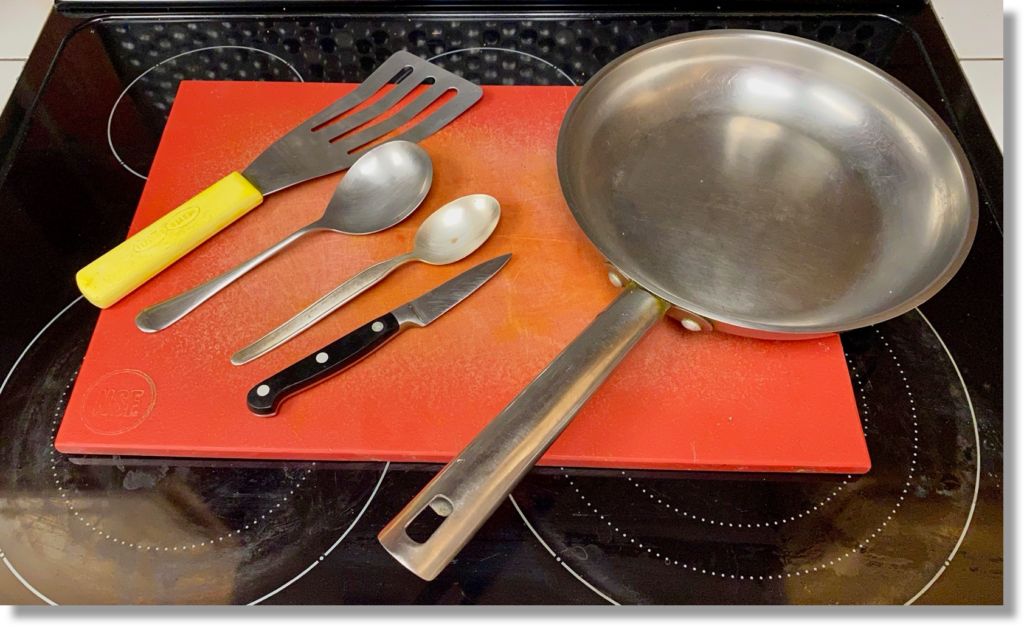
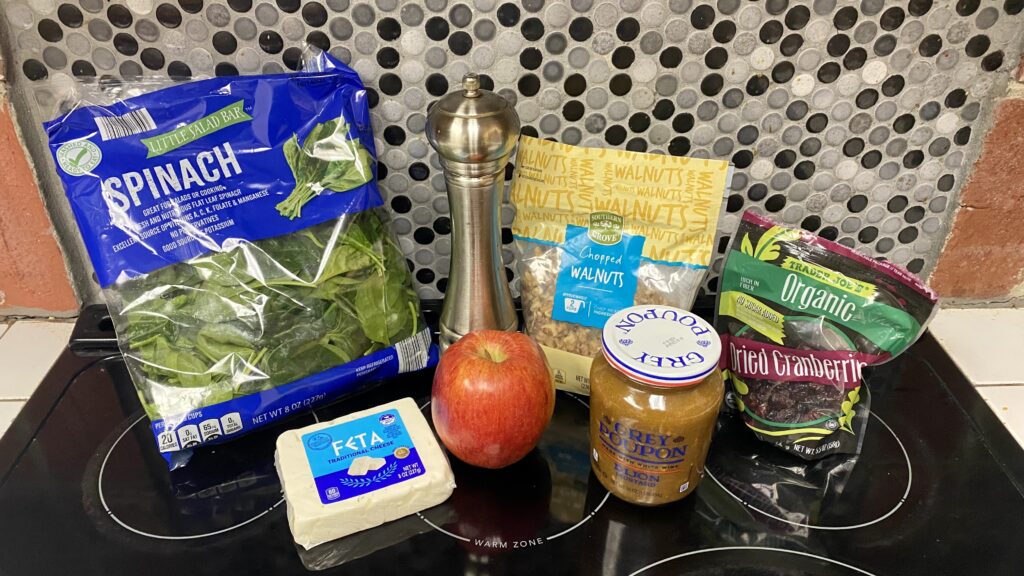
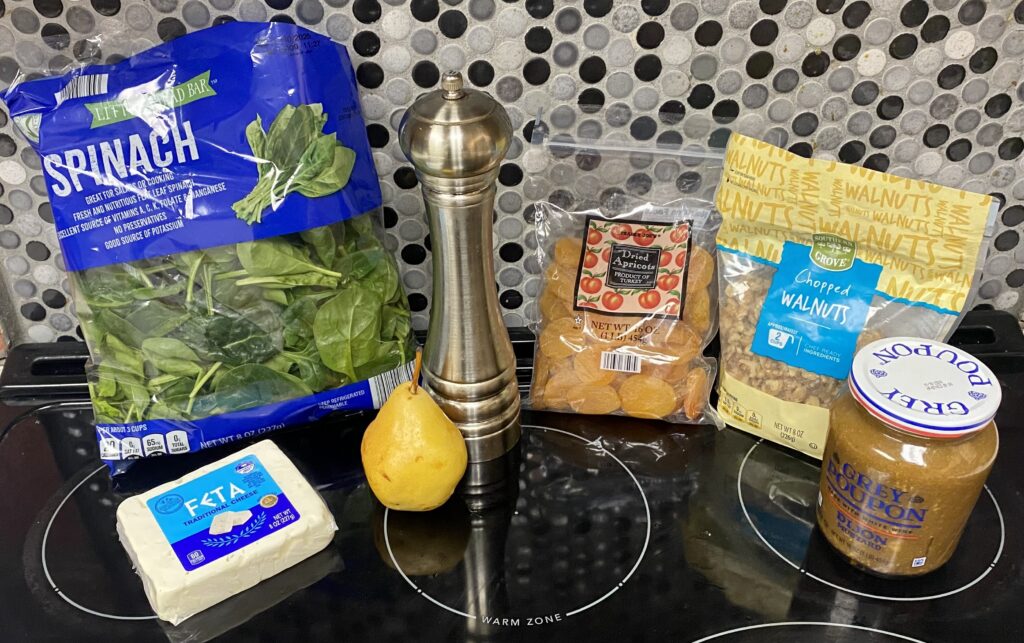
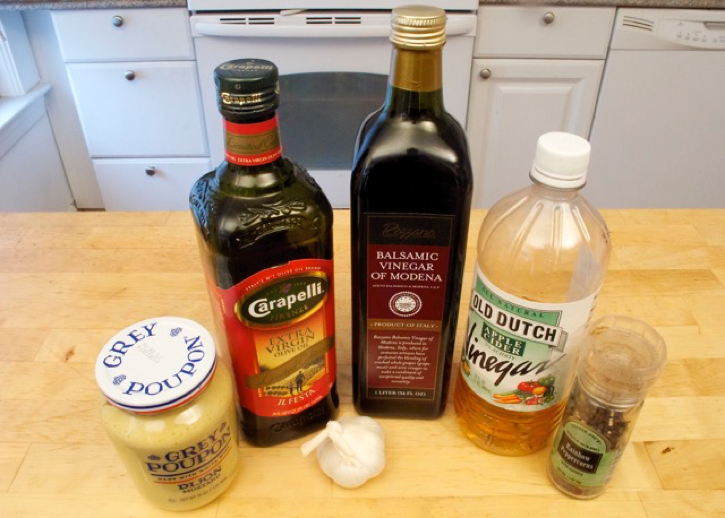
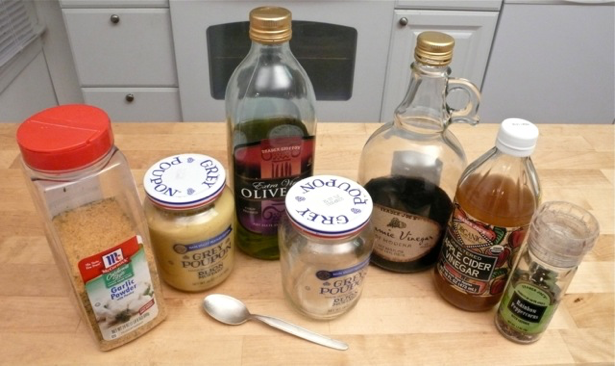
The toughest part about making this dressing is gathering the ingredients, like those shown below. You actually see six ingredients because I often use two different types of vinegars for added flavor (flavor rules here!), which you certainly don’t have to do.

Instant 5-Ingredient Salad Dressing ingredients

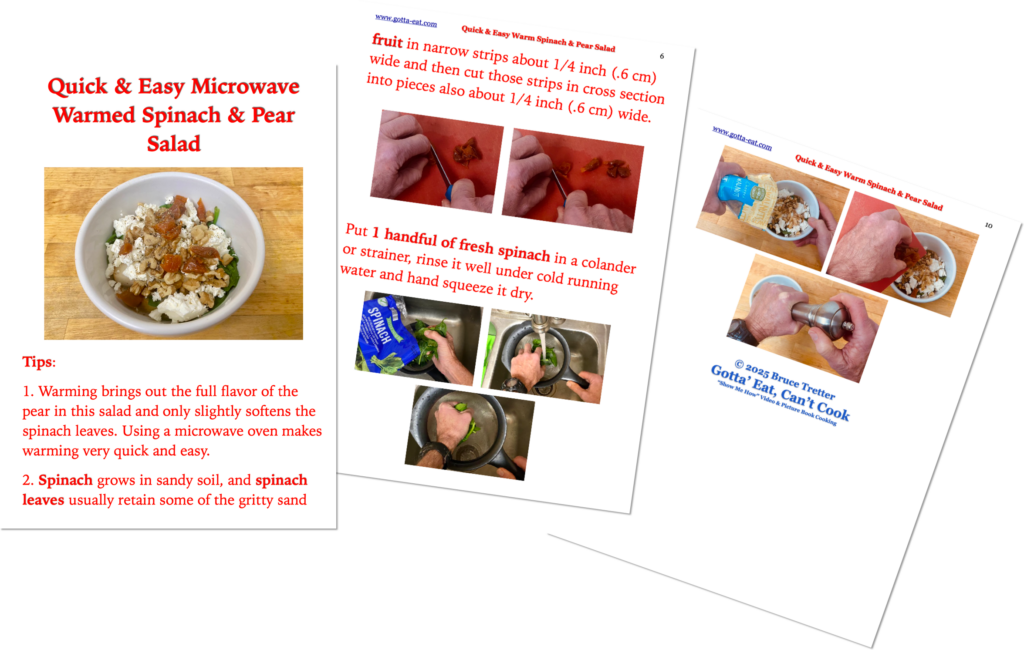
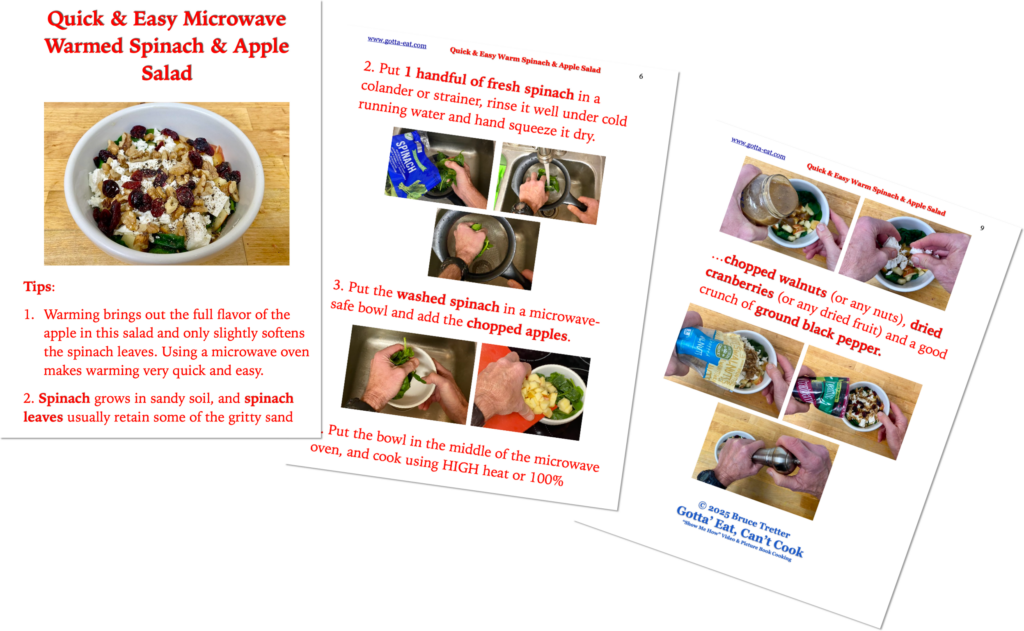
Click this link or any picture on this page for a complete step-by-step picture recipe that includes information about the sourness of different vinegars and why this recipe is considered low in both salt and sugar.

Instant 5-Ingredient Salad Dressing Recipe 3 Shot

I wish you the very best starting both the new year and your resolutions and will do my best to help you stick to those resolutions related to eating better to improve your quality of life.

More very soon!

Innovative Bella Vita Laser-Cut Chestnuts – and More in 2025

Closeup showing a long laser-cut on one side of a chestnut

Bella Vita’s Celso Paganini introduced me to his newly innovated laser-cut chestnuts when we got together last month. First, there’s nothing different about the chestnuts themselves, extraordinarily fully flavorful northern Italian “Marroni” chestnuts. Instead, the innovation comes in the form of a long laser cut on one side of the chestnut that slices only through the tough shell but leaves the moisture-retaining membrane intact, as shown in the closeup above.

I roasted those chestnuts exactly as shown in the directions you can get by either clicking this link or any picture on this page.

How to roast chestnuts in the oven picture book directions

My only concern was that Celso’s laser-cut chestnuts, with only one cut in the chestnut shell that left the membrane intact, might explode under high roasting heat. But nothing close to that happened. Roasting went exceptionally well, and the finished roasted chestnuts peeled incredibly easily one after another, as shown in the pictures below.

Oven roasted laser-cut chestnut collage.

Unfortunately this year’s chestnut season, just like the year itself, is over, but I’ll check in with Celso and find out how you can get fantastically fresh and flavorful chestnuts later next year.

For now, I wish your family, friends and you a warm close to 2024 with the promise of more full-on flavorful in 2025.

Happy New Year!

Oven Roasted Chestnuts – All In Pictures

Oven Roasted Chestnuts Holiday Banner

It’s Christmas Eve, and it’s hard to imagine this time of year without hearing “Chestnuts Roasting on an Open Fire” playing downtown – or in my head. Unfortunately, I’ve never roasted chestnuts on an open fire, but some day I will.

As I’ve mentioned before, roasting chestnuts has been a big part of Tretter tradition. But recently, since meeting Celso Paganini, owner of Italian foods importer Bella Vita, I’ve tried roasting chestnuts using two different techniques. The first technique, completely new to me, involves soaking freshly cross cut chestnuts in cold water for 6-10 hours or in warm water for 5-10 minutes before roasting them. I tried that technique, which I’d also found on other websites and, which, of course, was bit more time consuming. The results turned out great as shown here.

But I also saw on one of the sites, Aysegul Sanford’s Foolproof Living, that she saw no difference between soaking and not soaking chestnuts before roasting, as explained below.

After trying both the soaking and not soaking technique, I agree with Aysegul completely. At the same time, though, I like Celso’s idea of pre-heating the oven to high heat, though I chose 500° F (260° C) instead of Celso’s preferred 550° F (290° C) because not all home ovens can warm to 550° F (290° C), and then right away turning the heat down to 425° F (220° C) as soon as the chestnuts go in the oven. I also like the idea that I learned from both Celso and Aysegul of wrapping the hot chestnuts right out of the oven in a clean dish towel for 5-10 minutes to allow the chestnut meat to soften and make peeling easier.

Wrapping Hot Chestnuts in a Towel After Roasting

In the end, here is my new favorite way of oven roasting chestnuts – no rinsing or soaking in water required – that you can get by clicking this link or the picture below.

Of course, I love freedom of choice. If you’d like to try the chestnut pre-roast water soaking technique, or you’ve read about it and want picture book directions to make it plainly easy, either click this link or the picture below.

Most of all, I hope you make the most of your own family traditions, and I wish you a warm, fun and spirit-renewing holiday week!

Designed by Free Wordpress Themes and Sponsored by Curry and Spice