Archive for the ‘Anti-Inflammatory Foods’ Category

Nutty Cilantro Pesto Picture Book Directions

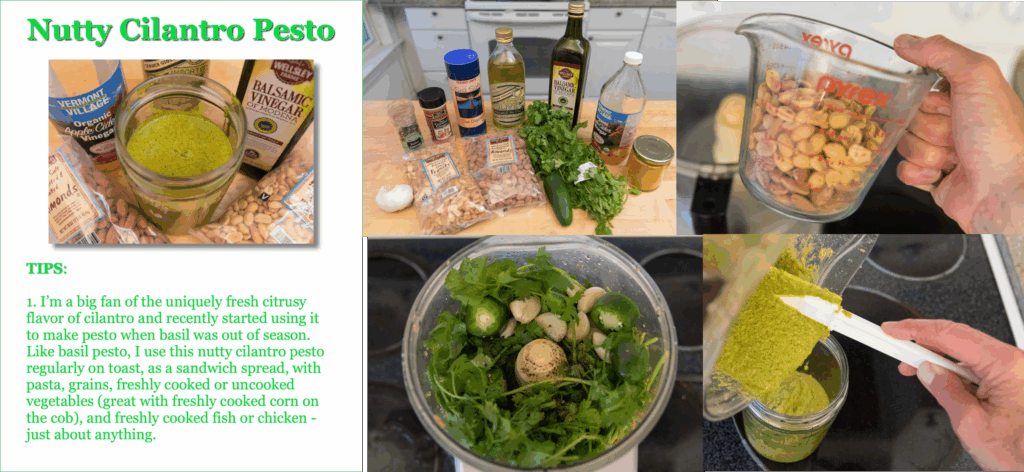
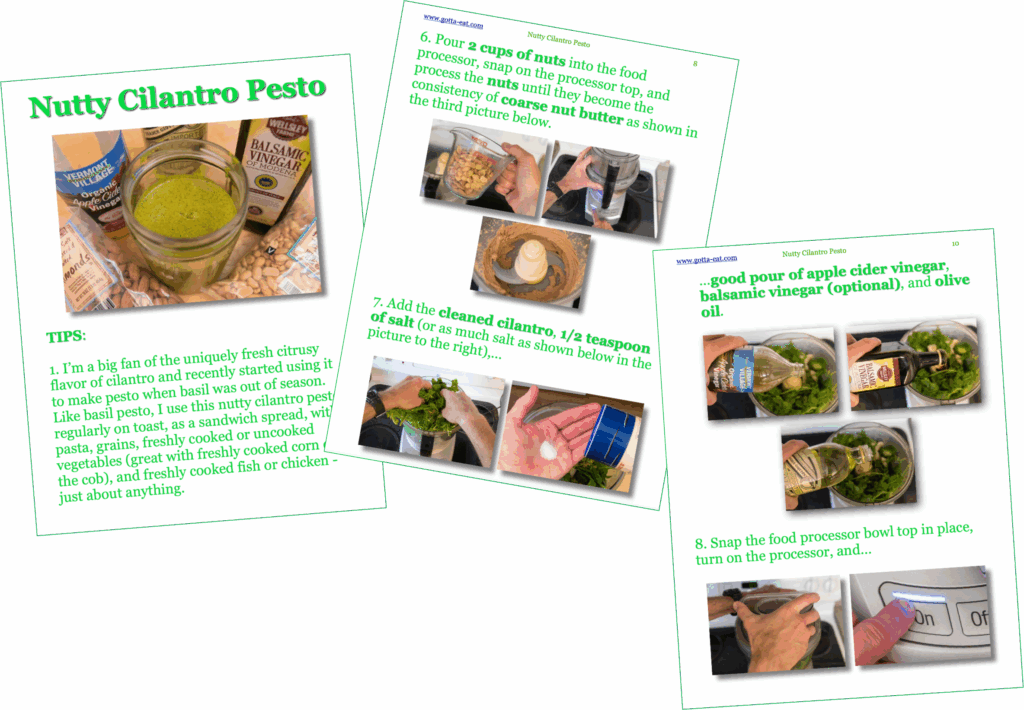
Sample recipe page and step-by-step pictures with link to nutty cilantro pesto picture book directions.

Here’s an example of how to take pesto from simple-to-exciting by adding ground ginger and turmeric, jalapeño pepper and mixed nuts. And though the picture book directions do show how to make this nutty cilantro pesto with a food processor, you can certainly use the recently posted hand-chopped basil pesto and hand-chopped cilantro pesto directions to make this nutty cilantro pesto by hand.

.

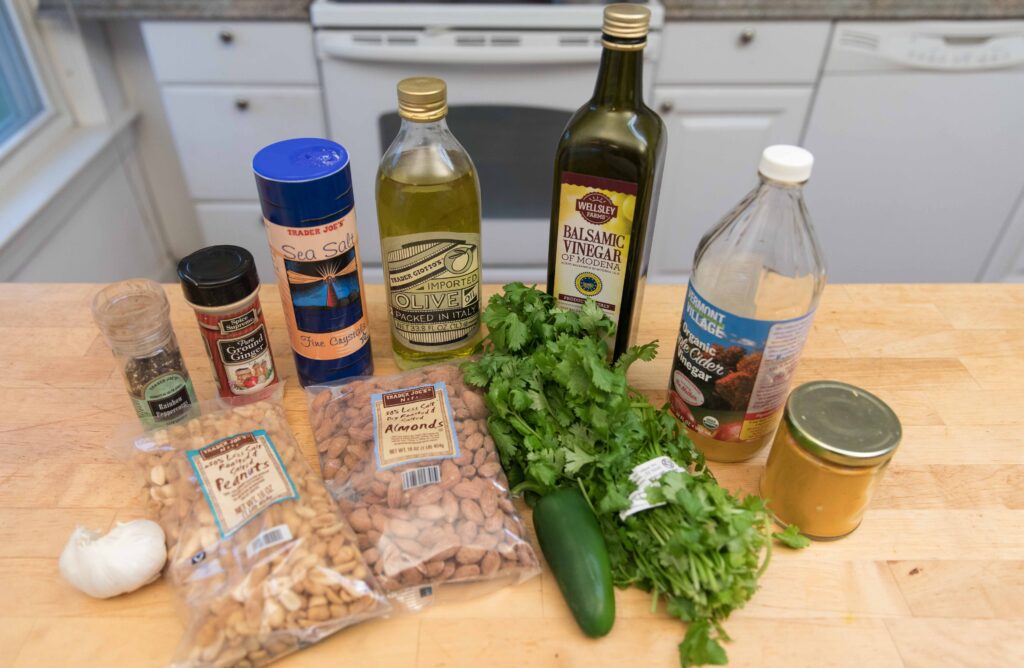
Here are the ingredients needed to make nutty cilantro pesto: 1 Big Bunch Fresh Cilantro, 1/2 – 3/4 Garlic Bulb, 1/2 Teaspoon of Salt, 1 Teaspoon Ground Turmeric, 1 Teaspoon Ground Ginger, Crunch of Black Pepper, Olive Oil, 2 Cups of Your Favorite Nuts, 1 Jalapeño Pepper, Shot of Apple Cider Vinegar and Shot of Balsamic Vinegar.

Ingredients needed to make nutty cilantro pesto with link to full picture book recipe

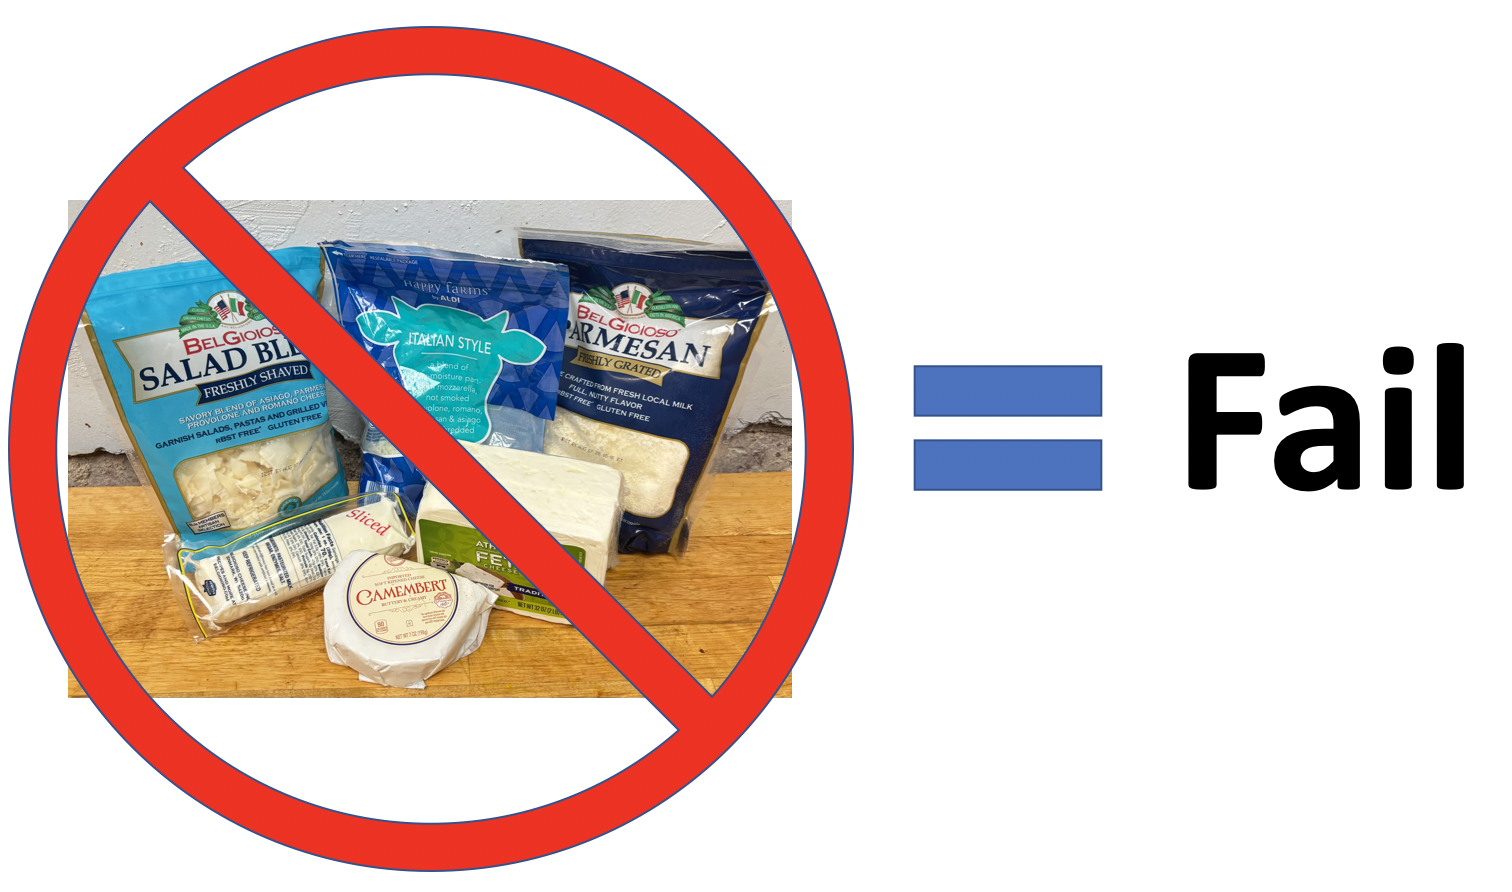
Ha! I just noticed I did not include cheese.

No Cheese equals Fail equation with link to picture book nutty cilantro pesto recipe.

As the equation above shows, “no cheese” is completely out of character. And, though the nutty cilantro pesto I shot and enjoyed shown above tasted just fine, I’ll chalk up the “no cheese” as an error. If you’re a cheese fan, please add any favorite grated or shredded cheese.

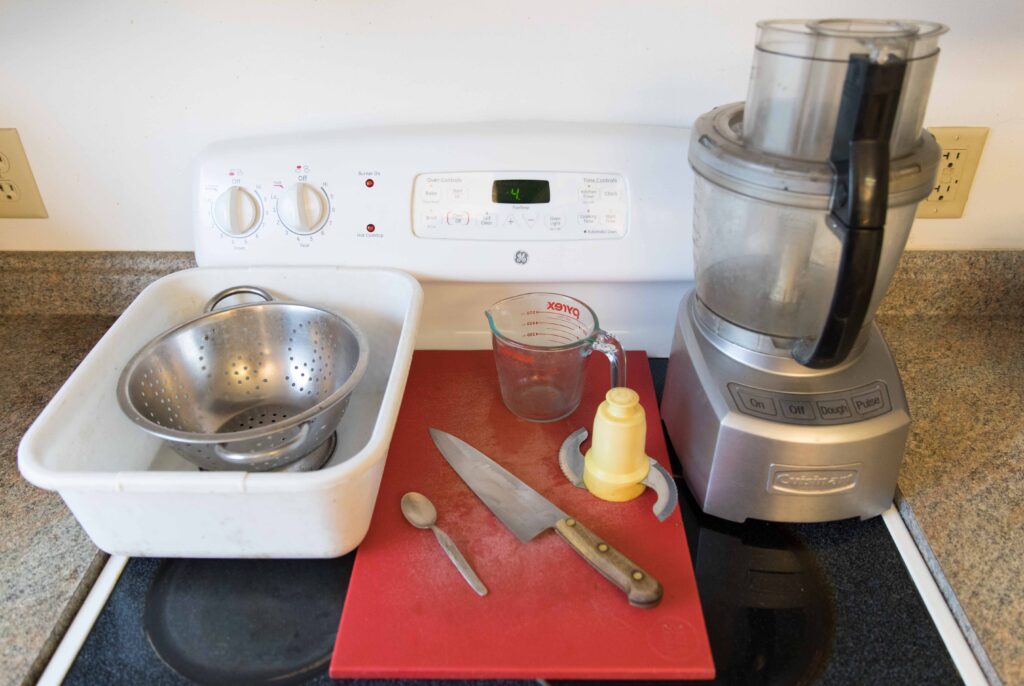
Here is the equipment you need: Food Processor with an “S”-Shaped Processor Knife Blade, Water Basin, Cutting Board, Strainer or Colander, Large Sharp (Chef’s) Knife, Spatula, Measuring Cup, Teaspoon.

Equipment needed to make nutty cilantro pesto with link to full picture book recipe

Click this link or any picture on this page for complete step-by-step nutty cilantro pesto picture book directions, and have fun using it with pasta, rice, grains, on sandwiches, salads – imagination is your only limit!

Sample recipe pages with link to nutty cilantro pesto picture book directions.

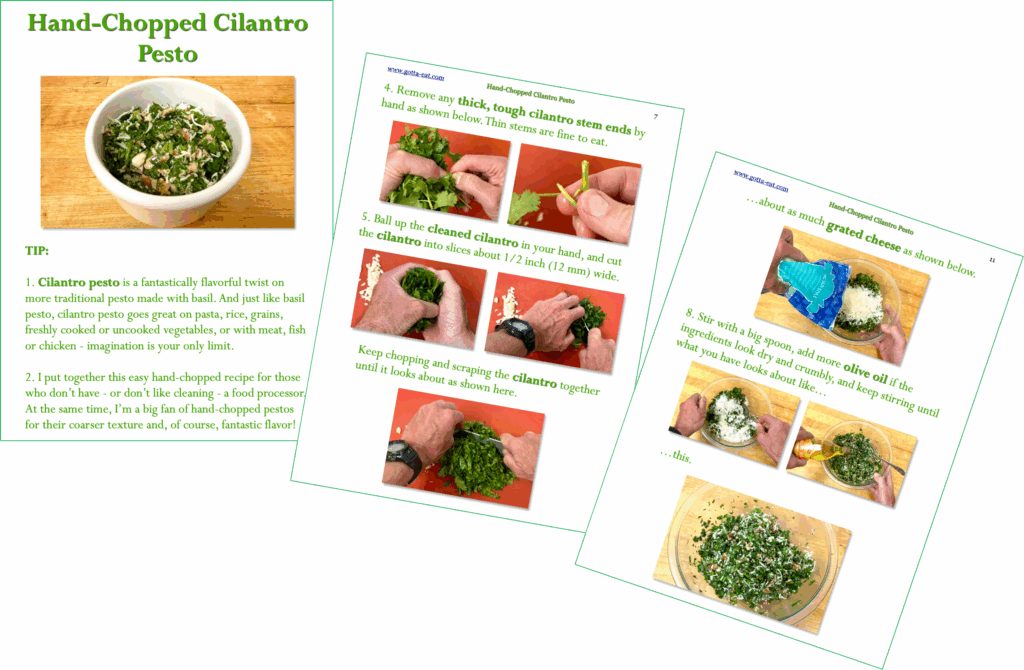
Hand-Chopped Cilantro Pesto Picture Directions

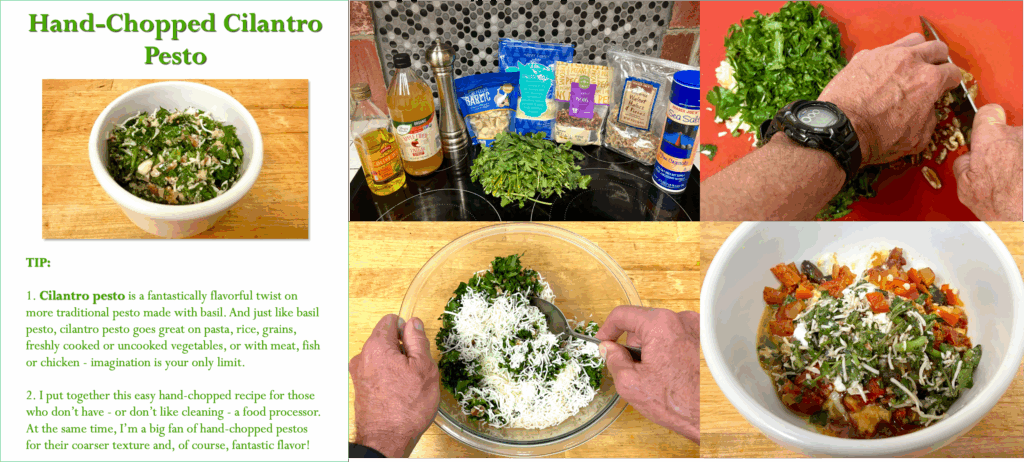
Sample recipe page with step-by-step pictures with link to hand-chopped cilantro pesto picture book directions

Last post showed how to make hand-chopped basil pesto, which is a great way to make pesto if you don’t have or don’t like to clean a food processor – and I fit squarely in that second category. I have to say, having put together the hand-chopped basil pesto directions and now this zesty twist on that recipe that just substitutes fresh cilantro for basil, I’m an even bigger fan of the hand-chopped method both because it avoids the need to have or to clean a food processor and because of its more robust, nutty texture. And just like basil pesto, cilantro pesto goes great on pasta, rice, grains, sandwiches, fresh or cooked vegetables, or with meat, chicken or fish. Imagination is your only limit!

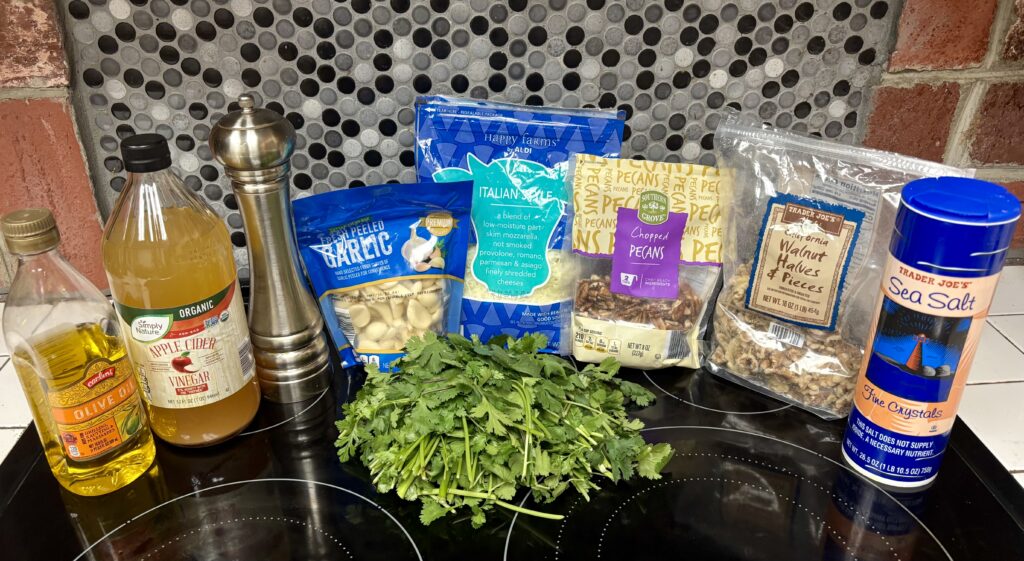
Here are ingredients needed to make hand-chopped cilantro pesto: 1 Bunch Fresh Cilantro, 4-5 Garlic Cloves (even though I used packaged peeled garlic cloves, as shown below, the picture book directions also show how to prepare and chop garlic from a fresh garlic bulb), Handful of  Your Favorite Nuts, 1/2 Teaspoon of Salt, Crunch of Black Pepper, Grated Parmesan (or other) Cheese, Olive Oil, Apple Cider (or any) Vinegar.

Ingredients needed to make hand-chopped cilantro pesto with link to hand-chopped cilantro pesto picture book directions

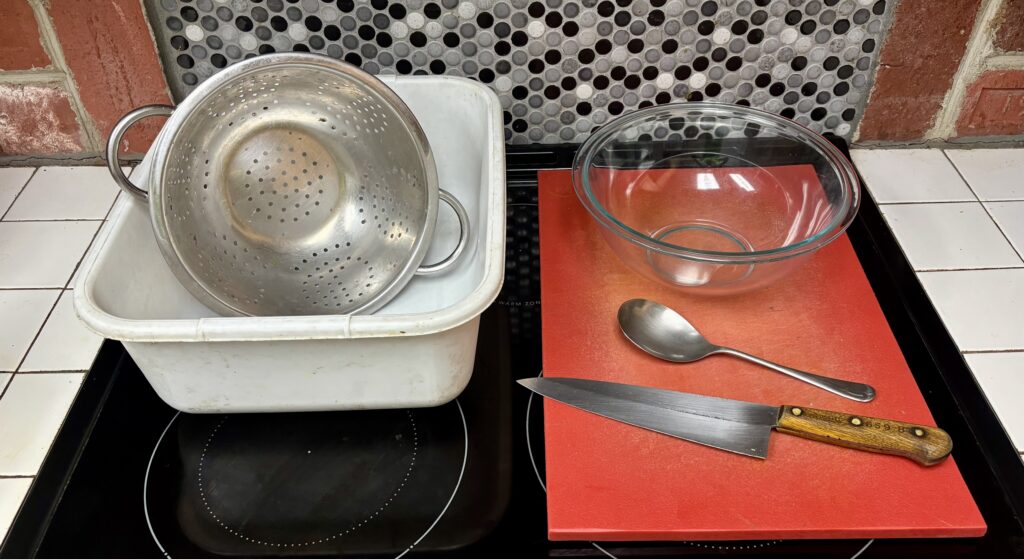
Here’s what you need for equipment: Water Basin, Cutting Board, Strainer or Colander, Large Sharp (Chef’s) Knife, Bowl, Large Spoon.

Equipment needed to make hand-chopped cilantro pesto with link to hand-chopped cilantro pesto picture book directions

Click this link or any picture on this page for complete picture book directions – and enjoy!

Sample Hand-Chopped Cilantro Picture pages with link to full picture book recipe.

Next post: nutty cilantro pesto made with a few added ingredients

Hand-Chopped Basil Pesto Picture Book Directions

Banner shot of hand-chopped basil pesto with link to picture book hand-chopped basil pesto recipe

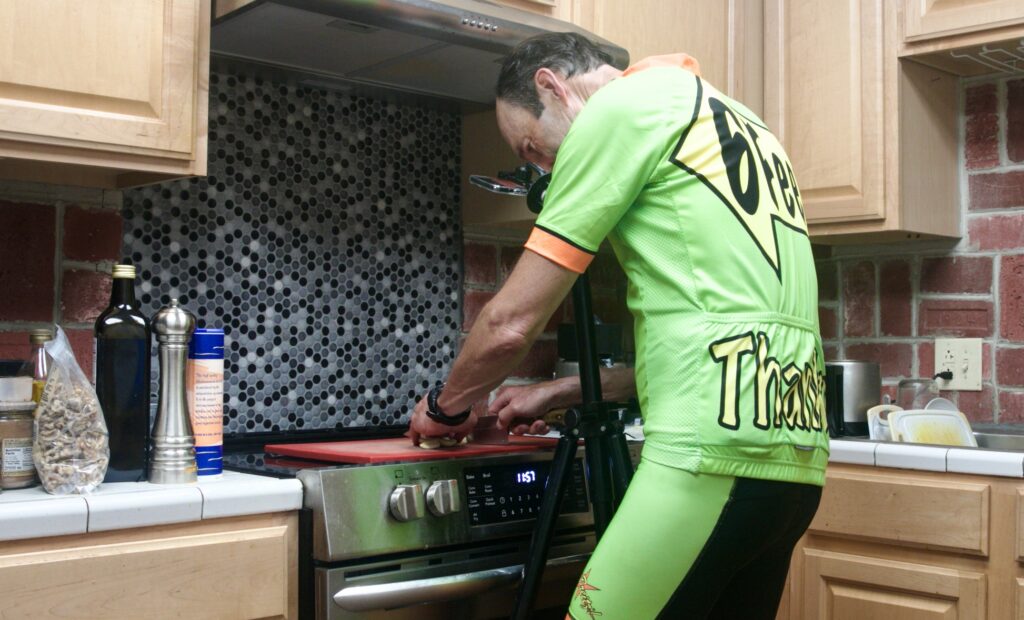
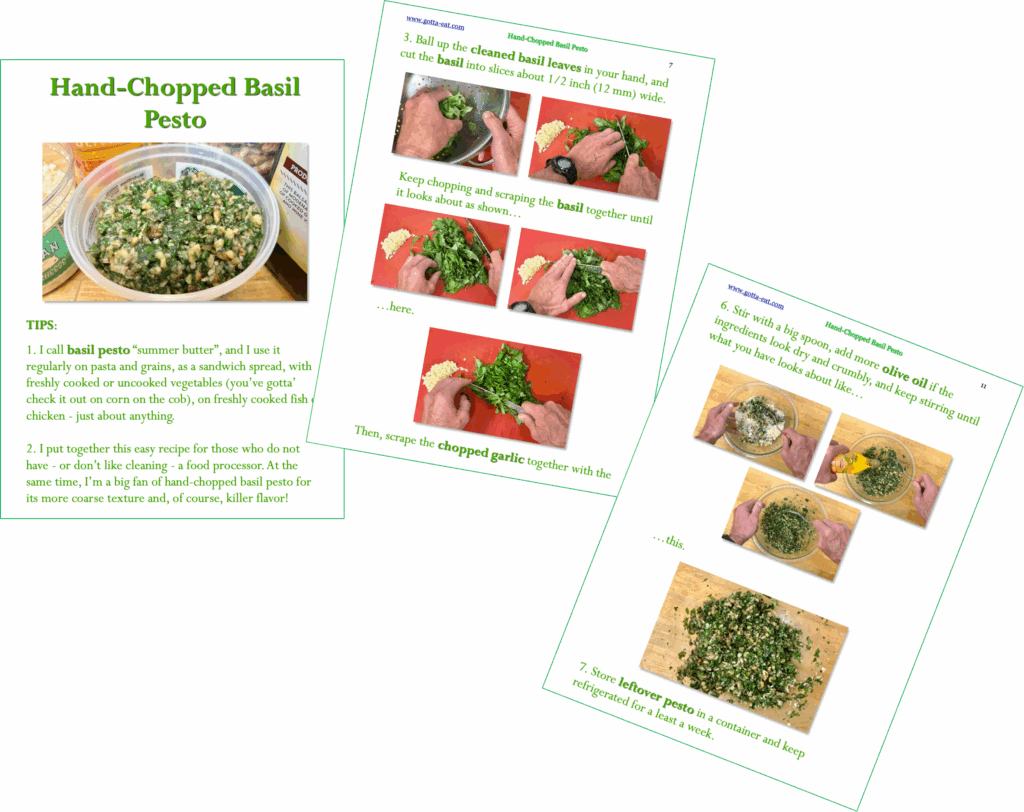
I promised in my last post that showed how to make fresh basil pesto using a food processor that I’d put together picture book directions showing how to hand-chop basil pesto if you don’t have – or don’t like cleaning – a food processor and, boy, I hopped on it with a “let’s get it done right now” right after taking a good hop on the bike.

Ha! Hunched over a bit because I use the tip of my nose to fire my cellphone camera when I shoot recipe action shots.

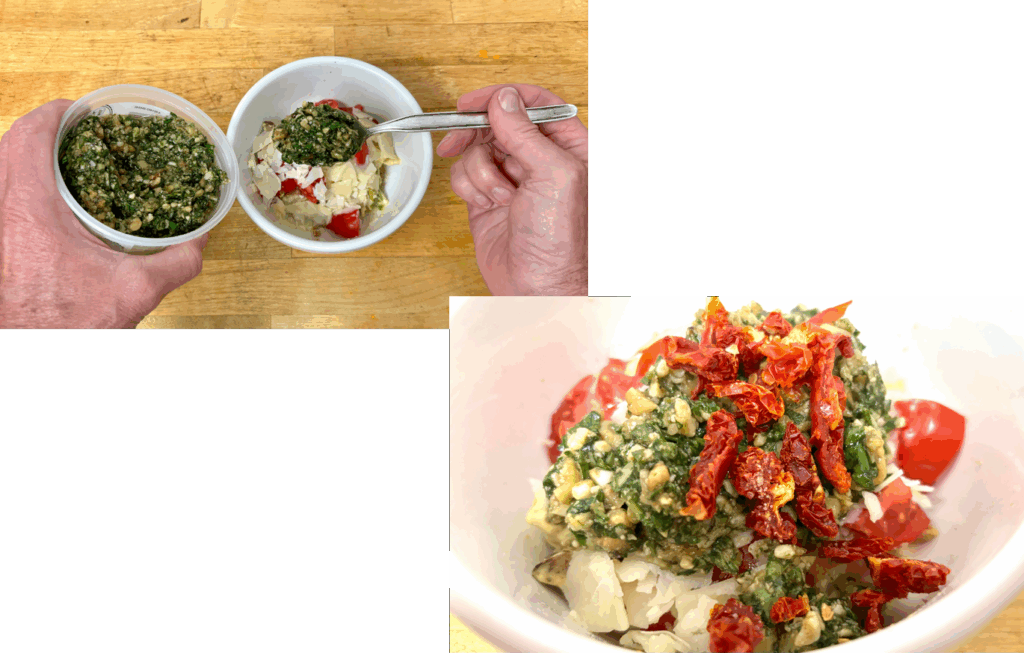
I have to say, having made hand-chopped basil pesto for the first time this week, I’m a big fan. I love the coarser texture and chewy, nutty, soft crunch and, of course, fresh full-on flavor – and freedom of not having to clean food processor parts. Here’s how I used it right away for a post-ride lunch: with chickpeas, tomatoes, mixed Italian cheeses and sun-dried tomatoes.

Chickpeas, tomatoes, mixed Italian cheeses and freshly made hand-chopped basil pesto with a link to hand-chopped basil pesto picture book directions.

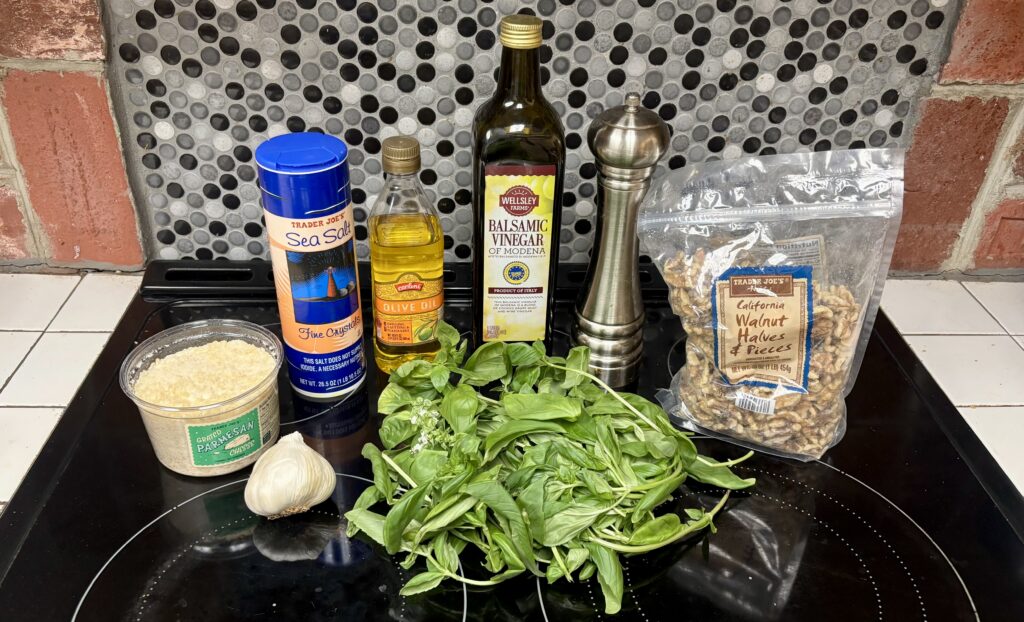
Here are the needed ingredients: 1 Bunch Fresh Basil, 4-5 Garlic Cloves, Handful of Your Favorite Nuts (I used no-salt walnuts), 1/2 Teaspoon of Salt, Crunch of Black Pepper, Grated Parmesan Cheese, Olive Oil, Shot of Balsamic Vinegar (optional but adds a punch of flavor)

Ingredients needed to make hand-chopped basil pesto with link to picture book hand-chopped basil pesto directions

Here’s what you need for equipment: Water Basin, Cutting Board, Strainer or Colander, Large Sharp (Chef’s) Knife, Bowl, Large Spoon

Equipment needed to make hand-chopped basil pesto with link to hand-chopped basil pesto picture book directions

Click this link or any picture on this page for complete step-by-step hand-chopped basil pesto picture book directions.

Sample 3 pages and link to hand-chopped basil pesto picture book directions

Homemade Fresh Basil Pesto – All in Pictures

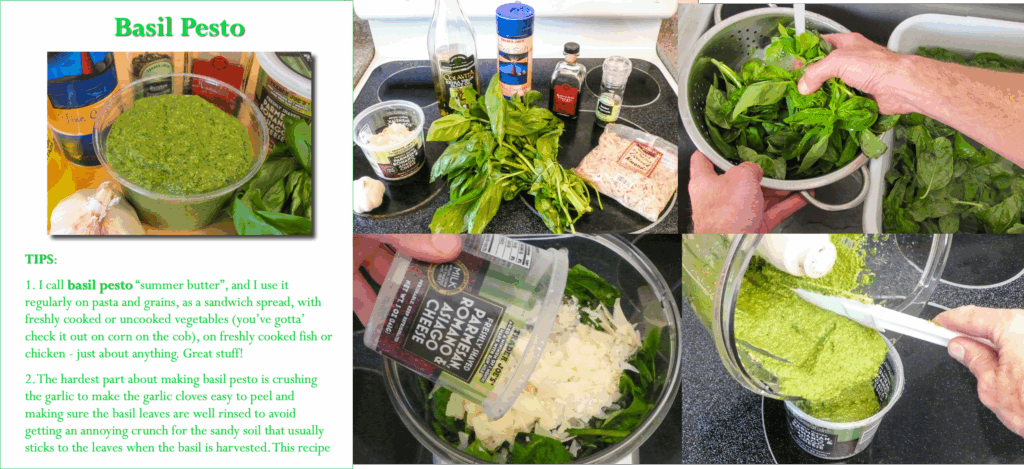
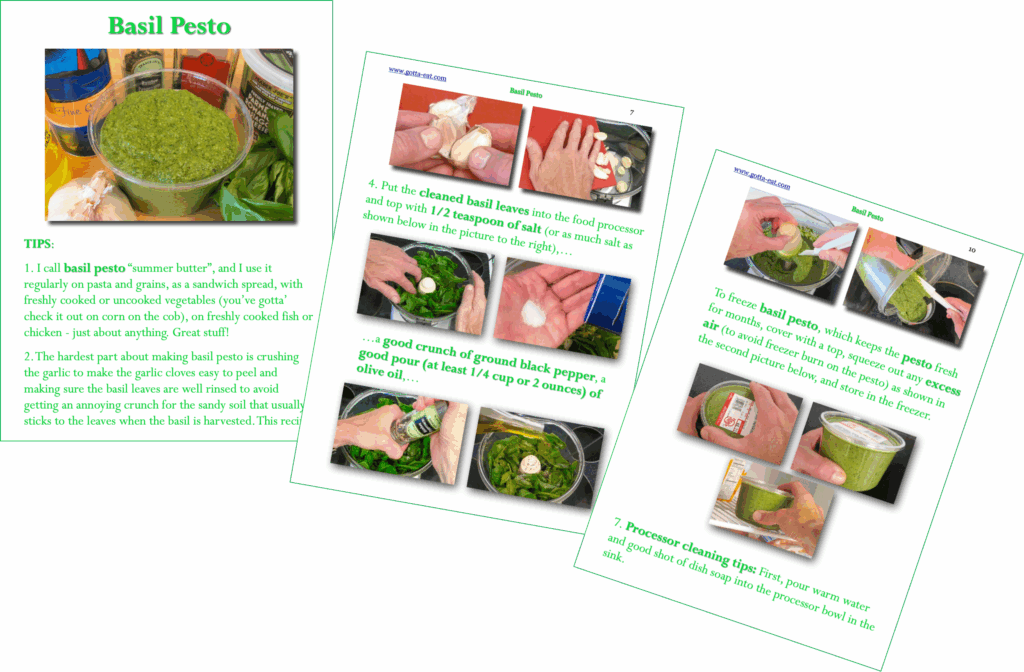
Title shot of fresh basil pesto recipe, sample shots of putting the recipe together and link to the full basil picture book recipe.

I introduced pesto in my last post as in ingredient for Warm Overnight Oats with Chickpeas, Pesto and Cheese. That post elicited a request from a friend to repost the Basil Pesto picture book recipe I put together 10 years ago that you can jump to immediately by clicking any picture on this page.

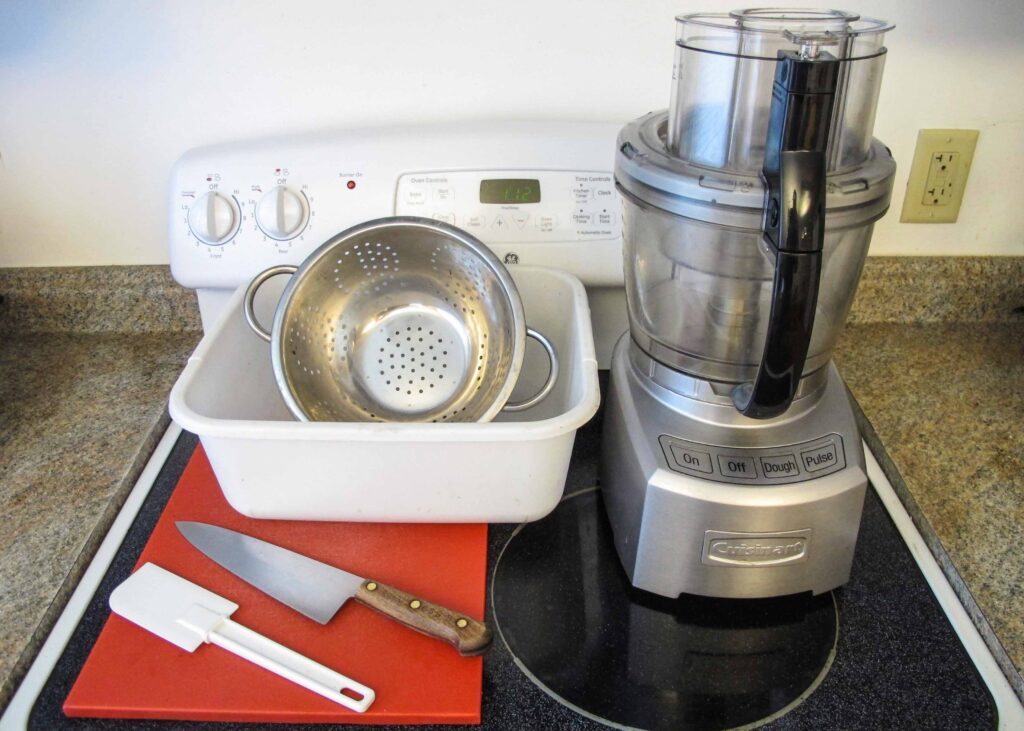
One big heads up/warning right off the bat: you’ll need a food processor to make fresh pesto like the processor shown below in the equipment picture or any other model or brand. If you don’t have one, try to borrow one from a friend or family – and even offer to share the pesto you make with them. If, however, you can’t access a food processor, please bear with me. I’ll shoot and post a hand-chopped basil pesto recipe next.

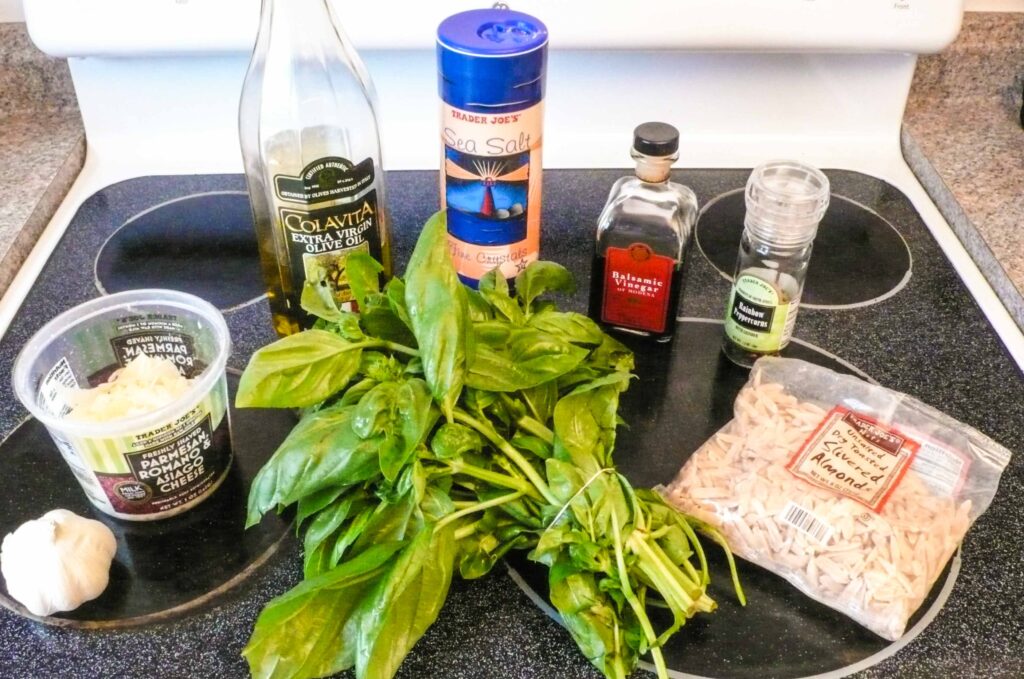
In the meantime, for those of you with a food processor good to go, here are the ingredients you need to make fresh basil pesto: 1 Bunch Fresh Basil, 1 Garlic Bulb, Grated Parmesan Cheese, 1/2 Teaspoon of Salt, Crunch of Black Pepper, Olive Oil, Handful of Your Favorite Nuts (I usually use either a lightly salted version of roasted almonds, no salt walnuts, or lightly salted mixed nuts instead of pine nuts usually called for to make pesto for both flavor and because pine nuts can be hard to find), Shot of Balsamic Vinegar (optional but adds a punch of flavor).

Ingredients needed to make fresh basil pesto with link to full picture book recipe.

Here’s a shot of the equipment you’ll need. The wide bladed chef’s knife below is just used to smash the garlic skins open to make peeling the garlic easy.

Equipment needed to make fresh basil pesto with a link to the full basil pesto picture book recipe

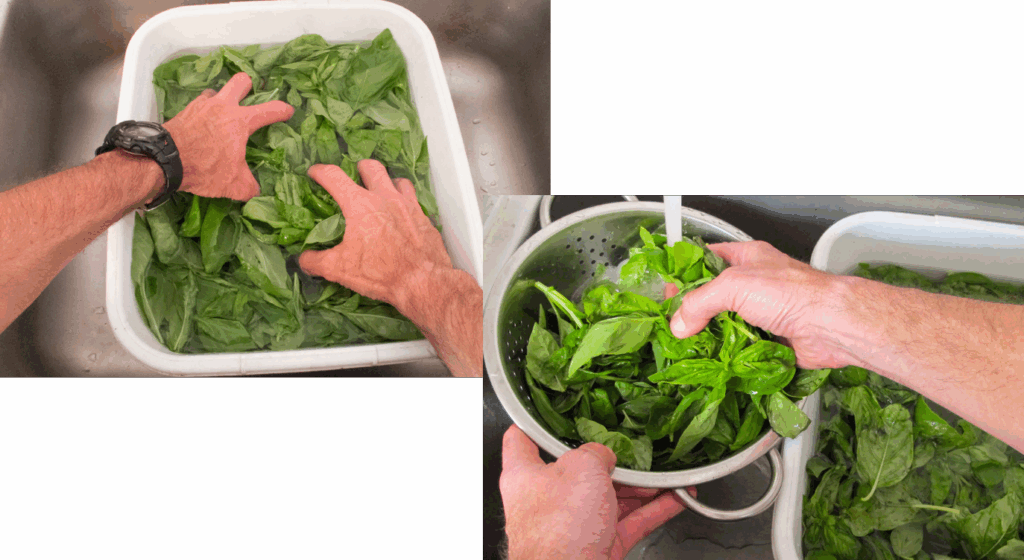
Another big heads up: definitely give the fresh basil a good hand scrubbing rinse as shown in the photos below to make sure to wash out any sandy soil that might stick to the basil leaves, which otherwise makes enjoying fresh fully-flavorful pesto a lot crunchier than it needs to be and less enjoyable.

Giving fresh basil leaves a good hand scrubbing rinse in cold tap water to wash out sandy soil that can cling to fresh basil leaves

Again, click this link or any picture on this page for complete fresh basil pesto step-by-step picture book directions.

Images of sample basil pesto picture book recipe with a link to that picture book recipe

Next post: hand-chopped fresh basil pesto.

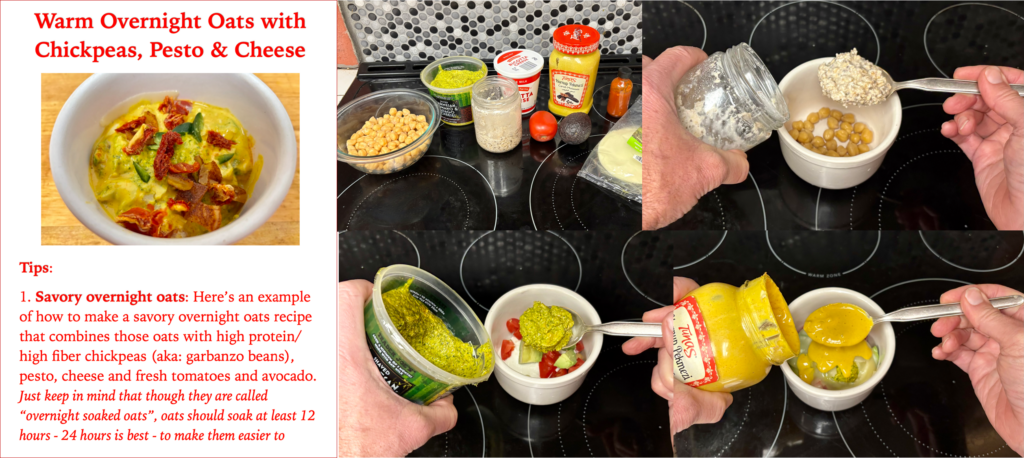
Warm Overnight Oats with Chickpeas, Pesto and Cheese Picture Directions

Overnight oats with chickpeas, basil pesto and cheese banner with link to picture book recipe

Last post showed how to make a sweet overnight oats recipe: overnight oats with grapes, yogurt, jam & kefir. This post puts a savory twist on those same overnight oats – all very easily and fantastically flavorfully.

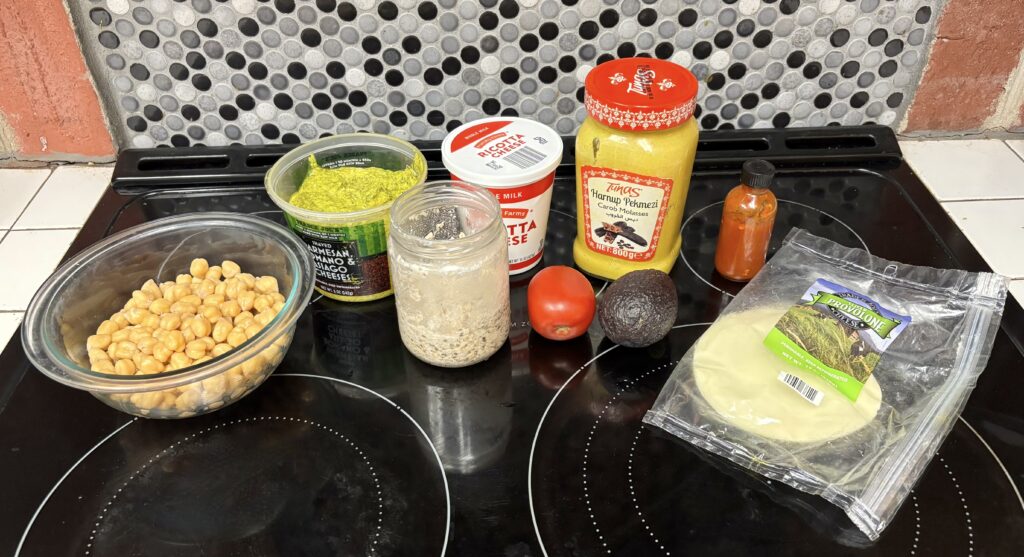
Here are the ingredients needed to make overnight oats with chickpeas, pesto & cheese, though I did add a couple ingredients after first shooting the dish as noted below.

Overnight oats with chickpeas, basil pesto and cheese ingredients with link to picture book recipe

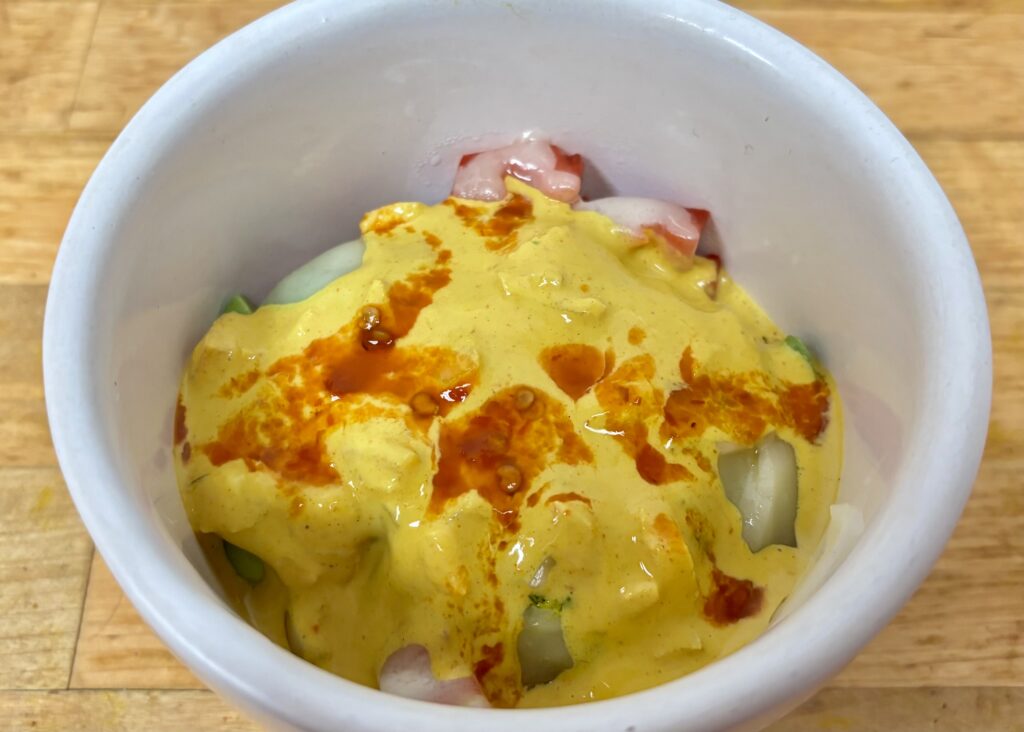
I’m what a I call a “peripatetic eater”, or someone who bounces from table to kitchen just a bit during a meal. And you know the deal here: FLAVOR RULES! So, though I liked this dish with just the ingredients above and as shown below,…

Overnight oats with chickpeas, basil pesto, cheese and hot sauce with link to picture book recipe

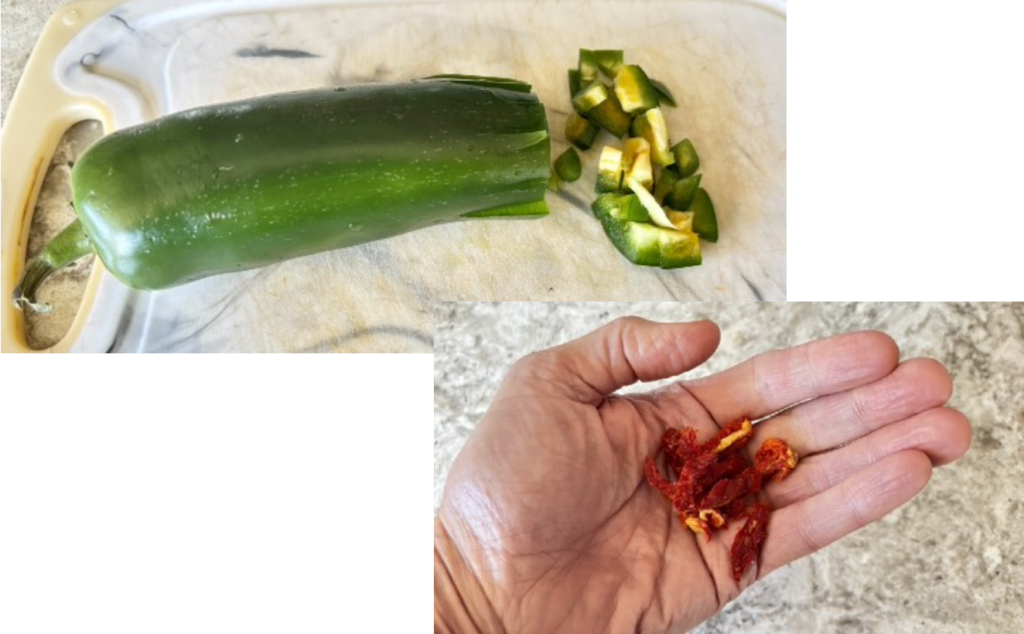
…I liked it even better – and made it look more photogenic – by just adding chopped jalapeños and sun-dried tomatoes…

Chopped jalapeños and sun-dried tomatoes to add to overnight oats with chickpeas, basil pesto and cheese banner with link to picture book recipe

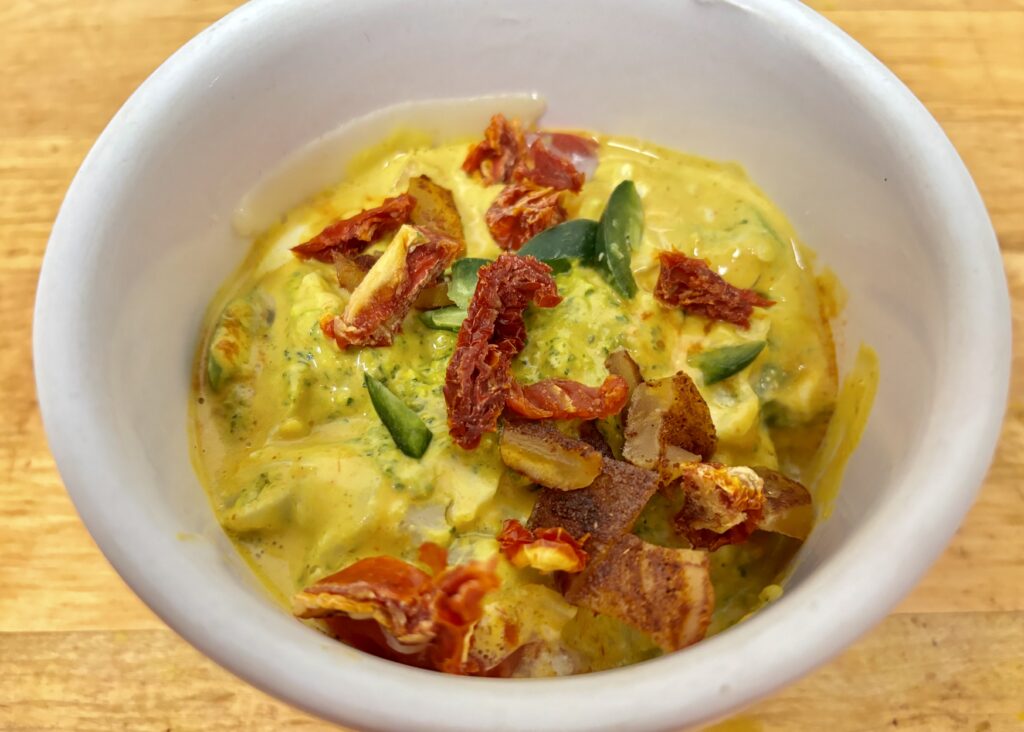
…to make this.

As I say in the recipe and often here, a recipe is only a guide. The real fun is trying different ingredients to make the flavor of a finished dish all your own both regarding flavor and any dietary restrictions you might have.

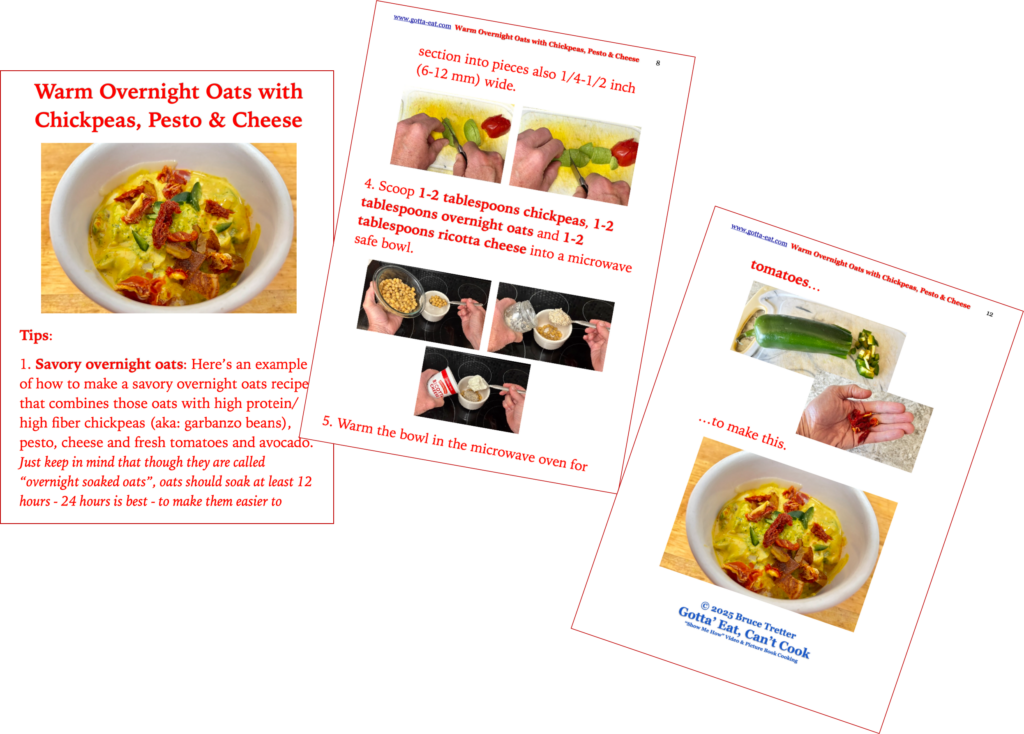
Click this link or any picture on this page for a full step-by-step picture book recipe.

Overnight oats with chickpeas, basil pesto and cheese recipe pages with link to the full picture book recipe

Overnight Oats with Grapes, Yogurt, Jam and Kefir Picture Directions

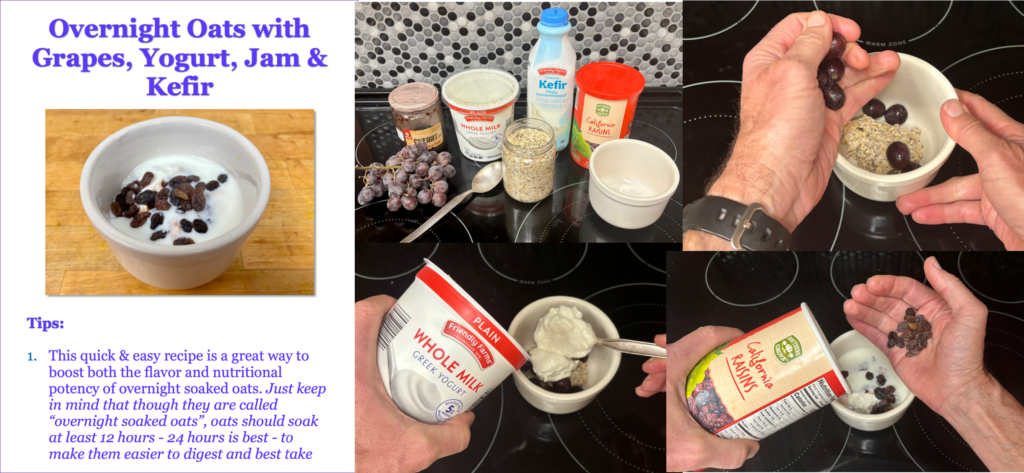
Summary of how to make overnight oats with grapes, yogurt, jam and kefir with a link to picture book directions.

As I mention in the first tip that you can almost see in the above banner, “overnight soaking” really means soaking oats for at least 12 hours – 24 hours is best – to make the most of both oat nutrient and fiber benefits. And this very quick, easy and fully flavorful overnight oats with grapes, yogurt, jam and kefir recipe is a great way to boost those benefits.

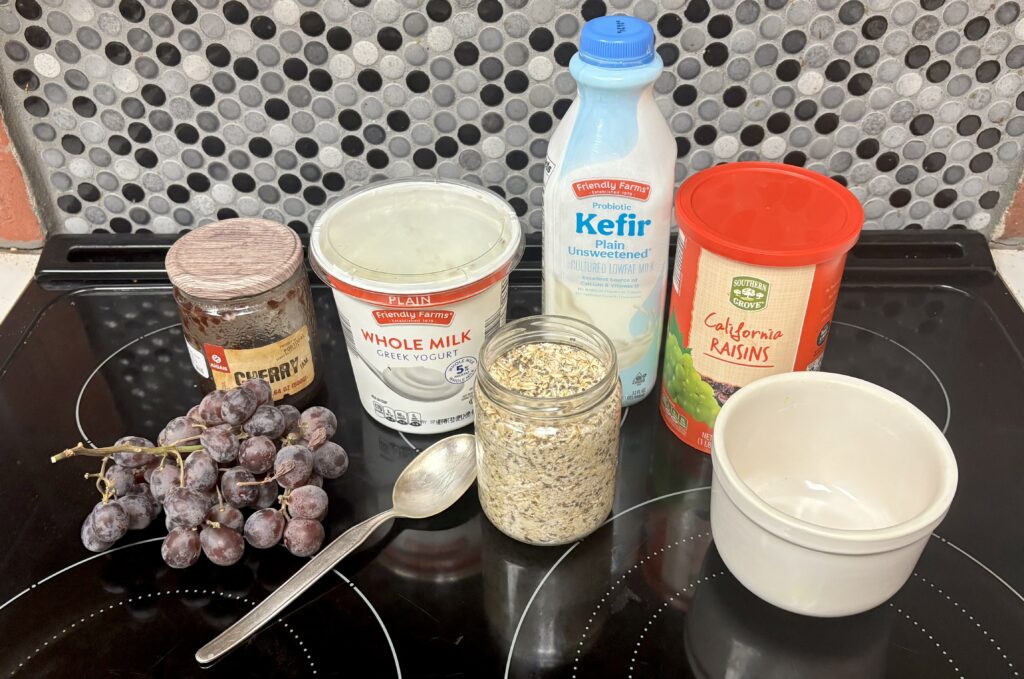
Here’s all you need for ingredients: overnight soaked oats, grapes (or any fruit), yogurt, your favorite jam, kefir (optional, but a great source of probiotics) and raisins (or any dried fruit).

Ingredients needed to make overnight oats with grapes, yogurt, jam and kefir with link to picture book recipe.

As always, what you see above are only suggested ingredients – and they taste great together. But, the real key to making the most of this recipe, and any recipe, is making it all your own by adding or substituting ingredients to suit your taste and/or support any dietary restrictions you might have.

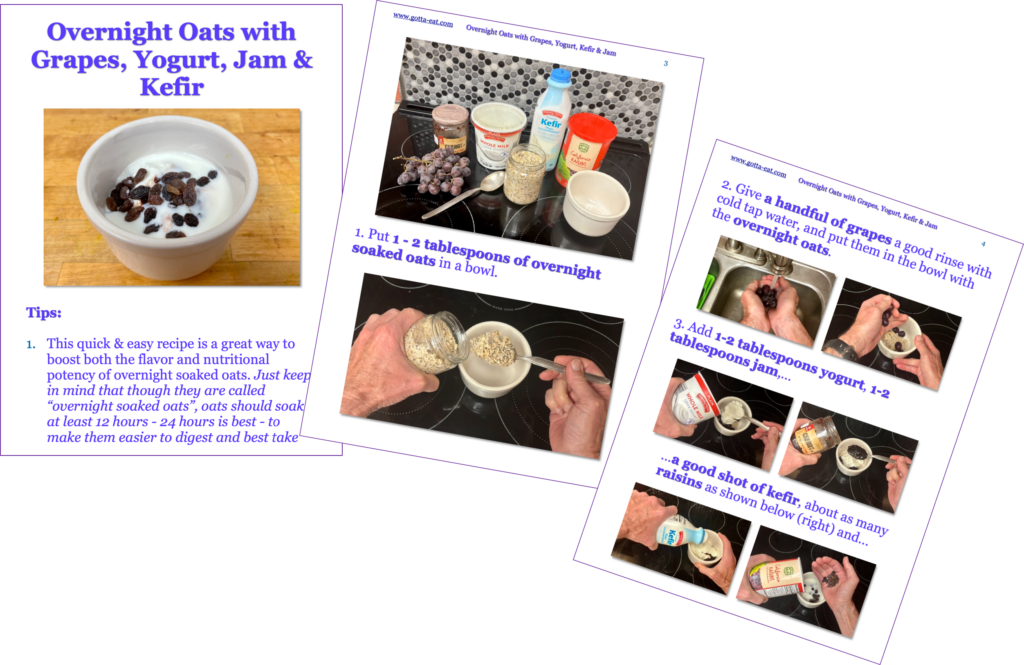
Click any picture on this page or this link for a full picture book recipe.

3 sample recipe pages with a link to the full overnight oats with grapes, yogurt, jam and kefir picture book recipe

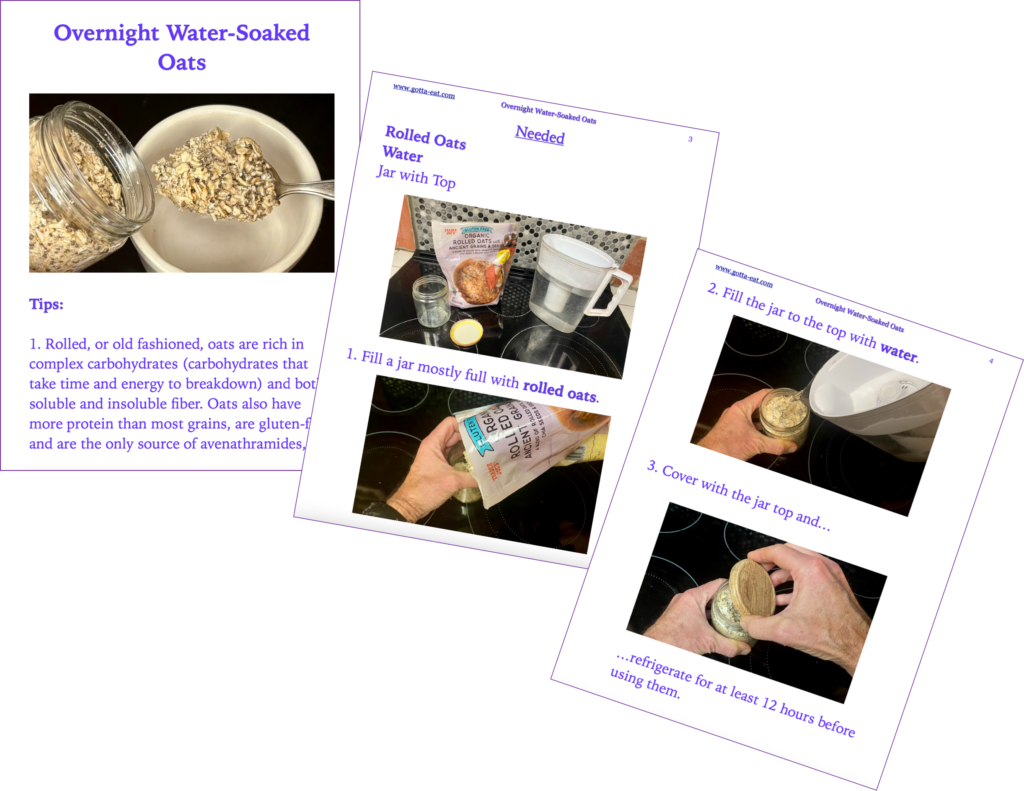
Overnight Water-Soaked Oats Picture Directions

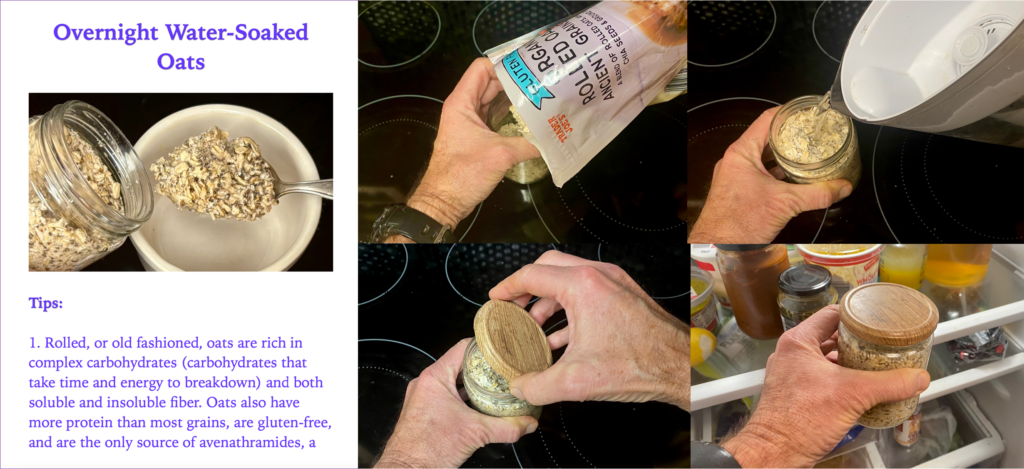
Picture book directions show how to water-soak oats to maximize nutrient content use in either sweet or savory dishes.

There’s no such thing as a particular “superfood”, or one food that will work miracles on your body to make you feel stronger, become healthier and prevent disease all on its own.

The real “open secret” is enjoying a varied diet rich in whole foods – whole foods are key – and oats, with their highly nutritious, gluten-free and fiber-rich properties plus their equally versatile use, which corresponds beautifully with my often-used “imagination is your only limit” line, are a great food to make part of your quality-of-life enriching eating habits.

For more information about the nutritional value of oats, which includes digestive support, heart health benefits, blood sugar moderation and weight loss/maintenance properties, and more, click this link to Healthline’s “9 Health Benefits of Eating Oats and Oatmeal”.

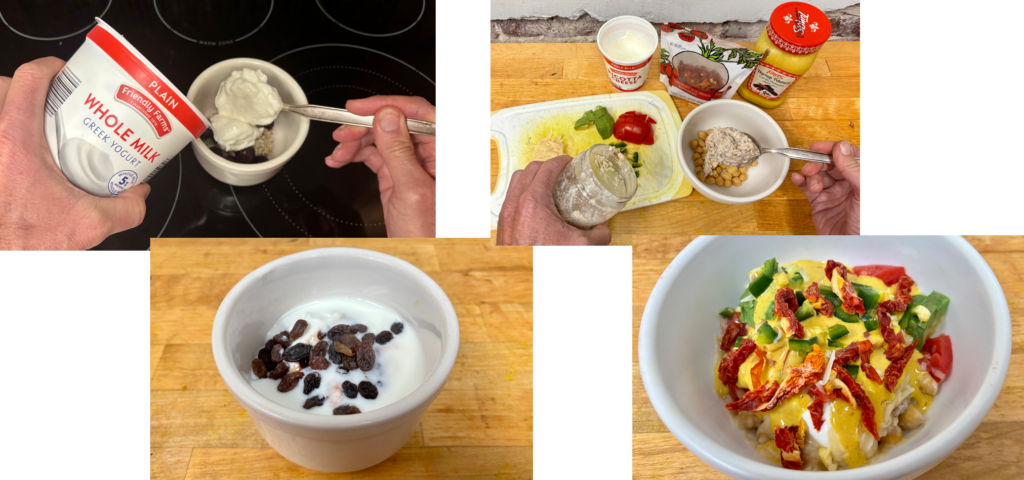
When it comes to simplicity, convenience and maximizing both nutritional and digestive advantages, water-soaking oats for at least 12 hours is the best and easiest way to enjoy rolled oats and open them up for use in either sweet or savory dishes like what you see below: oats with grapes, nut butter, yogurt and jam (left) and oats with chickpeas, ricotta cheese, tomato and avocado (right).

Examples of water-soaked oats meals: oats with fresh fruit, yogurt and raisins and oats with chickpeas, ricotta cheese, tomatoes and avocado

For easy-to-follow step-by-step overnight water-soaked oats picture directions, click this link or any picture on this page.

Picture book directions show how to water-soak oats to maximize nutrient content use in either sweet or savory dishes.

Next up: Easy-to-make overnight water-soaked oats with fresh fruit, nut butter, yogurt & jam

Making Your Better Eating New Year’s Resolution Easy to Start with This Instant 5-Ingredient Salad Dressing Picture Book Recipe

I just asked ChatGPT (Open AI’s artificial intelligence source), “What is the most popular new year’s resolution in the USA for 2025?” The answer was interesting. ChatGPT said it did not yet have enough qualitative information to give an accurate answer. I like that answer. But, based on trends over recent years, the AI took what it called “an educated guess” that resolutions to improve mental health would be highest priority followed by resolutions to improve physical health, specifically regarding both diet and exercise. 

That makes a lot of sense. I’ve believed for a long time that the three things we can do to make the best of our quality of life is eat life-promoting foods, move our bodies rigorously and manage stress, all of which go a long way toward regulating our physical, mental and spiritual well-being. 

Considering this site is focused on how to prepare life-promoting foods as easily as possible, I asked AI, “What is the easiest recipe to teach a person new to cooking?”. The answer: scrambled eggs and toast, which required 5 needed ingredients plus optional ingredients to taste and 12 steps to complete. I think I have an easier answer and one that’s far easier to make and much more versatile than what AI offered:  Instant 5-Ingredient Salad Dressing.

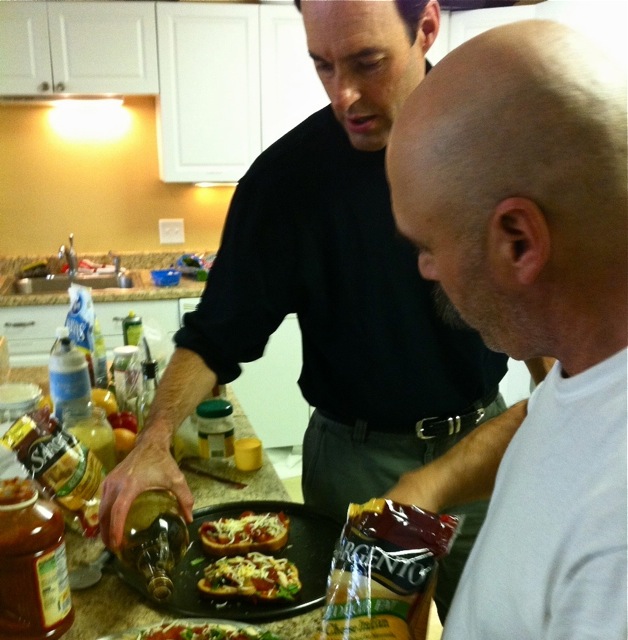
Helping veterans make life-promoting meals at Veterans Incorporated, Shrewsbury, MA

First, a quick back story. The first time I ever made this recipe was with a group of fellow veterans who were turning their lives around through Veterans Incorporated (Vets Inc.) in Shrewsbury, MA. One of the guys in the group, a fellow Navy veteran – not the guy shown above – chimed in when I listed the seven ingredients I intended to use: garlic powder, salt, ground black pepper, mustard, honey, vinegar and oil.

“Why do we need the added salt and sugar? A lot of guys here have diabetes and/or high blood pressure. We don’t need that _____(4-letter word for “stuff”)!

I get blunt great and agreed. But this was the first recipe I was teaching these guys, let alone the first time I’d ever met them. My inner dialog: “Fine, I’ll cut the salt and honey – but, boy, this dressing’s gonna’ taste horrible.”

I quickly made the dressing with just 5 ingredients: garlic powder, ground black pepper, mustard, vinegar and oil and asked the guys to taste a spoon of it before I tasted it myself. The stunner? They loved it, so did I – and I’ve never looked back.

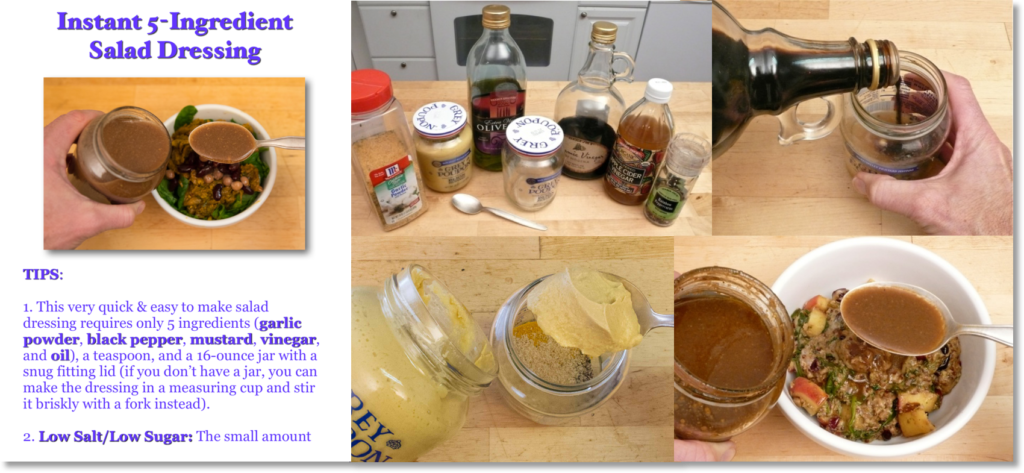
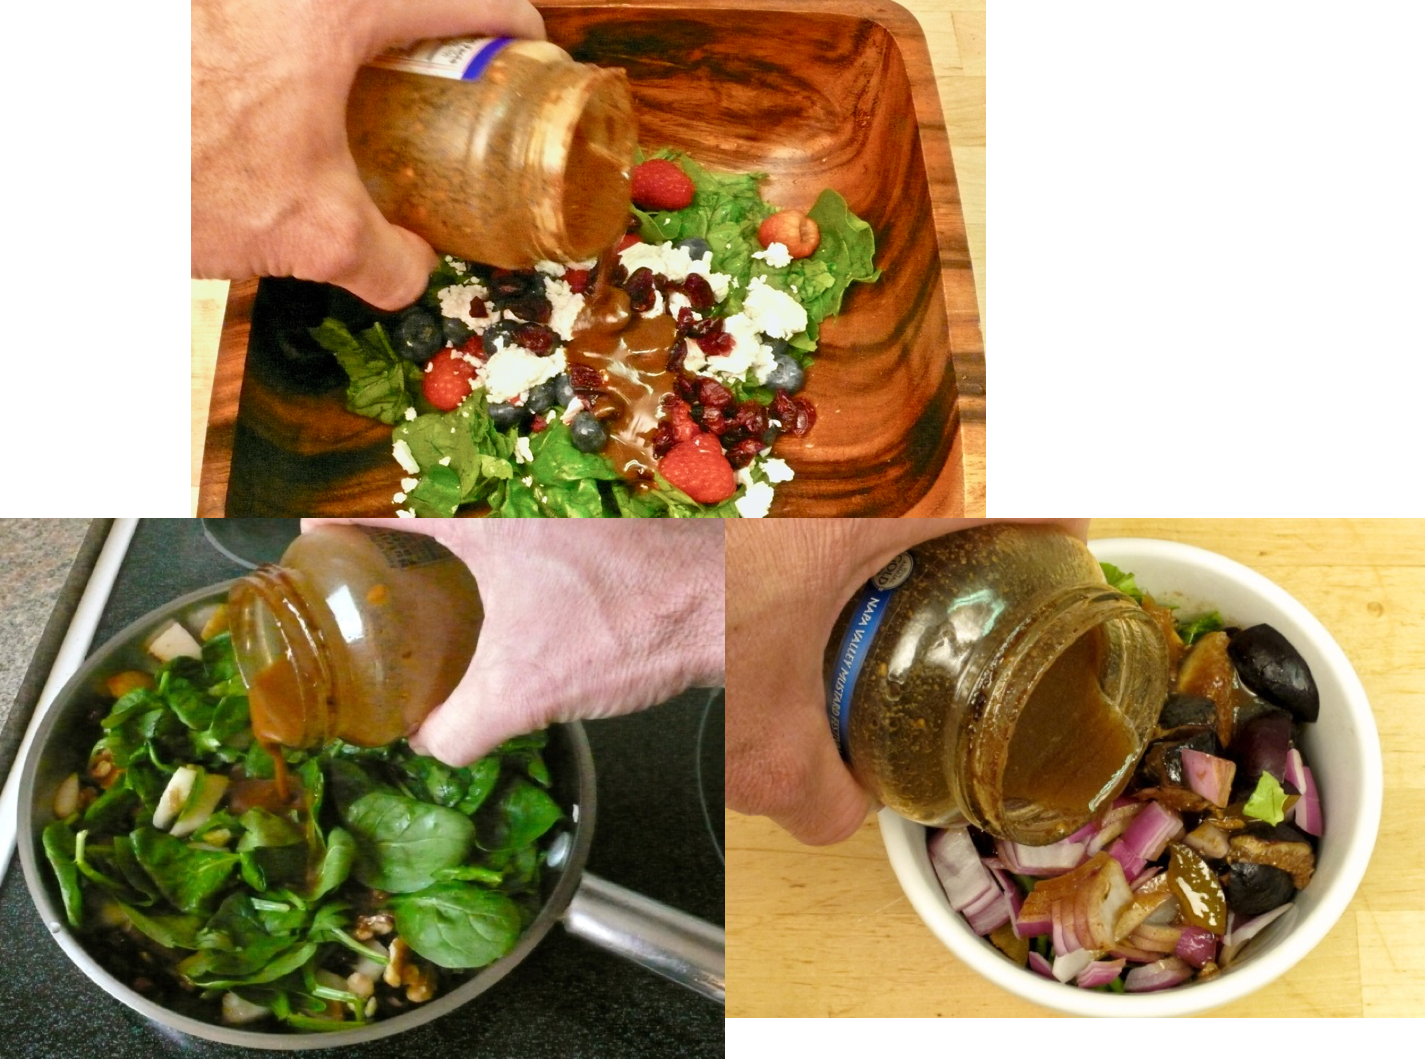
Not only does this dressing taste great (most important), but it’s also incredibly easy to make and versatile. As shown in the few sample pictures below, it goes great on any kind of warm or cold salad, over cooked vegetables, meat, chicken, fish, pasta, rice – imagination is your only limit.

3 photos show examples of how versatile instant 5-ingredient salad dressing can be.

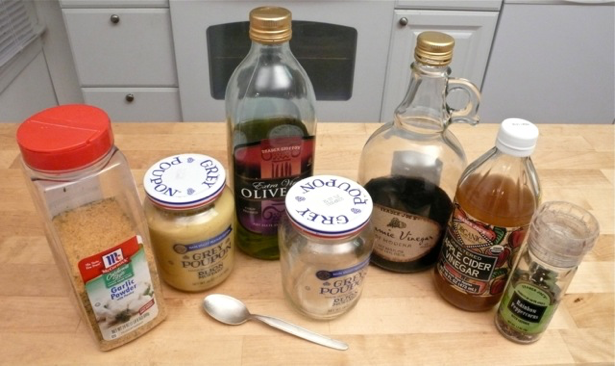
The toughest part about making this dressing is gathering the ingredients, like those shown below. You actually see six ingredients because I often use two different types of vinegars for added flavor (flavor rules here!), which you certainly don’t have to do.

Instant 5-Ingredient Salad Dressing ingredients

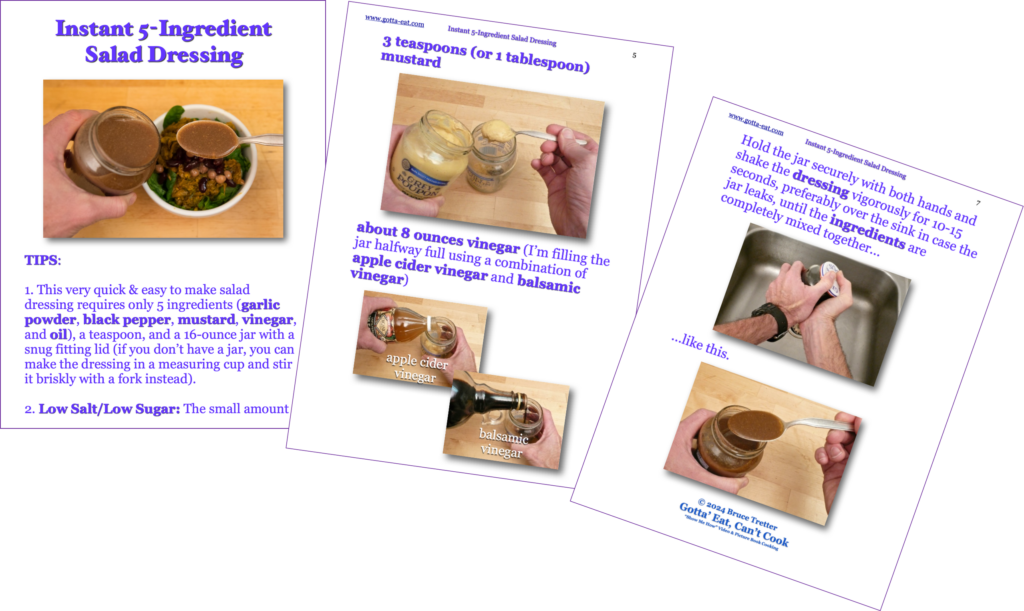
Click this link or any picture on this page for a complete step-by-step picture recipe that includes information about the sourness of different vinegars and why this recipe is considered low in both salt and sugar.

Instant 5-Ingredient Salad Dressing Recipe 3 Shot

I wish you the very best starting both the new year and your resolutions and will do my best to help you stick to those resolutions related to eating better to improve your quality of life.

More very soon!

Banana Ice Cream Full-On! Picture Directions

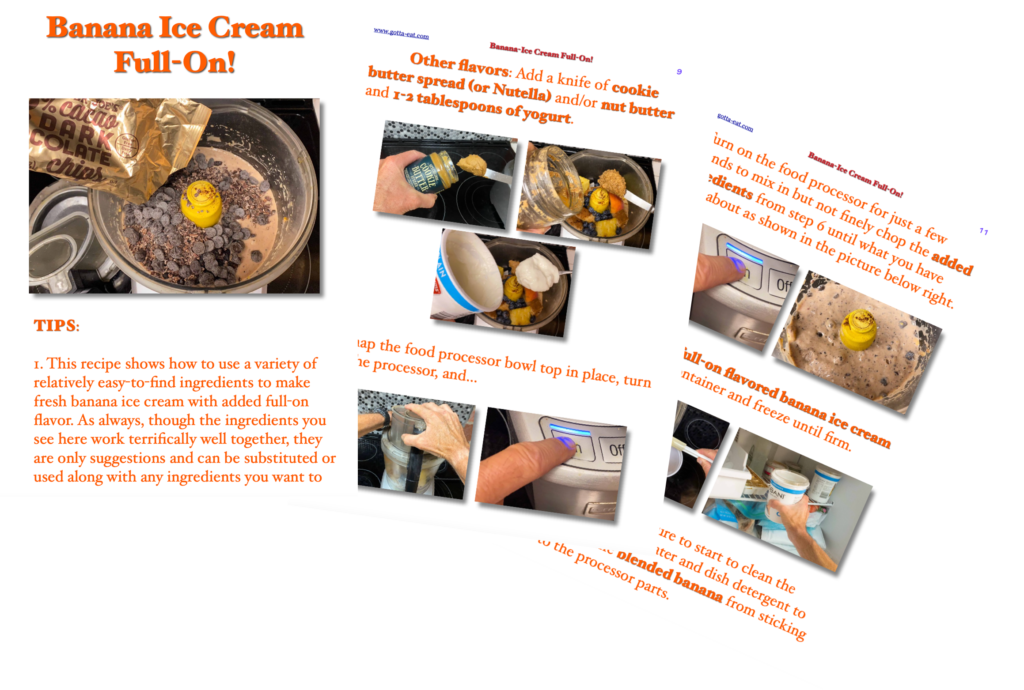
Adding commonly found ingredients to make banana ice cream with full-on flavor

Last post showed how to make fully flavorful (non-dairy) banana ice cream using only 3 ingredients: frozen bananas, vanilla extract and ground cinnamon. (Please also see Bananas Are Good Food! if you haven’t seen that post before or have been informed incorrectly by other sources that bananas are not good for you.)

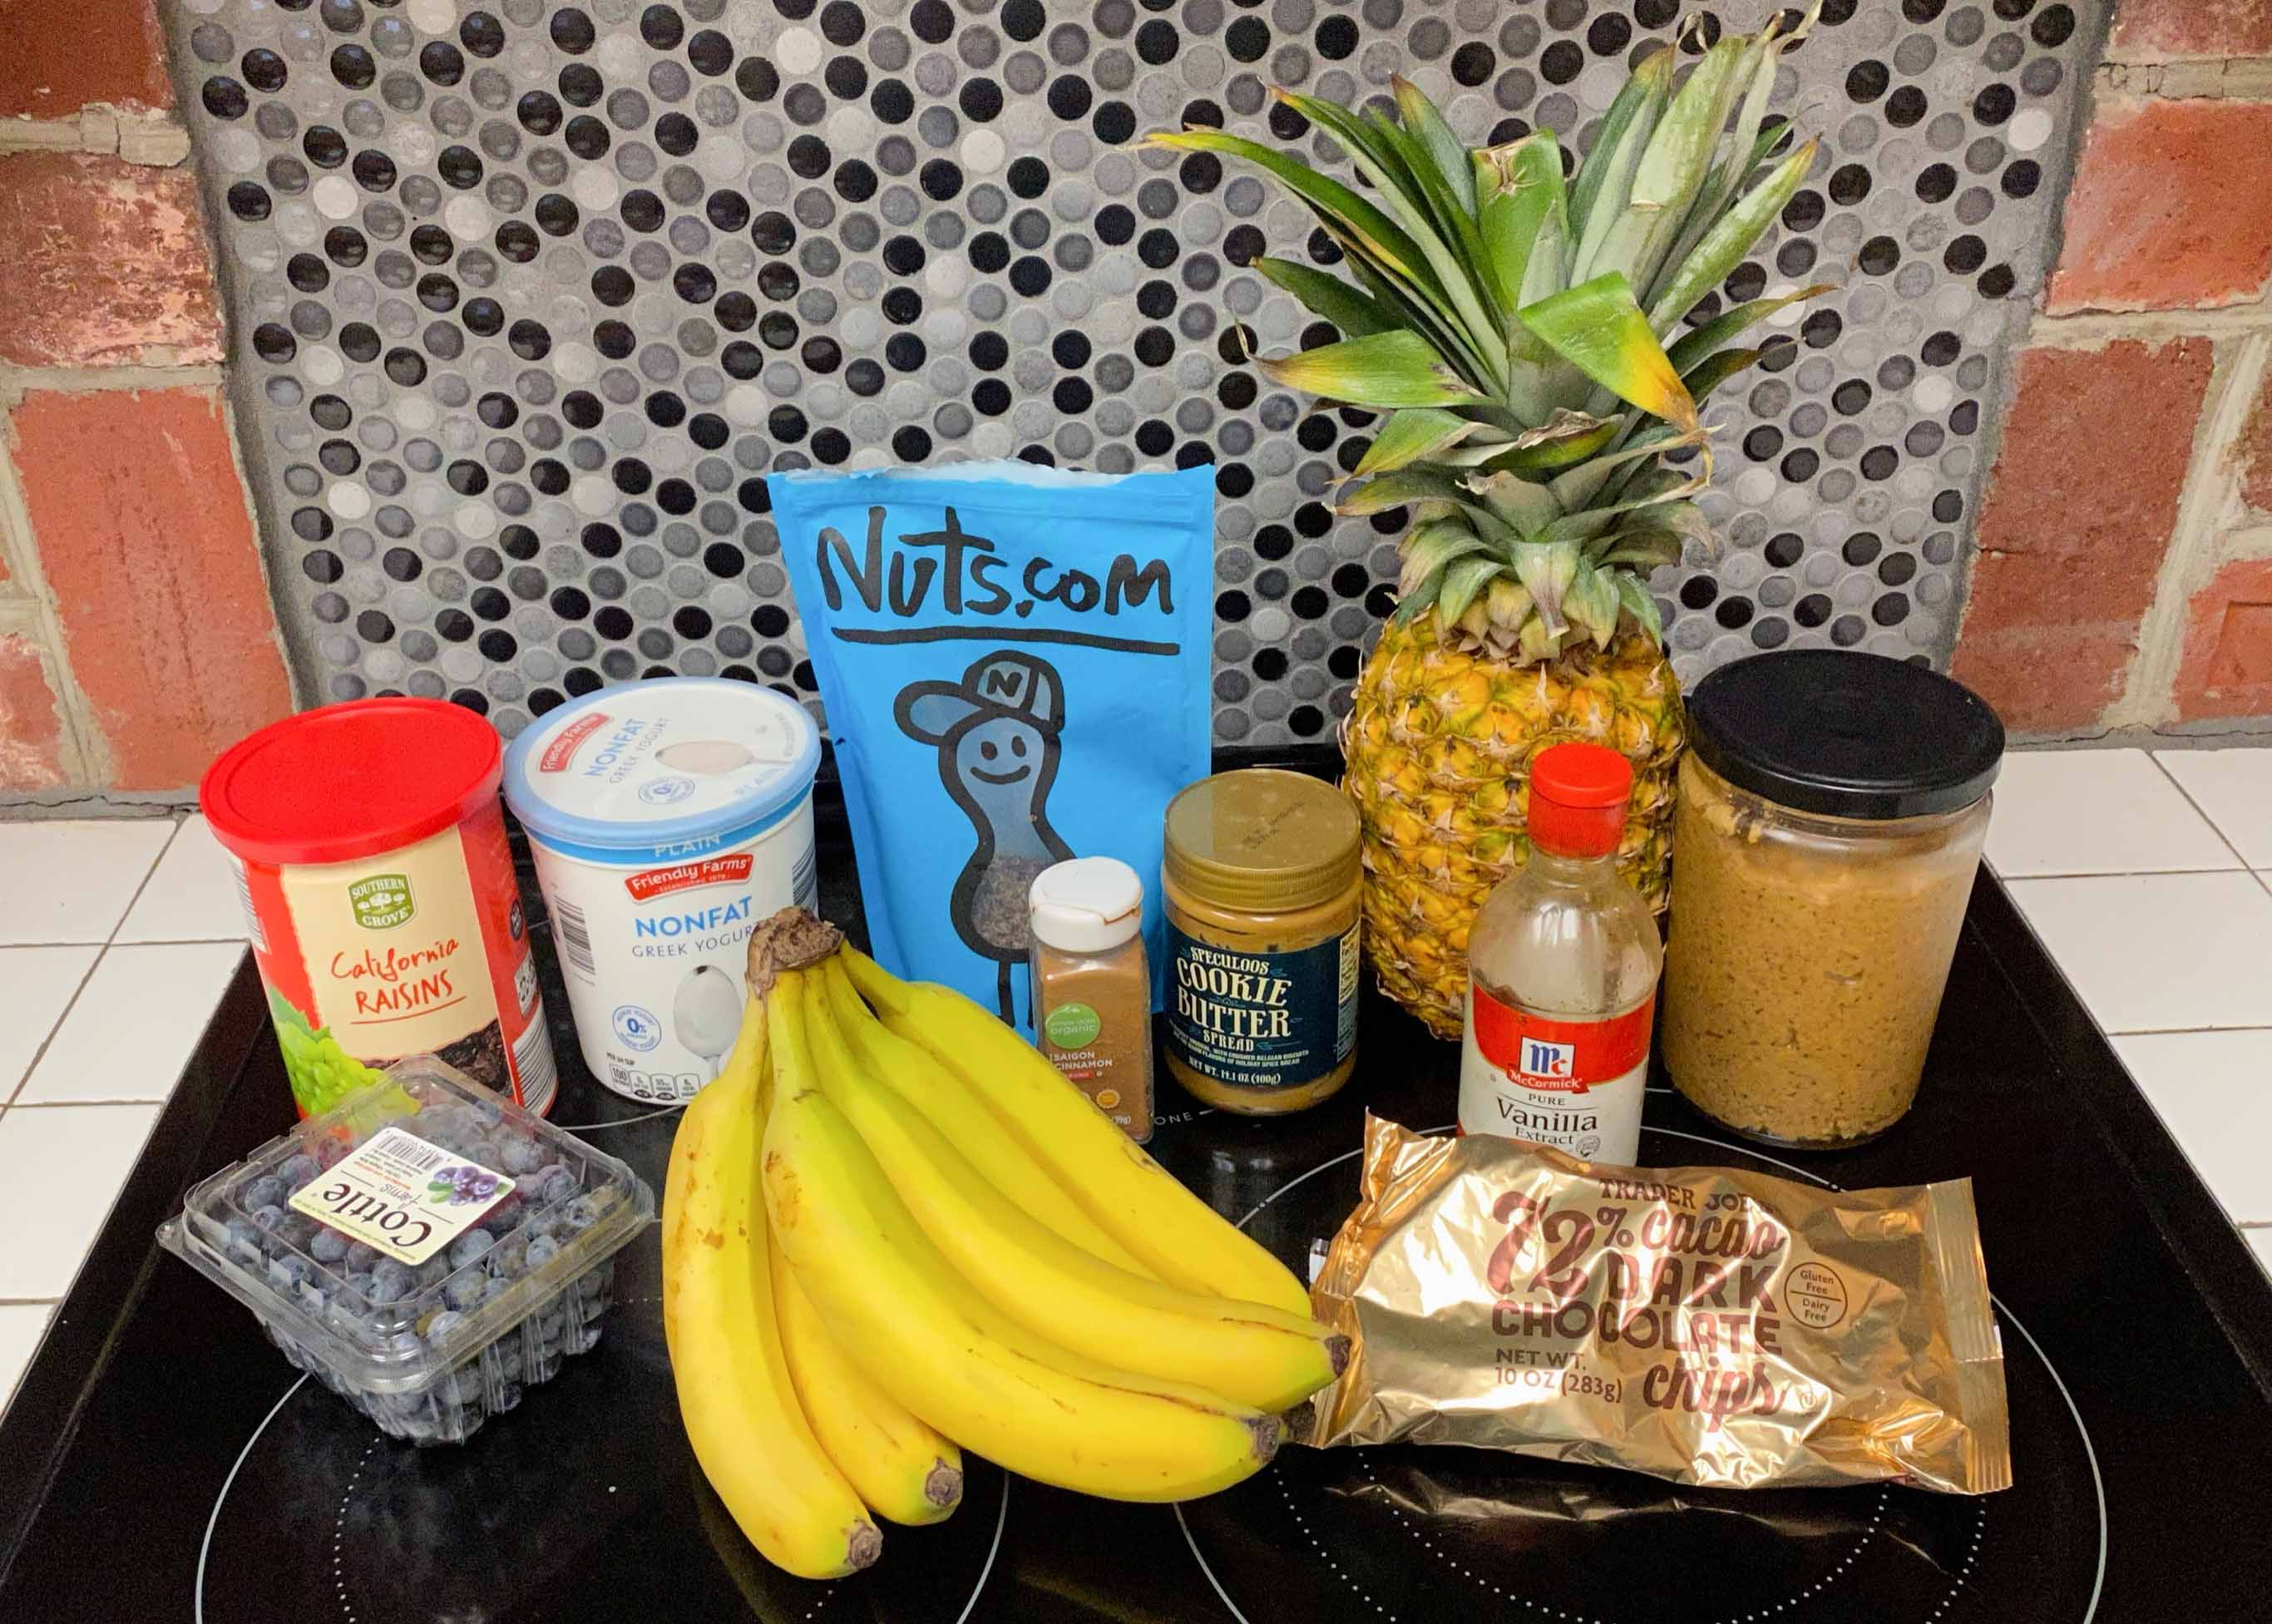
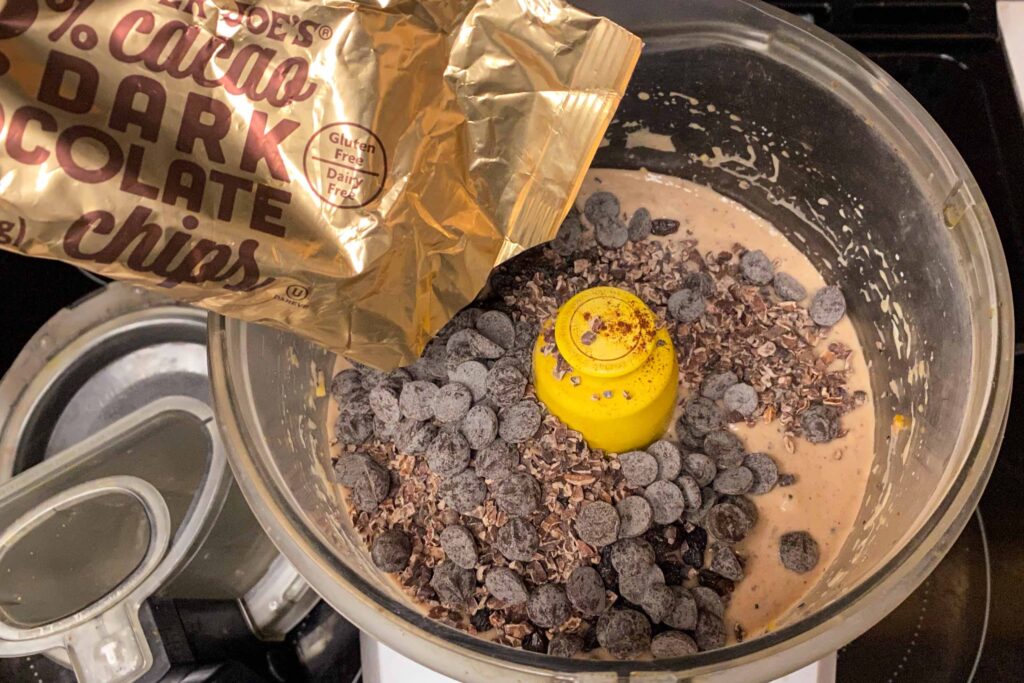
This post show how you can easily use some of the commonly found ingredients in your kitchen to take that simple banana ice cream to full-on exciting. Here’s an example of what I used recently to help kick your imagination in gear.

Commonly found kitchen ingredients to take simple banana ice cream to full-on flavorful exciting

When you download the recipe, you’ll see I point out that I added a fresh peach not shown in the above ingredients. That’s exactly what I mean about improvising on the fly to suit your taste and/or dietary needs.

Please click this link or any picture on this page for complete step-by-step picture book Banana Ice Cream Full-On! directions.

Big Flavor 3-Ingredient Banana Ice Cream Picture Book Recipe

Last post focused on the health benefits of bananas, which, as one of the world’s most consumed foods, are often given a bad rap, as shown in the popup ad below, for no good reason at all.

Banana graphic with "5 foods never to eat" popup ad.
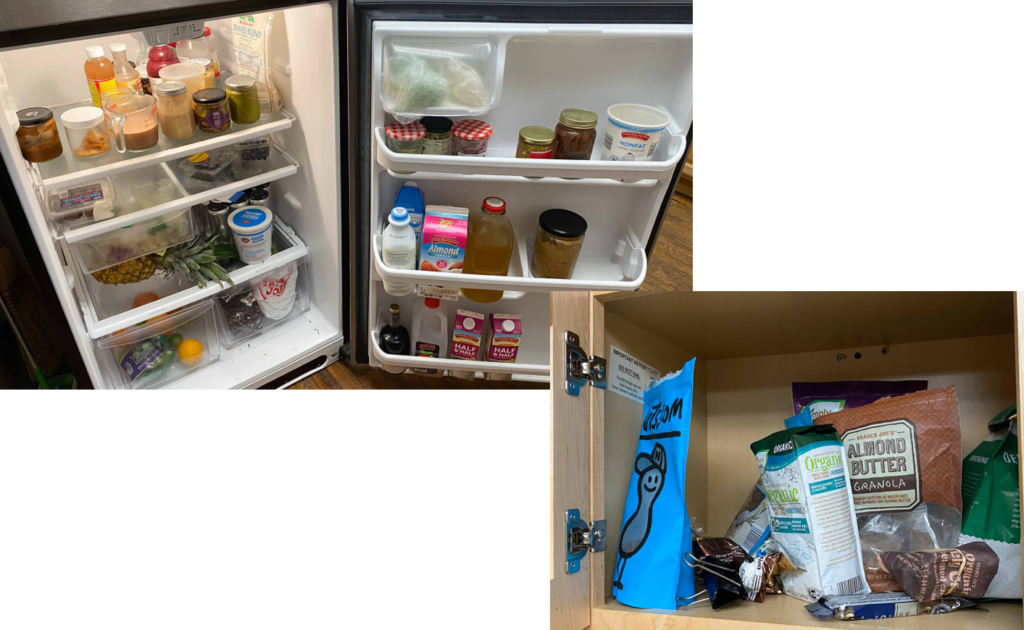
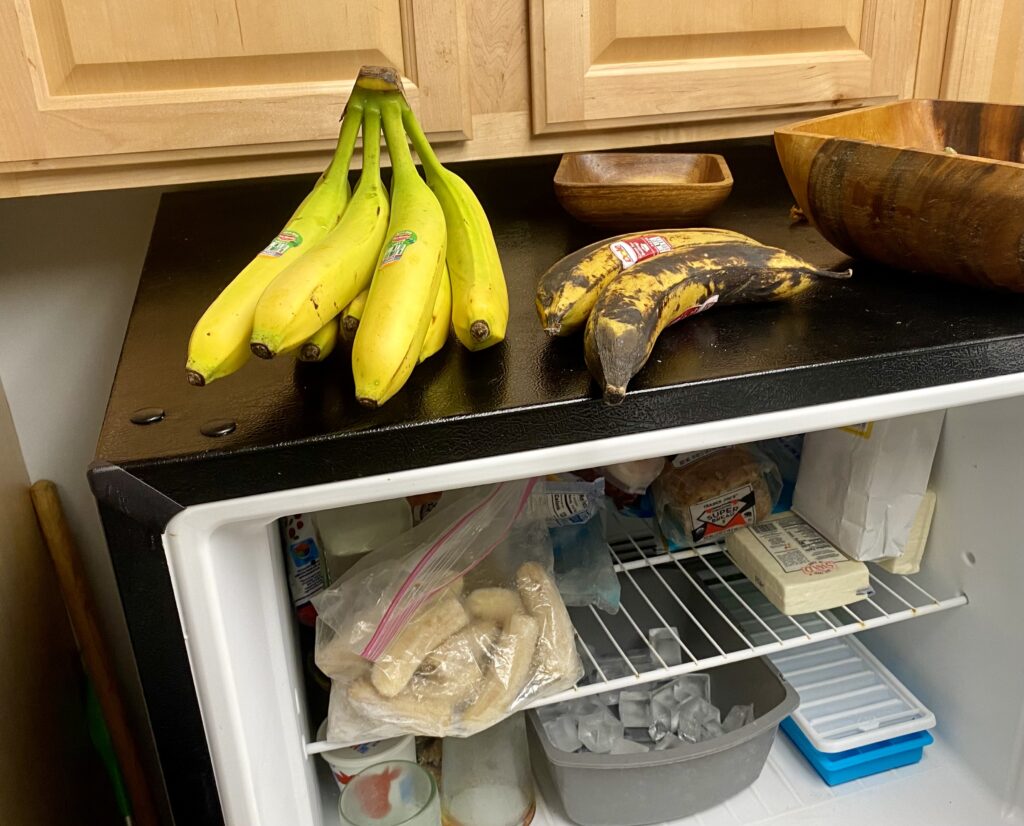
As a lifelong avid cyclist, I always have bananas on hand, either at room temperature or frozen, as shown in the shot below of the top of my fridge and inside my freezer today. Those two more darkly patched bananas are actually plantains, part of the banana family, that I use to make sweet & savory dishes.

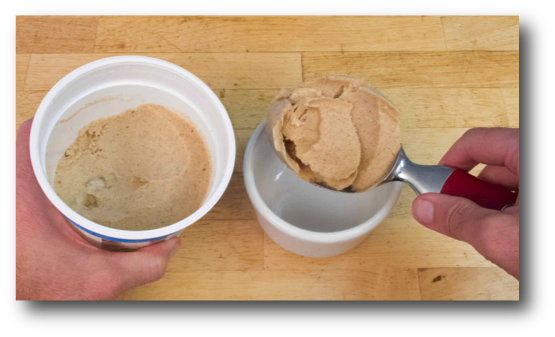
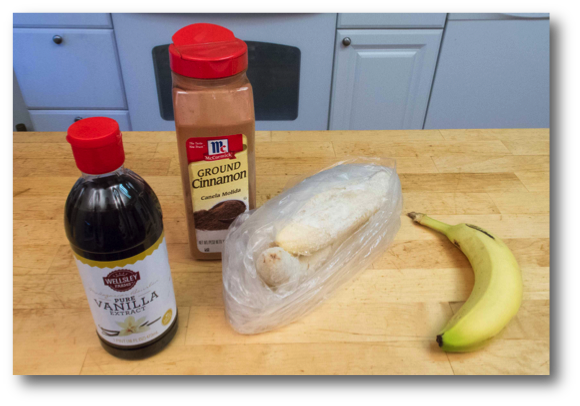
Of course, there are many ways to enjoy bananas, and here’s one of my favorites: banana ice cream. To start as easily as possible, I’m showing just the base recipe here that requires only 3 ingredients: ripe bananas, vanilla extract and ground cinnamon – no cream or sugar at all. And though those ingredients, when blended together, taste killer good, I’ll show you in future posts how to take that base recipe from “simple to exciting” with added easy-to-find, fully flavorful ingredients.

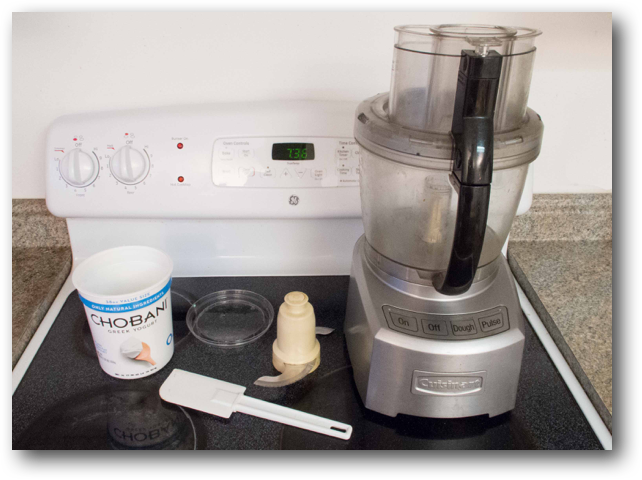
The only kicker: you’ll need a sturdy food processor, like the one shown below, to make this recipe. If you don’t have one, either click this link for mash and freeze banana ice cream, which doesn’t require a food processor, or borrow a food processor from a friend or relative and make enough banana ice cream to share with them.

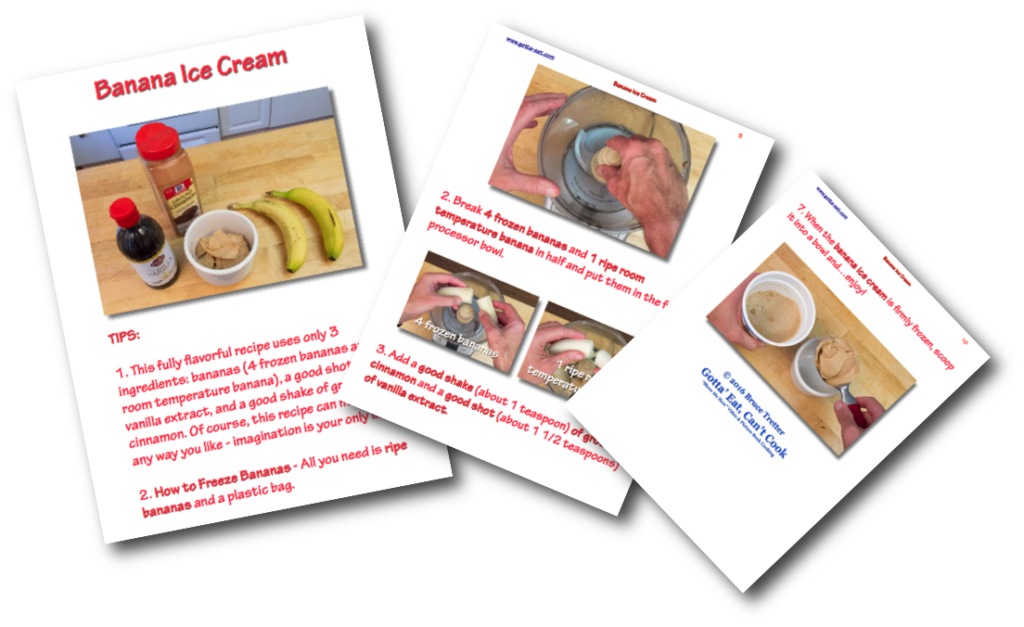
Click this link or any picture on this page for easy-to-follow 3 ingredient banana ice cream picture book directions.

Designed by Free Wordpress Themes and Sponsored by Curry and Spice